Showing posts with label Bristol. Show all posts

Monday, October 15, 2018

Glow in the Dark Halloween Shakers with MFT and Arteza Watercolors with a sale at Ellen Hutson!


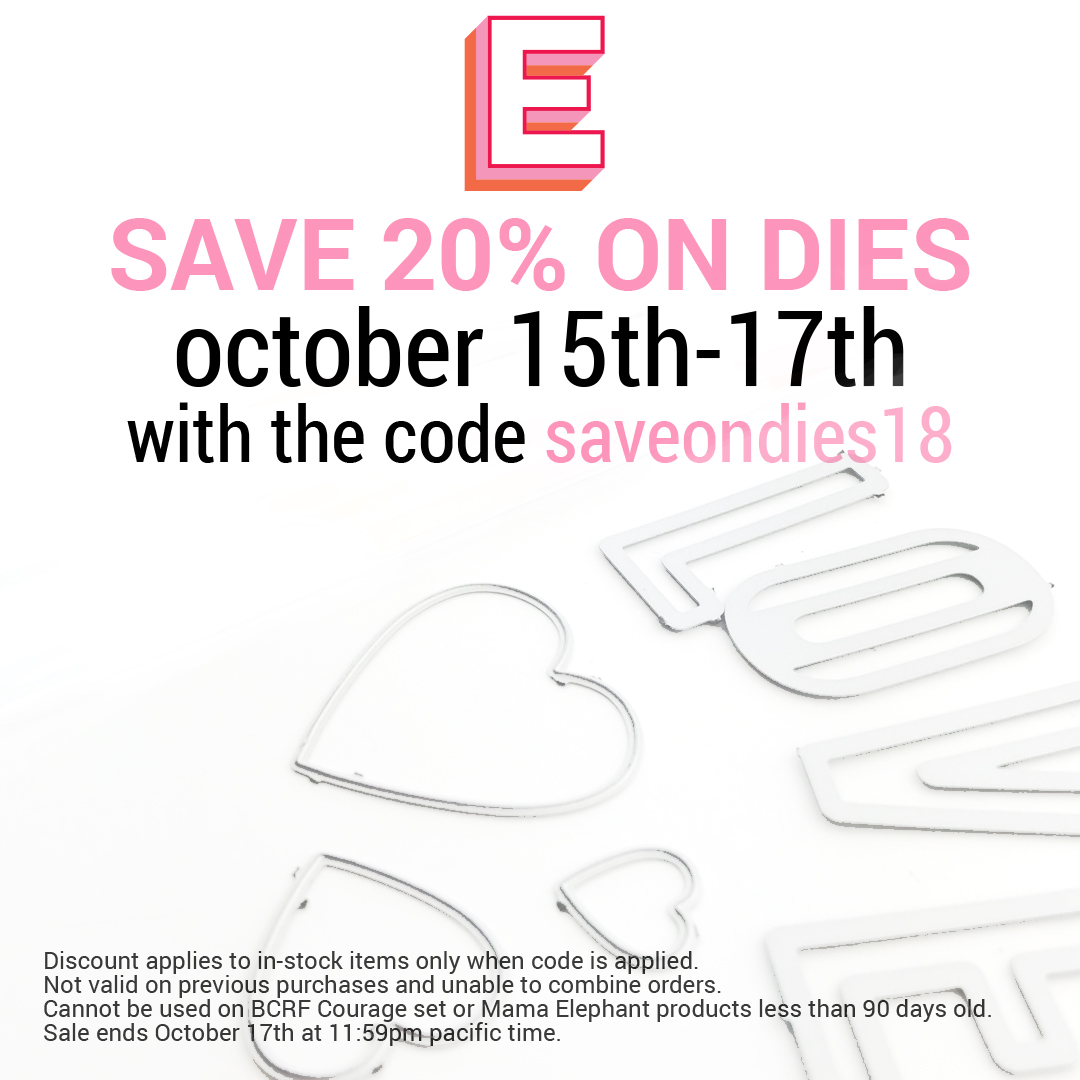
Happy Halloween!  Todays project is a frightfully fun set of shaker cards that glow in the dark!  Given the fact that *most* cameras need light, I was not able to capture the glowing effect satisfactorily on either of my cameras.  My cell phone camera got an ok picture and you can see that at the end of the video on my YouTube channel.  However, they do glow quite brightly and look really cool in real life.  My nieces and nephews are going to love them.  Lets get started!  Added bonus- you can save 20% on the die set used in this project until 10/17/18!

Supplies:
MFT Frightfully Sweet Stamps
MFT Frightfully Sweet dies
Distress Ink Originals


MISTI
Strathmore 140 lb WC paper
Ranger Matte Medium
Nuvo Green Glow in the Dark drops
Hero Arts Star Stencil
Bristol Smooth cardstock
Arteza Watercolors
Ink on 3 Blackout
Hot Off the Press Heat Resistant Acetate
Circle dies
Be Creative Tape
3M Foam tape
Versamark
Ranger Black Sparkle EP
EK Success Powder Tool
MISTI
Staz-on Black ink
28 Lilac Lane Bold and Bright sequins
Little Things Clear Irridescent Stars and Star Shine
Patterned Paper from stash

I your Halloween is full of fun and excitement!  Valid through 11/10/18 is a coupon code, JasmineBurgess1, for 10% off the Arteza watercolors I used to paint the critters.  If you're interested in my review video of Arteza watercolors, click here for that video.  As always if you have any questions, let me know.  Happy to help!

Monday, July 30, 2018

Simply Colored Fuchsias


Hey guys!  Todays project has simple coloring and minimal embellishments while being quite pretty.  I'm one of those crafters who likes bling and upping the wow factor, but I wanted to demonstrate that it's not always necessary and sometimes, less IS more.  Fuchsias are sentimental for me because I grew up with them; my mom loves them and she always had several baskets hanging around the house.  Hummingbirds are sentimental because my nephew loves them and always says "Jazz, look at the hummingbirds" when he sees them at his feeders.  I'm still young at 36, but as I get older, I'm realizing how important moments are with the people you love.  This card is full of memories and faith and so much love.

Here is the link to the video on my YouTube channel.  My supplies are listed below.

Supplies:
Avery Elle Hummingbird stamp set
Avery Elle Wonky Stitches die set
Ink on 3 Blackout ink
MISTI

Bristol Smooth cardstock
Janes Doodles Bless Your Heart stamp set
Arteza Brush Markers
Versamark
Nuvo Black Embossing Powder
Copic Markers: B000 and B0000
Bazzill Candy Necklace (4.25"x5.5")
Ranger Matte Medium
Pretty Pink Posh 4mm Clear Droplets
Nuvo Clear Glitter Gloss pen
Be Creative Tape (also called Scor-tape)
Delicata Golden Glitz

Thanks so much for hanging out with me!  Happy to help if you have any questions!

For Christs glory and much love,
Jasmine

Saturday, May 12, 2018

Spring Themed Cards Collaboration with Gerry from Gerry's Craft Room Part 1


 Hello there!  I don't know about you, but I am so excited that it's finally warming up outside.  We have had the weirdest weather in the Midwest over the past few weeks, but I think it's safe to say it's SPRING!  Gerry, from Gerry's Craft Room and I decided to do a little collaboration.  We each created backgrounds and exchanged them so that I could finish the cards with her backgrounds and she finish cards with my backgrounds.  And without discussing what we'd use, both reached for Distress Oxide inks.  Both cards could be gender neutral, especially if your guy likes birds.  The second one with the cupcake, was made with my husband in mind, as it was his birthday around the time I was crafting and he loves loves loves cupcakes.  The colors Gerry used in the background made it perfect for a masculine design, so I carried that through with a Tim Holtz Blueprint stamp and bold die cut letters for the sentiment.
Usually, when I do collaborations with other artists on YouTube, I have footage of the creations of my backgrounds and the completed cards.  However, for this project, the gremlins got my footage.  So while I can't show you how I created them, I can list what I used.  Sorry! So frustrating...  Anyway, here's the video on my YouTube channel and the supplies are listed below.  You can find Gerry's video here.
Supplies:
My backgrounds (Gerry's finished cards)
Bristol Smooth Cardstock
Distress Oxide Inks:
Shaded Lilac
Blueprint Sketch
Cracked Pistachio
Hickory Smoke
Nuvo Glimmer Paste Black Diamond 
The Crafters Workshop Swirl Stencil
The Crafters Workshop Butterfly Swirl Stencil
Black cardstock
Nuvo Glimmer Paste:
Green Peridot
Blue Sapphire
Moonstone
Gerry's Backgrounds:
White cardstock
Distress Oxide Inks:
Peacock Feathers
Twisted Citron
Spiced Marmalade
Squeezed Lemonade
Embossing folders
Birdsong Card:
Gerry's Blue/Green background
Versamark ink
Ranger Holographic embossing powder
Ranger Enchanted Gold embossing powder
Vellum
Stick-It sheet adhesive
Dina Wakely Scribbly Birds stamp set
MISTI
Copper glitter paper
Archival Jet Black ink

Cupcake Birthday:
Gerrys Orange/Yellow background
Memento Tuxedo Black ink (Copic friendly)
Copic markers
Cake: E29, 37, 47, 49
Frosting: E23, 25, 27
Candle: B02, 05, 18
Flame: Y00, 13, YR04
Lawn Fawn Stitched Rectangle die
Tim Holtz Birthday Blueprint stamp set
Sizzix Celebrate Thinlits
Stick-It Sheet Adhesive
Black cardstock
Be Creative Tape
MISTI
Bristol Smooth cardstock

Gerry and I both had a lot of fun creating new cards with each others backgrounds.  It's a creative and exciting challenge for sure.  Be sure to check out both videos and let us know what you think.  See you next time!

Much love and prayers,
Jasmine

Saturday, March 10, 2018

6 cards with the Brutus Monroe Unicorn Inspiration Box


Lots to talk about today!  If you haven't tried one of Brutus Monroe's Inspiration Boxes, you are missing out!  Brutus Monroe always has images that are different and a bit funky and original.  They're attractive and versatile, making them suitable for both genders.  Masculine cards are something that tend to be difficult, so finding a stamp set and card kit that lend themselves to guy suitable cards is a rare find indeed.  These kits include a stamp set, cardstock, patterned paper, ink, foilable panels (toner printed panels ready to receive foil), and embellishments.  I have lots of leftovers to play with as well.  So lets get to the good stuff; the cards! I've made 5 cards, each with a different image and sentiment from the stamp set and a sixth card with leftovers from creating the others.  Here's the video with each card so you can re-create them at home or better yet, find more inspiration for your own designs.

Supplies: Hello Sunshine
Brutus Monroe Unicorn Inspiration Card kit
Copic Markers
BG01, 02, 05, 07
Y11, 13, 18
G03, 05, 07
RV02, 04, 06
V01, 04, 05
E50, 51, 21
R81, C6
Bristol Smooth Cardstock
Memento Tuxedo Black ink
MISTI
Rainbow Deco Foil
Brutus Monroe Gilded Embossing Powder
Versamark
Scor-tape
Foam squares

Supplies: Made with Love
Memento Tuxedo Black ink
Bristol Smooth Cardstock
MISTI
Zigs: 64, 26, 92, 62, 28, 36
32, 91, 84
Copic B0000
Stitched Rectangle die
Versamark
Nuvo Black Embossing Powder
Scor-tape


Supplies: Yoga Unicorn
Memento Tuxedo Black ink
Bristol Smooth cardstock
MISTI
Zigs: 36, 32, 31, 38,
91, 26, 71, 62
Summer Rainbow Deco Foil
Lawn Fawn Happy Birthday die
Spectrum Noir Clear Sparkle Pen
Scor-tape


Supplies: Rock On
Rainbow Deco Foil
Memento Tuxedo Black ink
Bristol Smooth cardstock
MISTI
Hero Arts Acetate
Scor-tape
Little Things Embellishments:
Jewels: Clear Iridescent
Garden Flowers: Peony and Hyacinth
Itty Bitty Stars: Clear Iridescent and Gold
Vellum
Stick-It
Foam Squares
Brutus Monroe Gilded Embossing Powder
Versamark
Neat & Tangled Scalloped die set (banner)
Lawn Fawn Puffy Stars dies
3M Foam Tape
Copics: E21, 50, 51
RV00, 52, 63, 06; C8, 9


Supplies: Superhero
Bristol Smooth cardstock
MISTI
Rainbow Deco Foil
Copics:
C00, 0, 2; R20
B04, 05, 06, 18, 28, 29
Memento Tuxedo Black ink
Spectrum Noir Clear Sparkle Pen
Neat & Tangled Scalloped dies (banner)
Mama Elephant Creative Cuts Peek a Frame
Versamark
BM Gilded Embossing Powder
Foam Squares
Scor-tape


Supplies: Star Shaker
Rainbow Deco Foil
ME Postage Creative Cuts
Lawn Fawn Puffy Stars dies
Simon Says Stamp Hello die
Stick-It
Glitter cardstock
Little Things:
Clear Iridescent Itty Bitty Stars

Clear Rainbow Mini Stars
Jasmine Garden Flowers
Hero Arts Acetate
3M Foam tape
Scor-tape
BM Glass Slipper Bottle Cap sequins

 Whew, that's a lot of cards!  So much color and excitement though, and I love each and every one.  Who can say no to a rainbow?  Thanks for joining me today!  I hope you enjoyed it and got lots of new ideas for your card making.

For Christs glory and much love,
Jasmine

Wednesday, March 7, 2018

Brutus Monroe and Arteza Brush Pens Watercolor

 Is that a gorgeous rose or what?  Sometimes it's nice to get a little lost in coloring and the Enchanted Rose from Brutus Monroe is nice and large, so it allows you to take a little time and wander through a rose garden of your own making.  I've always loved coloring because you can do what you want.  Blue horse? Sure, why not?  While this rose may never appear in nature, it's lovely and wonderful and fun.  I had fun trying out the Arteza Brush Pens on this project.  They're a water based ink and are very similar to Zig clean color markers and you can use them interchangeably as well as together, which I did in the lavender rose in the top left corner.  Because there's lots of lovely bright color going on in the rose, I kept the rest of the card simple.  Head over to my youtube channel for the video tutorial and my supplies are listed below.

Supplies:
Arteza Brush Pens
Brutus Monroe Enchanted Rose background stamp
Bristol Smooth cardstock
MISTI
Archival Jet Black ink
Zig Clean Color Brush markers
Mama Elephant Smile die
Stitched Square die (4.5")
Cream cardstock (5"x10")
Black cardstock
Doodlebug White glitter cardstock
Tombow Mono Multi glue
Neat & Tangled Like Magic sequins
Scor-tape

Arteza was kind enough to give me a discount code for my viewers as well: XBH-QDU-800 for 10% off!

Thanks for stopping by and I'll catch you next time!

For Christ's glory and much love,
Jasmine


Wednesday, February 7, 2018

Moody Unicorn Birthday Party with Alcohol Inks and Copics

 These Moody Unicorns by Gerda Steiner Designs...can't help myself but to make more projects with them!  This guy is ready to welcome you to his birthday party or wish you a happy birthday!  This is actually a fairly simple card to make.  Make an alcohol ink background, stamp, color and die cut our adorable unicorn, a few die cut sentiment banners, some sequins and voila!  Perfect for any age, any gender and if it doesn't make you smile, I'm not sure you have a heartbeat.  Scrooge couldn't not smile.
Here is the video tutorial on my YouTube channel and my supplies are listed below!
Supplies:
Gerda Steiner Designs Moody Unicorn S&D
Ranger Alcohol Inks: 
Purple Twilight, Flamingo, Sunset, Sunshine
Memento Tuxedo Black ink
MISTI
Bristol Smooth cardstock
Ranger Alcohol Ink cardstock
Copics
C2, 4, 6/ E50, 51, 21/ R20/ B01, 02, 04
My Favorite Things Wonky Stitches die
Lawn Fawn Stitched Rectangle die
SSS HB die
SSS Crystal Reflections Sequins
Ranger Matte Medium
Versamark
Ranger Holographic Embossing powder

Thanks for stopping by guys and I will see you next time!!  Stay tuned for an EPIC vlog hop coming very soon for your chance to win some awesome prizes.

For Christ's glory and much love,
Jasmine


Saturday, February 3, 2018

Maaike's Celebrate 2k Subscribers Blog Hop Moody Unicorn Spinner with Alcohol Ink Background

 Ok party people, we're here to celebrate Maaike's having reached 2000 subscribers on her YouTube channel.  Woot Woot!  Congrats Maaike.  What better way to celebrate than with a Spinner Unicorn card?  I think this design speaks to all ages.  It's fun, whimsical, bright, playful, and mischievous with a touch of sarcasm for kicks.  English is second to Sarcasm in my world, so I love this card!  This would be so easy to change up for a dude, just by using his favorite colors in the Alcohol Ink background and the unicorns hair.  Here is the link to the video tutorial on my YouTube channel and my supplies are listed below.

Supplies:

Gerda Steiner Designs Moody Unicorn S&D
Ranger Alcohol Inks:
Memento Tuxedo Black ink
MISTI
Bristol Smooth cardstock
Ranger Alcohol Ink cardstock
MFT Channel Spinner die
MFT Spin and Slide Discs
Copics
C2, 4, 6/ RV00, 14, 17, 19/ E50, 51, 21/ R20
3M Foam tape
Archival Jet Black ink
Mini Glue Dots
3M foam tape
Penny

The fun isn't over just yet; there are more stops on the hop and prizes to be won!  The next stop on the hop is the lovely and talented Gerry.  You're going to love what she has to show you.  A complete list of hop stops is listed below in case you lose you way or want to visit someone again.

I mentioned PRIZES didn't I?  To be entered to win, you must subscribe, comment and leave some love at each stop on the hop, either on the blog post or YouTube video.  I'll give you an extra entry if you leave a comment on both of mine.  Each of us will have a different prize to offer.  My prize is the card we made and a few other goodies.  Unfortunately, due to international shipping costs, I have to limit the winners to the U.S.  Winners will be contacted directly and will have 48 hours to claim their prize before another winner is drawn.

Here is the complete list of blogs and YouTube channels on the hop:
Maaike UIjthoven: https://youtu.be/PEjPkcSAuxg
Karen Hasheck: https://www.youtube.com/watch?v=2rZK_zXGl10&feature=youtu.be
Mary Polanco: https://www.youtube.com/watch?v=K2ivbEM4xa8&feature=youtu.be
Charlotte Ehrukainen: https://www.youtube.com/watch?v=osVe3m1p7Uo&feature=youtu.be
Jasmine Burgess: https://www.youtube.com/watch?v=LiAo3_oZ5E0&feature=youtu.be
Gerry’s craft room: https://youtu.be/fYQxbTvQYK8
Maike kreations: https://maikreations.blogspot.nl/2018/01/celebrate-maaike-uithovens-2000.html
Uniquepaper15: https://www.youtube.com/watch?v=kaPbJxUDqRc&feature=youtu.be

Thank you for joining us to celebrate and good luck in winning a prize!  Happy to help if you have any questions and I'd love to know what you think.  See you next time!

For Christ's glory and much love,
Jasmine

Saturday, January 20, 2018

DT Guest Spot: Penguin Shaker with Gerda Steiner Designs and Alcohol Ink Background

 Hello and Happy 2018!  I am excited for the blog post and video today.  Macy from Gerda Steiner Designs reached out to me and asked if I would like to guest design for them.  They always have such charming and delightful images and excellent quality products, so of course I said yes.  I was brimming with ideas for these little guys and couldn't wait to play.
Valentine Penguins is one of those versatile sets that can be romantic, but also lends itself to friendly or encouraging.  My first card was one inspired by Empire Penguins that have the really colorful feathers on their heads.  I wanted to bring lots of color and excitement to the party and alcohol inks are perfect for that.  As I worked, the ideas coalesced into a shaker card and I love how it turned out.  Here's the link to the video tutorial on my YouTube channel and my supplies are listed below.
Supplies:
GSD Valentine Penguins (supplied to me)
Strathmore Bristol Smooth cardstock
MISTI
Ranger Alcohol Ink cardstock
Alcohol Inks:
  • Honeycomb
  • Magenta
  • Purple Twilight
  • Flamingo
Lawn Fawn Stitched Rectangle dies
Hero Arts Acetate
3M foam tape
Little Things:
Lemon and Tangerine Jewels
Deep Fuschia and Lily White sequin mixes
Cream cardstock
Ranger Archival Jet Black ink
Copic Markers
C6, 8, 9
Y17; YR15

Thanks again to Macy and Gerda for inviting me to design for them!  And thank you for stopping by.  As always, I'm happy to help if you have any questions and I'd love to know what you think as well.  I hope you have a blessed and joyous 2018.

For Christ's glory and much love,
Jasmine

Saturday, December 2, 2017

Handmade Christmas 2017 using Concord & 9th, Ink Blending and Heat Embossing

 For the entire series this year, I wanted to challenge myself to create all new designs with stamps and dies that I already owned.  I didn't buy a single new release.  Not because there weren't any that I liked; there were plenty of lovely designs available.  It was because I needed to reign in superfluous spending and there's a lot of folks who simply can't go buy all the pretty new things.  So I made due.  And it was fun!  I discovered how many stamp sets I have bought but never used and how versatile non-Christmas sets can be.  The Cozy Up set by Concord & 9th is a Valentines set, so why not make a Christmas card with a romantic vibe?  I ended up putting both cards in one video because the footage gremlins stole enough footage so that I couldn't make 2 videos and they are quite similar, so it fit together anyway.  Here's the link to the video on my YouTube channel and the supply list is below.

Supplies:
Concord & 9th Cozy Up S&D
Concord & 9th Joy stamp set
SSS Merry Christmas die
Avery Elle Wonky Stitches die
SSS Heavyweight White cardstock
MISTI
Versamark
Ranger Liquid Platinum EP
Brutus Monroe Icicle EP
Altenew Inks:
  • Caramel Toffee
  • Dark Chocolate
  • Paper Bag
  • Ruby Red
Distress Oxide ink: Candied Apple
Tim Holtz Holiday Knit stencil
Distress Inks: Antique Linen and Tea Dye
Doodlebug White Velvet cardstock
Stick-It
ARC Wood Veneer paper
Lawn Fawn Stitched Snowflake die

Thanks for joining me today.  I hope you get a chance to get crafty and enjoy the Christmas season with those you love.

In His glory and much love,
Jasmine


Monday, November 20, 2017

Handmade Christmas 2017: Gerda Steiner and Chibitronics Light Up Rudy

 Please forgive my thumb in the photo; I didn't have another way of demonstrating the fact that Rudy's nose lights up.  And it's the point of the card and video, so it was kind of important.  I've had a box of Chibitronics sitting in my studio since last Christmas that I never got around to playing with but I'll be honest, building electronic circuits was intimidating.  However, all the instructions and easy to follow blueprints make it really simple and fun.  I made three for the series this year only because I ran out of batteries.
I had the Peeking Friends stamp set from Gerda Steiner designs and my idea was to create a scene with Rudolph and Santa peeking in a window.   I also had an alcohol ink background that reminded me of a night galaxy sky.  Things were starting to take shape.  I dug out the window die I knew I had somewhere; add the glowing nose and all that was left to do was put everything together.  Here is the video tutorial on my YouTube channel and my supplies are listed below.  Here is the link to the video with the alcohol ink background.

Supplies:
Gerda Steiner Designs Peeking Friends stamp set
Memento Tuxedo Black ink
Bristol Smooth cardstock
MISTI
ARC Cherry Veener paper
Mama Elephant Creative Cuts Peek A Frame
Stick It Sheet Adhesive
Chibitronics
3M Foam tape
White cardstock
Yupo
Alcohol Inks
Staz-On Cotton White ink
Neenah Classic Cream cardstock
Hero Arts Acetate
Lawn Fawn Stitched Rectangle (2.75"x4")
Copics:
Rudolph: E17, 19; E23, 25, 27; R27, 37, 39, 20; C6
Santa: E00, 50, 51; R27, 37, 39; C0, 00, CB

I hope you have a wonderfully creative and happy Christmas season!

For His glory and much love,
Jasmine

Monday, November 13, 2017

Handmade Christmas 2017: Art Impressions Bells Ring with Copics

 Today we have the third card in my Handmade Christmas 2017 card series.  Every time I look at this set and this card, "Shake Your Booty" by KC and the Sunshine band gets in my head.  And how can you not smile and laugh when you see a booty-shaking snowman getting his groove on?  I think we need more of that; more laughter, more silliness and more mirth all around.  Christmas celebrates where we can find ultimate joy- Jesus.  Joy that doesn't fade or end, but lasts forever.
The stamp set used is Bells Ring by Art Impressions.  The set comes with the stamps, die and 1 action wobble.  You can buy more action wobbles at their website and many retailers carry them as well.  If you enjoy coloring, this card is easily mass-produced as well.  Here is the link to the video tutorial on my YouTube channel and the supplies are listed below.

Supplies:
Art Impressions Bells Ring set
AI Action Wobbles
Bristol Smooth cardstock
Memento Tuxedo Black ink
Avery Elle Wonky Stitches die
Copics:
  • Jacket/Berries: R37, 39, 59
  • Hat/Gloves: E17, 18, 19
  • Scarf/Leaves: G17, 19, 29
  • Carrot nose: YR15, 04
  • Bells: Y17, 35; YR20
  • Shadows: C00, 2
  • Blush: R20
Doodlebug Ladybug (Red) Velvet cardstock
Neat & Tangled banner die
Spectrum Noir Sparkle Pen
Neenah Classic Cream cardbase
Scor-tape
Power-tabs (adhesive foam squares)

I hope you are enjoying this years card series so far.  I also hope and pray that you know Jesus.  If you don't, I encourage you to check him out and give him a chance.

For His glory and much love,
Jasmine


Friday, November 10, 2017

Handmade Christmas 2017: Neat & Tangled Lumberjack Love with Copics

 Hello and welcome to the second card in my Handmade Christmas 2017 card series.  The Neat & Tangled Lumberjack Love set is geared more towards Valentines day than Christmas, but I thought why couldn't it be a Christmas card.  Romance abounds around the holidays, possibly even more so that the rest of the year.  So this card is for lovers and I colored the girl like me and the boy like my husband.  He proposed to me in January and we're coming up on our 10 year wedding anniversary, so he was on my mind while making this card.
I stamped the images first, using the MISTI and Memento Tuxedo Black ink.  When deciding which ink to use, keep this rule in mind: opposites attract.  Copics are alcohol ink markers and need dye ink images because the dye ink doesn't react with alcohol and it wont smudge or bleed.  The industry has made advancements in technology and produced inks that are any medium safe, but I don't have them, so I'll continue to use what I know ;).  The background is alcohol inks and Yupo.  Yupo is actually plastic and will warp easily with heat.  The piece I used did begin to warp as I finished up the embossing.  So be careful with it.  Let your gun run for 30-60 seconds to get hot before applying to your paper so that you're heating for a shorter time span.  Or just use glossy cardstock with your alcohol inks and avoid the issue altogether.  Here is the link to the video tutorial on my YouTube channel and the supplies are listed below.

Supplies:
Neat & Tangled Lumberjack Love S&D
Bristol Smooth cardstock
Memento Tuxedo Black ink
MISTI original
Wow Snow Sparkle embossing powder
Versamark
Ranger Silver Pearl embossing powder
Avery Elle Wonky Stitches die
White Yupo paper
Ranger Alcohol inks
  • Denim/ Sky/ Indigo/ Amethyst/ Snow Cap/ Pearl
Alcohol Blending Solution
Mini Mister
Woodgrain patterned paper
Scor-tape
Foam Squares
Copic Markers
Brown Hair: E25, 27, 29, 71, 74
Blonde Hair: E51, 33; YR20
Girl Outfit: E13, 15, 17, 19, 50, 51 Headband and Bird: B12, 14, 16
Boy Outfit: Hat and Shirt: B12, 14, 16 Jeans: B32, 34 Shoes: E13, 15, 23, 25
Skin: E51, 33, 31 Ax: C2, 4
Stump: E31, 27, 47, 49

Thanks for stopping by.  Always happy to answer any questions.  Merry Christmas!

For His glory and much love,
Jasmine

Wednesday, November 1, 2017

Handmade Christmas 2017: Penny Black Winter Fairy with Copics

Hello and welcome to the kick off of my Handmade Christmas 2017 series.  Christmas is my favorite time of the year and I'm always looking forward to the creativity that comes with cardmaking.  The only rules are the ones we give ourselves.
I fell in love with the Penny Black Winter Fairy image because she looks so sweet, innocent and darling; it reminded me of childhood Christmases that were magical and lovely.  I imagine that snowball as her gift to baby Jesus; heartfelt and genuine.
The blue and purple version was a practice card, but I absolutely loved how it turned out and decided to include it in the post.  Copic markers are amazing in the right hands and they're a labor of love, but I'm determined to get better with them.  The blue and purple is in the non-traditional color family while the red and gold is certainly in the traditional realm and both are beautiful.
Here is the link to the video tutorial on my YouTube channel and my supply list is below.

Supplies: Red/Gold
Penny Black Winter Fairy stamp
Memento Tuxedo Black ink
Strathmore Bristol Smooth cardstock
MISTI
Copics:Red/Gold
Hair: E31, 33, 37; YR20
Skin: E50, 51, 21; R11, 20
Skirt: R27, 29, 37, 39, 59
Wings and Snowball: RV0000
Earmuffs and legwarmers: C00, 0, 1; R27, 37, 59

DCWV Foiled Cardstock Stack- Red/Gold
Lawn Fawn Stitched Rectangle dies
Viva Decor Hologram Glitter Pen
Neenah Classic Cream cardbase
SSS Merry Christmas die
Stick-It sheet adhesive
Scor-tape


Blue/Purple:
DCWV Shimmer Cardstock: Pale Blue
Lawn Fawn Stitched Rectangle dies
Spectrum Noir Clear Sparkle Pen
Neenah Classic Cream cardbase
Doodlebug White Glitter cardstock
Stick-It sheet adhesive
Neat & Tangled Happy Holidays die
Scor-tape


Thanks for stopping by to hang out with me.  Let me know if you have any questions; always happy to help.  If you're interested in Copic marker classes, go see Sandy at art-classes.com.  She's got mad skills and so easy to learn from.  Merry Christmas!!

For His glory and much love,
Jasmine

Monday, October 23, 2017

Fantastic Halloween with Copics, Glitter Paste and Alcohol Ink Background

Last, but certainly not least, is my final card in what has turned out to be my Halloween series for 2017.  As much as I loved my Unicorns and pumpkins, this card is my favorite.  It's also the design that required the least thought; it just came together on it's own.  I had the background hanging out in my studio for a while, added glitter paste through a stencil and it fit "purrfectly" with the vampire kitty.  I love it when that happens.  I die cut the background before I added the glitter paste.  You can add it and then die cut (after it's completely dry), but the pressure from the die cutting can distort the shape of the dried paste as well as ruin the dimension. 

Here's the link to the video tutorial on my YouTube channel and my supply list is below.  Here is the link for the alcohol ink background.  Have fun!

Supplies:
Ranger Alcohol Inks:
Raspberry/ Flamingo/ Valencia
Yupo or Gloss cardstock
Bazzil Black Licorice cardstock
Neat & Tangled Scalloped die set (label die is in this set as well)
Nuvo Black Diamond Glitter paste
Star Stencil
Mama Elephant Plushoween stamp and die sets
Memento Tuxedo Black ink
Bristol Smooth cardstock
MISTI
Ranger Sparkle Black embossing powder
Versamark ink
Copics: BV13, V17, RV10, C00, C8, C9
Distress Inks
  • Carved Pumpkin
  • Picked Raspberry
Scor-tape
Foam Squares

Thanks for joining me today!  I hope your Halloween is exciting and sweet!  Happy Halloween!

For His glory and much love,
Jasmine

Thursday, October 19, 2017

Boo Crew Halloween with Ink Blended Background and Copics

 Here is the fifth card in what has become a Halloween series this year.  These guys are from the Plushoween set by Mama Elephant and they aren't just for Halloween.  These guys would make adorable birthday cards too.  You could mask out the face on the pumpkin and turn it into an ornament for Christmas as well.  I colored the guy in the middle as a cat in a bunny costume, but I realized after coloring him that he is supposed to be a fox.  Don't care; still cute! LOL!  At any rate, this was a lot of fun to play with.  I used my cat Pixie as inspiration for the vampire cat and my childhood cat Spunky for the coloring on the would be fox.  The bear I kept simple.  I had a sunset in mind for the background, so I used 3 colors of Distress inks with the ink blending technique; Mermaid Lagoon, Picked Rasperry, and Carved Pumpkin.  When it was dry, I added some Shimmer Spritz.
Here is the link to the video tutorial on my YouTube channel and my supplies are listed below.

Supplies:
Mama Elephant Plushoween S&D
Bristol Smooth cardstock
Memento Tuxedo Black ink
Copics:
Vampire Cat: BV13, V17, R20/ C00, 0, 6, 8, 9
Pumpkin Bear: E23, 25, 27; C9
G19; YR07, 04, 15; Y13, 35
Bunny Fox: E000, YR20, Y17, R20, RV10, 20
Spider: C8, B29
Versamark
Ranger Holographic embossing powder
Distress Inks
  • Mermaid Lagoon
  • Picked Raspberry
  • Carved Pumpkin
Sparkle Shimmer Spritz
Gelly Roll Sparkle Pen
Foam Squares
Neenah Classic Cream cardbase
Scor-tape
Lawn Fawn Stitched Rectangle die

I had a lot of fun with this project and I hope you enjoyed your visit.  Always happy to answer questions too.  See you next time!

For His glory and much love,
Jasmine

Wednesday, October 18, 2017

A Sweet Halloween with Darcies and Copic

Here is Halloween card #4.  I'll be honest; I struggled with a background for this one and turned to Pinterest and YouTube to see if I could find any inspiration.  I came across a video Sandy Allnock made last year using the same stamp set and totally copied her idea.  (They say imitation is the sincerest form of flattery, right?)  The potion forming a spooky little cloud above the little guys was perfect and simple, allowing the focus to remain on the main images and all the coloring we put into them.  Simple and sweet with just a tiny hint of mystery while being completely adorable.  This stamp set is fairly versatile as well.  You could also use it for Valentines by masking off the bat from the cupcake and hat from the apple.

Here is the link to the video tutorial on my YouTube channel.  Here is the link to Sandy's video too.

Supplies:
Darcies Heart and Home Sweet Halloween stamp set
Memento Tuxedo Black ink
MISTI
Bristol Smooth cardstock
Post-It Removable Tape
Copics:
Apple: YG03, 06/ R24, 27, 29/ E13, 15/ C6, 8
Potion: V12, 04, 05, 17
Cupcake: G14, YG17/ YR15, 04, 07  Bat: C9
Background: V12, 000, C2/ Colorless Blender
Spectrum Noir Sparkle Pen
Lawn Fawn Stitched Rectangle dies
DCWV Glitter paper
Scor-tape
Neenah Classic Cream cardbase

Thanks for stopping by and I hope you have a wonderfully sweet Halloween.

For His glory and much love,
Jasmine

Tuesday, October 17, 2017

Magical Halloween Part Deux with Darcies and Copics


Hey guys, welcome back!  As I said yesterday Halloween being my birthday was so much fun as a kid, but is just another day as an adult; for me, it's getting one step closer to Christmas that's the exciting part.  However, when I came across this stamp set with a Unicorn perched upon a jack-o-lantern, I couldn't resist.  The shaker was originally my practice image, but I loved it so much that I fussy cut it out and mounted it to the front of the shaker window.  I just couldn't let it go to waste.  The green glitter card has a Copic colored background because I wanted to keep the focus on the adorable unicorn.  Just a few sequins to finish it off.  This image is perfect for all the Halloween and Unicorn lovers alike.  I'll be sending these to my nieces; they'll love them!

Here's the link to the video tutorial on my YouTube channel and the supply list is below.

Supplies: (This list is used in both cards.)
Darcies Heart and Home Magical Halloween stamp set
Memento Tuxedo Black ink
MISTI
Strathmore Bristol Smooth cardstock
Copic Markers:
Mane and tail: RV06/ V05, 09/ B04, 06/ G03, 07/ Y13, 18/ YR04, 07
Hide: RV0000, 00, 52/ R20  Hooves: C6  Horn: RV000, 52
Wings: BV0000, 000, 01
Pumpkins: YR04, 15; Y35, 13; R39
Leaves: YR15/ Y17/ YG17/ YG67/ G07
Hat: E21, 33, 35, 40

Green Glitter:
Sky: BG000/ B000/ B01, B12 
Ground: YG67, 17
Spectrum Noir sparkle Pen (Mane, tail and wings)
DCVW Green glitter paper
Lawn Fawn Stitched Rectangle dies
Ranger Muliti Medium Matte
Simon Says Stamp Crystal Reflections sequins

Scor-tape
Neenah Classic Cream cardbase


Orange Shaker:
Paper Studio glitter cardstock
Hero Arts Acetate
3M Foam tape (doubled up)
Scor-tape
Spectrum Noir Sparkle Pen (Mane, tail and wings)
Doodlebug patterned paper
Simon Says Stamp White Pigment ink
Stampendous White embossing powder
Little Things sequin mixes
  • Tangerine Jewels
  • Viola Sequin mix
  • New England Fall sequin mix
Neat & Tangled Scalloped die

Thank you for joining me today!  I hope you get a chance to enjoy fall and all the beauty God gave it.  Happy Halloween!

For His glory and much love,
Jasmine


Wednesday, October 4, 2017

Tattooed Owl Card with Brutus Monroe

 Todays project started with the owl; who could say no to a tattooed owl?  Because there's quite a bit of detail in the owl image, I kept the background fairly simple.  After stamping and masking him, I added some ink blending and used a tree stencil to smooth glue over the image.  After letting the glue cure for 20-30 minutes, I went in with my glitters to create the branches of the tree.  I used Copic markers to color in the owl, but kept it very simple because it's a small image.  Pictures just don't do justice to how sparkly the glitter is, especially in the sunlight.  It's gorgeous and adds quite a bit of dimension as well.  Here is the link to the video tutorial on my YouTube channel and my supplies are listed below.

Supplies:
Strathmore Bristol Smooth Cardstock
Stitched Rectangle die
MISTI
Brutus Monroe You're a Hoot Inspiration kit
Memento Tuxedo Black ink
The Crafters Workshop Branches stencil
IndigoBlu Flitter Glu
Art Glitter in Old Gold and Teak
Distress Inks
  • Salty Ocean
  • Blueprint Sketch
Copic Markers:
G02, 05, 17, 21
E13, 79
B01, 02
C6, 9
Scortape

Thanks for joining me today!  Let me know if you have any questions.  I'm happy to help and love interacting with you guys.

For His glory and much love,
Jasmine


Handmade Christmas Series 2018: Day 1 Watercolors and EH Mondo Holly 2 ways

Here's an exciting sale for everyone!  ellenhutson.com is having a 20% off sale on all dies with the code above.  I...
