Showing posts with label Memory Box. Show all posts

Friday, November 24, 2017

Handmade Christmas 2017: Scraps and Die Cuts

 As you may have noticed, there's no stamping in todays cards.  It's all scrap papers and die cuts so we not only use up otherwise unusable excess, but also give ourselves a creative stretch.  I have all sorts of different papers in these cards; glitter, foil, patterned paper, wood veneer, velvet and shimmer.  To add interest and flair, mix up your finishes.  Varying the textures also gives depth and dimension to the finished product.  You also want to pay attention to widths.  Place wide pieces next to skinny pieces so that you draw the eye and add interest.  You can make these any size too.  I went with the standard 4.25" x 5.5", but the size is only limited by the length of your scraps.  This technique also works for absolutely any occasion and it's perfect for guy cards.  I have strips as thin as 1/8" and as wide as 3/4".  I used my paper trimmer to cut strips down and trim off any torn or crooked edges.  Here is the link to the video tutorial on my YouTube channel and my supplies are listed below.
Supplies:
DCWV papers
  • glitter
  • foil
  • shimmer
Doodlebug
ARC wood veneer paper
MemoryBox Snowflake Border die
Simon Says Stamp Merry Christmas die
Simon Says Stamp Christmas Blessings die
Neat & Tangled Happy Holidays die
Sizzix TH Alterations Reindeer Flight die
Stick-It sheet adhesive
Scor-tape
Tombow Mono Multi glue
Snowflake dies
White cardstock, cut to 4.25x5.5"
Neenah Cream cardbases
 I hope you're enjoying some creative time and get the opportunity to give yourself a creative stretch to try this technique out.  It's really easy and a great way to create quick yet beautiful cards and use up some leftovers in the process.

Merry CHRISTmas and much love,
Jasmine


Tuesday, September 5, 2017

You're A Hoot by Brutus Monroe

 Todays post is a 2 for 1 deal!  I've made 2 cards with similar styles using the Brutus Monroe You're A Hoot Inspiration Box and I love each of them.  The Inspiration Box is basically a card kit that includes a stamp set, cardstock, dies, embellishments, stickers and an ink cube but goes a step further to include toner prints that you can foil using a laminator.  Super cool.  This certainly has a fall color scheme to it, but the stamp set and owl die are usable all year.  I have a few ideas for Christmas cards too.  I hope Brutus Monroe makes the toner sheets available as a stand alone item in their shop because they are so versatile and cool.
 In the video tutorial on my YouTube channel, I give an overview of the kit contents and how I made each card and my supplies are listed below.

Supplies:
Shaker:
Brutus Monroe You're A Hoot Inspiration Box
Vellum 1.5" wide by 5.5" long (trim the edges)
Stick-It Sheet Adhesive
BARC Cherry Wood Veneer paper
Stitched Rectangle die
MISTI
Bristol Smooth cardstock
Branch Die
Distress Oxide Inks
  • Wild Honey
  • Frayed Burlap
  • Vintage Photo
Deco-Foil Amber Watercolor
Catherine Pooler Inks
  • Something Borrowed
  • It's A Boy
Versamark
BM Gilded Embossing Powder
3M Foam Tape
Hero Arts Acetate
Scor-tape 1/8"
Little Things Gold Dust sequin mix
Pretty Pink Posh Nature sequin mix
Neenah Classic Cream cardbase

Emerald Card:

Brutus Monroe You're A Hoot Inspiration Box
Vellum 1" wide by 5.5" long (trim the edges)
Stick-It Sheet Adhesive
BARC Cherry Wood Veneer paper
Stitched Rectangle die
MISTI
Bristol Smooth cardstock
Branch Die
Distress Oxide Inks
  • Fossilized Amber
  • Vintage Photo
  • Walnut Stain
Deco-Foil Emerald Watercolor
Catherine Pooler Inks
  • Something Borrowed
  • It's A Boy
Versamark
BM Penny Embossing Powder
Neenah Classic Cream Cardbase

Thanks for stopping by guys!  Let me know if you have any questions and I'll see you next time.

For His glory and much love,
Jasmine

Saturday, April 23, 2016

Cool Fathers Day Card

Is this cool or what!?!  I am so stoked about how this card turned out.  It's so perfect for my Dad and I can't wait to see his reaction on Father's Day.  Lets get started!

Supplies:
Tim Holtz Distress Wood-grain Card stock
Daniel Smith Iridescent Antique Gold watercolor
Distress Inks in Ground Espresso, Antique Linen and Tea Dye
Lawn Fawn Stitched Rectangle Dies
VersaMark
Black embossing powder
Doodlebug Black Crushed Velvet cardstock
Doodlebug Kraft in Color 6x6 paper pack
Alphabet die by Memorybox
Chipboard die cuts from Infinity Engraving


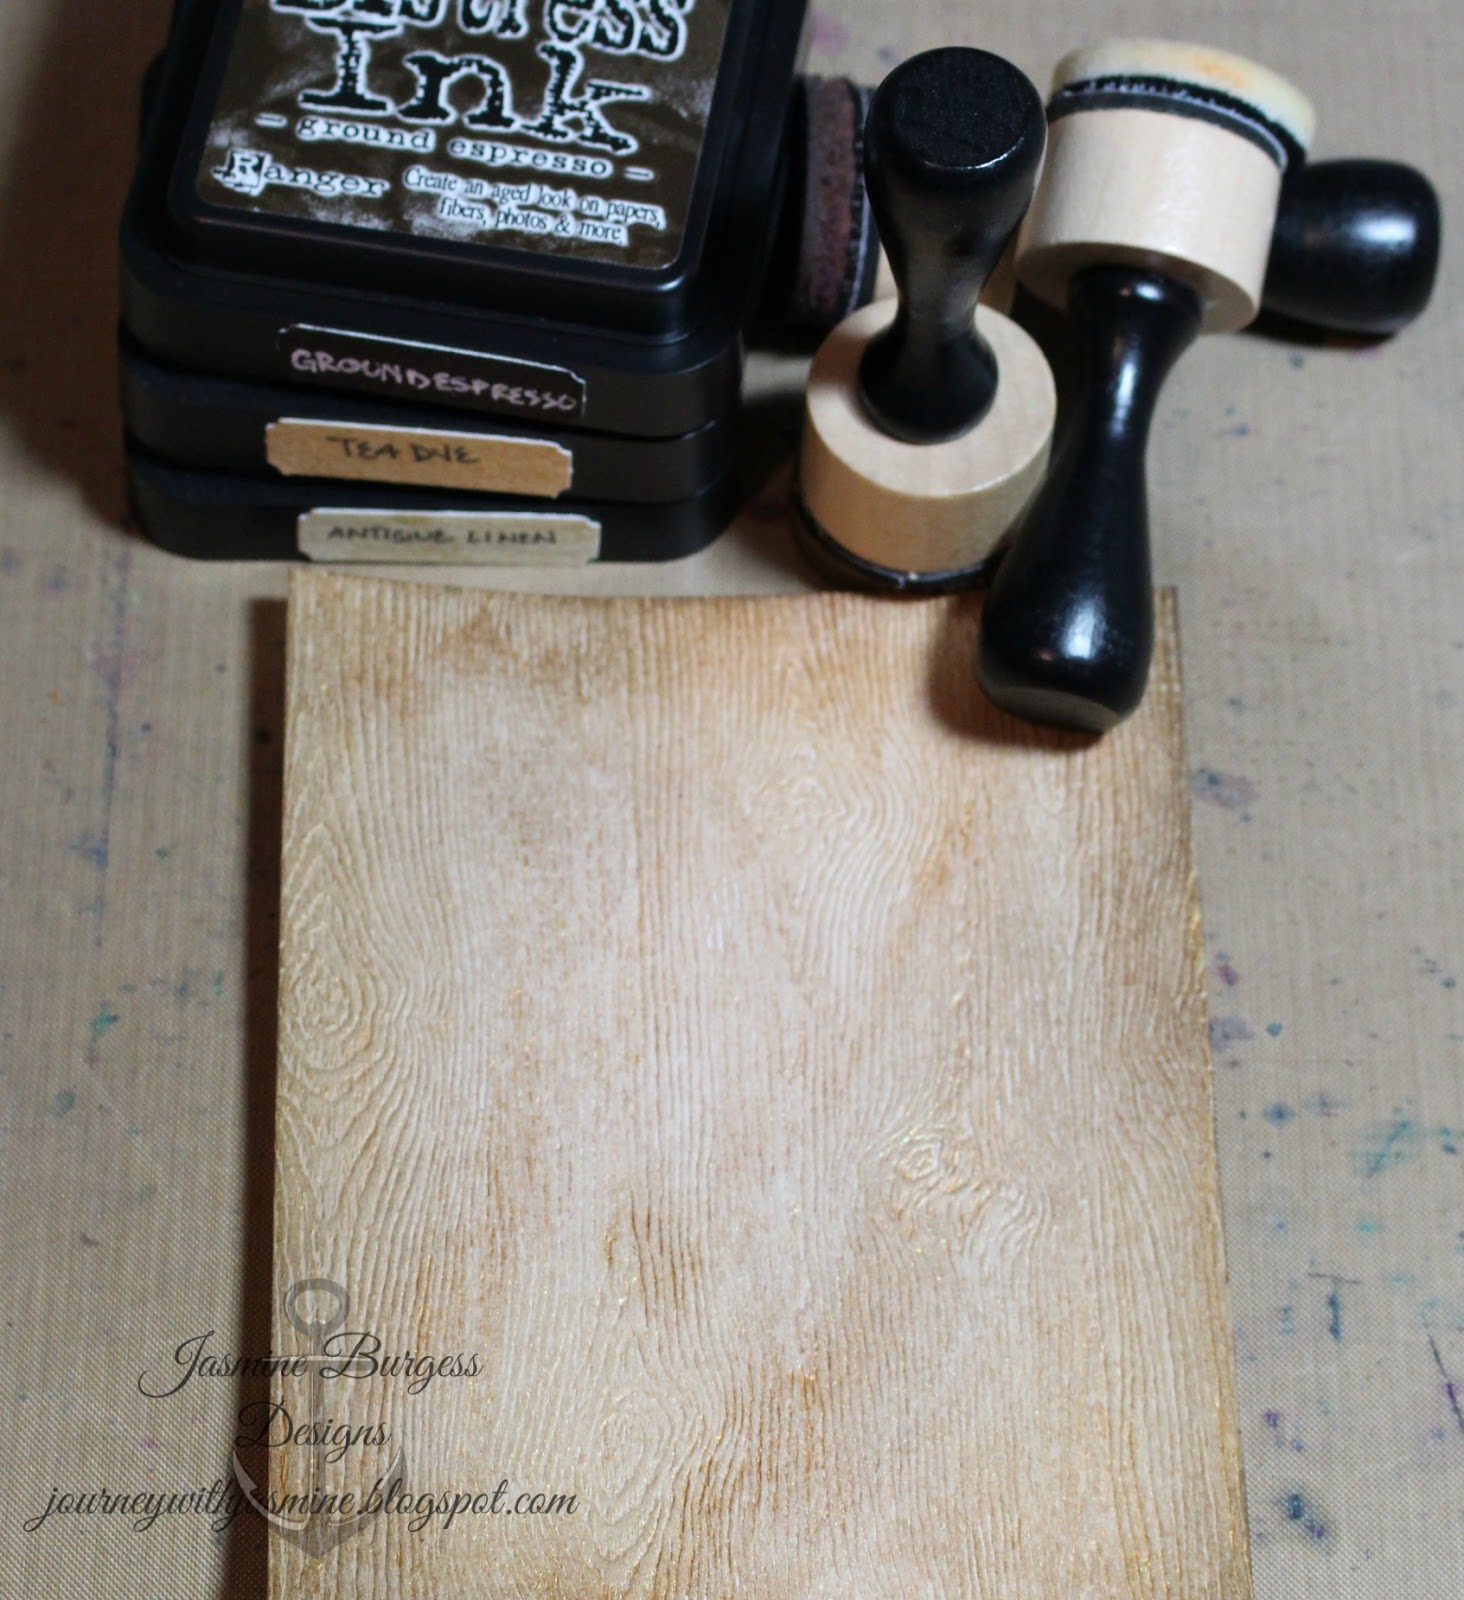
Starting with a piece of cardstock, lightly paint a wash of gold over the entire piece, leaving variations in the color.  Let dry.  While it's drying we'll color the die cuts.  Using Versamark or another clear, sticky embossing ink, give each die cut a coat; the surface will be shiny when it's completely covered.  Cover with embossing powder and tap off the excess.  Heat to melt powder.  When it's shiny, it's melted.  Repeat the process so that it has 2 layers of embossing powder.


Using the ink blending tool, add ink to the cardstock, starting with Antique Linen, then Tea Dye and adding Ground Espresso to the edges.  The goal is to give the cardstock an aged, rugged, masculine look.  Think plank of wood.  You want to give it some variability in the colors.  When you are done inking, die cut with the 2nd largest Stitched Rectangle die.
The next step is to die cut the letters DAD from the velvet cardstock and the gray houndstooth cardstock.  Also die cut a panel of the gray houndstooth using the largest of the Stitched Rectangle dies. 


Mount the gray piece to a card base.  Adhere the woodgrain piece in the center of the gray piece.  Adhere the die cuts using liquid glue.  I placed something heavy on top of them to make sure they made good contact and would stay put. To create the shadow behind the word, I layered the black letters behind the gray with liquid glue and then adhered them, centering the "A" and adding the "D"'s.   Let it dry with something heavy on top to get good adhesion.


Our card is complete! 

There's my Mom and Dad!  Thanks for stopping by and hanging out with me today.  Feel free to ask any questions and let me know what you think!

Much love,
Jasmine

Wednesday, March 2, 2016

Tweet Me A Song

Happy Spring!  Today's card was inspired by the birds I heard chirping at the bird feeder, a sound I've loved since I was little.  I used a holiday set by Altenew called Winter Cardinal and by changing the colors from reds to blues, I created a Blue Jay instead of a Cardinal.  You could use yellows to create a Cedar Waxwing.  Let's get started.
Supplies:
Altenew Winter Cardinal Stamp set
MISTI
Neenah Solar White 110lb cardstock
Wplus9 Oatmeal cardstock
BARC Wood Paper
Lawn Fawn Stitched Rectangle dies
Memory Box Branch die
Inks:
-Simon Says Stamp Slate, Dark Chocolate
-Lawn Fawn Deep Sea, Fish Tank
-Momento Bahama Blue, Danube Blue
-Distress Ink Squeezed Lemonade (set #10), Tumbled Glass (set #8), Blueprint Sketch (set #14)
-Delicata Golden Glitz
White Fun Foam
Tombow Mono Multi liquid glue
1/2" Scor-tape
Little Things sequin mixes in Warm Golden Glow and Mountain Lake

Step 1)  Using the largest two Stitched Rectangle dies, cut two panels of Oatmeal cardstock.  Using the MISTI, start the stamping with the branch in Dark Chocolate ink.  Next, stamp the feet using Slate ink.  Now for the body of the bird.  This is a layering stamp set, and it's easy to know which to stamp first.  The first layer to stamp is the body in Momento Bahama Bay ink.  The second layer is in Lawn Fawn's Fish Tank ink.  The third layer is in Momento Danube Blue and the fourth and final layer is in Lawn Fawn Deep Sea.  If you get any spotty stamping, just reink and stamp again (this is where the MISTI comes in handy). 

Step 2)  Using an ink blending tool, add Squeezed Lemonade over the top right corner of each panel and Tumbled Glass around the rest of the panel.  Add Blueprint Sketch around the Tumbled Glass, just along the edges for some depth. 

Step 3)  Add scor-tape to the back side of the larger inked panel and adhere to a card base.  Cut a piece of fun foam slightly smaller than the bird panel and add scor-tape to both sides.  Remove backing paper from one side and adhere to the back side of the bird panel. Remove backing tape and centering the bird panel, adhere to the larger inked panel. 

Step 4)  Cut branch from wood veneer paper using the branch die.  Adhere over the stamped branch using liquid glue.  Pull out three gold sequins of varying sizes and two blue sequins of different size.  Adhere with liquid glue in the top left corner.  Our card is complete!

Thanks for hanging out with me today! Let me know if you have any questions and I'd love to know what you think!

Much love,
Jasmine

Handmade Christmas Series 2018: Day 1 Watercolors and EH Mondo Holly 2 ways

Here's an exciting sale for everyone!  ellenhutson.com is having a 20% off sale on all dies with the code above.  I...