Showing posts with label Lindy's. Show all posts

Thursday, February 22, 2018

Watercolor Emboss Resist Birthday with Moody Unicorns

 Unicorns and birthdays are best friends, so I decided to put them together in honor of one of my besties, Jen.  We met in college, became best friends and never looked back!  I started by making my own patterned paper by randomly stamping and heat embossing the larger unicorn images followed by filling in with the smaller images in the stamp set, the cupcake and little present.  Using watercolors to add pops of brightness helped each image stand out without looking overdone and the die cut sentiment finished things off nicely.  I chose a foil paper for my sentiment because it adds a contrasting finish and texture, which adds easy interest.  Here's the video tutorial and supplies are listed below!  Happy Birthday Jen!!

Supplies:
Gerda Steiner Designs Moody Unicorns
Canson XL 140 lb watercolor paper
MISTI
Versamark
Lindy's Stamp Gang Silver Moon Orchid EP
Gansai Tambi watercolor palette
Silver Black Velvet brush #8 round
My Favorite Things Wonky Stitches die
DCWV Foil and Glitter papers
Lawn Fawn Happy Birthday die
Tombow Mono Multi glue
Be Creative tape

I hope you enjoyed todays post and project and that you enjoy good friendships like I am blessed with.  Happy crafting and God bless!

For Christ's glory and much love,
Jasmine


Friday, November 17, 2017

Handmade Christmas 2017: Easy Watercolor cards with Koi and Fine-Tec Metallics

 It's the fourth post in my Handmade Christmas 2017 series and I have 4 easy watercolor cards that are perfect for mass production.  I used 1 stamp set, 3 watercolor palettes and 1 sheet of 9x12 watercolor paper.  You don't have to be a master watercolor artist to make these cards.  If you can move a brush from side to side, you can make these.  Easy peasy. I wanted to keep products to a minimum by using them in different combinations on each card so that you get variety without needing/using tons of different things.

Here is the link to the video tutorial on my YouTube channel and my supplies are listed below.

Supplies (used in each card):
Canson XL 140 lb Coldpress watercolor paper
Hero Arts SD412 stamp set
Archival Jet Black ink
Koi Pocket Feild Sketch watercolor palette
Silver Black Velvet brushes
MISTI
Versamark
Green tree on red mat:
Green tree on Gold mat:
Blue wash on Gold mat
Blue/Bronze on Red mat


 I hope you enjoyed todays post and video.  Watercolors are really quite forgiving and these are a really easy way to get your feet wet ;)  Merry Christmas!

For His glory and much love,
Jasmine

Monday, June 26, 2017

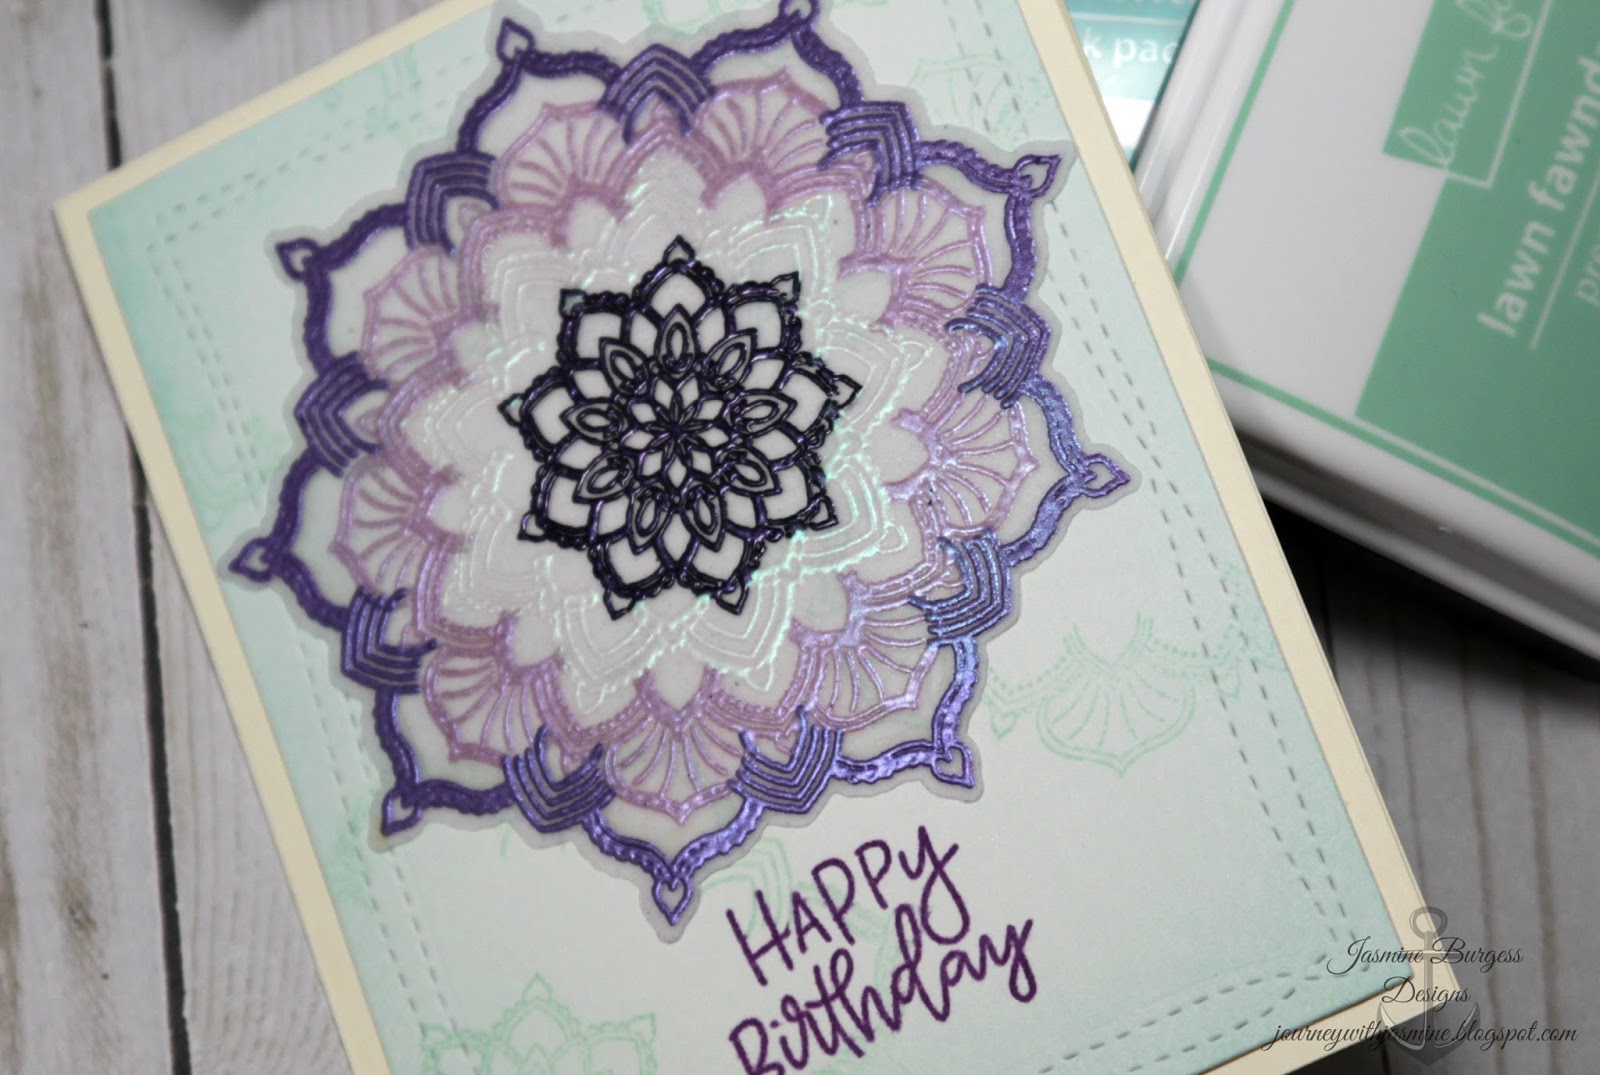
Many Mandala Birthday with Heat Embossing and Vellum

 Today we are going to play with vellum, heat embossing, ink blending and tone-on-tone stamping to create a fresh, delicate and graceful design.  The color combinations are endless and with the range of possibilities in embossing powders, design options are infinite.  I used the Many Mandala stamp and die sets by Concord & 9th to create the vellum medallion with Versamark and four different colors of embossing powder.  Here is the link to the video tutorial on my YouTube channel and my supply list is below.

Supply list:
Concord & 9th Many Mandala stamp and dies
Vellum
Strathmore Bristol Smooth cardstock
Versamark
WOW embossing powder
Lindy's Stamp Gang
  • Hollyhock Scarlet Plum
  • Angel Wings Peacock
  • Midnight Violet
Lawn Fawn inks
  • Minty Fresh
  • Mermaid
Neenah Classic Cream cardstock
Scor-tape
Avery Elle Wonky Stitches die


Thanks for stopping by! Catch you next time.

In His glory and much love,
Jasmine

Thursday, May 4, 2017

Soft and Loose Watercolor Mother's Day Hugs Shaker with Concord & 9th

 We are almost half way through the year already and while I'm wondering where the time has gone, Mother's Day has quietly crept up.  I have three Mother's Day cards to make every year and I enjoy the creative challenge of doing something different.  Traditionally, flowers make an appearance and while my Mom and both MIL's enjoy flowers, I went a another direction.  This design is really versatile, perfect for birthday, thinking of you, encouragement and sympathy.  Starting with white embossing on watercolor paper, I used powdered watercolor paints to create a loose and soft emboss-resist background.  After that was dry, I die cut the "hugs" and the border edge detail.  To finish it up, I stamped an accompanying sentiment in the bottom right corner, built the shaker and mounted it to a card-base. 
Here is the link to the video tutorial on my YouTube channel and my supplies are list below.  If the idea of Watercolor is intimidating, try the loose technique demonstrated in my video.  It's really easy and so user-friendly, not to mention hard to mess up.

Supplies:
140 lb Watercolor paper
Concord & 9th Cuddles and Hugs stamp and die sets
Versamark
White embossing powder
MISTI
Lindy's Stamp Gang Magicals shakers
  • Guten Tag Teal
  • Polka Purple
Colorburst Liquid Metals Platinum
Colorburst Orchid
My Favorite Things Wonky Stitches
Hero Arts Acetate
Scor-tape
Tombow Mono Multi glue
3M Foam Tape
Little Things Sequin Mixes
  • Pacific
  • Lucky Dip Purple Paradise
Memento Tuxedo Black ink
SSS Smoke cardstock

Friday, March 10, 2017

Happy Hello featuring Concord & 9th

 A happy hello to you!  Here in Michigan the weather has been all over the place with warm and cold, rain and sun and snow.  I needed to comfort myself with some Spring colors and bright imagery, so that's how this card was born.  Butterflies are the quintessential harbinger of spring and I love the life they bring to just about anything.  The watercolor look designed into Concord & 9th's Butterfly Beauty stamp set makes it so easy and simple to get the look without the work. 

If you aren't familiar with Lindy's Stamp Gang products, they make an amazing array of colorful pigment powders, sprays, embossing powders and now watercolor powders called Magicals.  I used the Magicals to create a rainbow watercolor panel that I die cut the hello sentiment from using Concord & 9ths Say Hello dies.  Magicals are somewhat similar to Colorburst or Brusho in that they are a dry powder activated with water, but also have some shimmer to them.  Let me know in the comments if you'd like to see a video specifically about the Magicals and I'll see what I can do to make that happen. 

Here is the link to the video tutorial on my YouTube channel and my supply list is below!
Supplies:
Lawn Fawn Stitched Rectangle die
Concord & 9th Butterfly Beauty stamp set
Concord & 9th Say Hello dies
Strathmore 140 lb watercolor paper
Strathmore Bristol Smooth cardstock
Memento Tuxedo Black ink
MISTI
Altenew inks: Lavender Fields, 
Deep Iris, Cotton Candy
SSS ink: Twirling Tutu
Vellum
Stick-it Sheet Adhesive
Scor-tape
Little Things Ivory sequin mix
Ranger Multi Matte Medium


Thanks for stopping by and hanging out with me!  Let me know how you like it and as always, if you have any questions, I'm happy to help.

Catch you later!

Much love,
Jasmine


Monday, February 27, 2017

Quick and Easy Die Cut Card with Lindy's Stamp Gang Magicals

 Today's card is an easy project to put together because it's all die cuts.  When I get new products, I like to play with them to see what they can do.  Lindy's Stamp Gang has some awesome products and I have quite the collection of their sprays, pigment powders and embossing powders.  They recently released Magicals, which are dye based powders that are similar to Colorburst or Brusho, but include some shimmer.  I created a rainbow with the Magicals and watercolor paper, letting each color dry a bit before adding the next one so that they didn't blend too much.  Once it was dry, I used it for die cutting. 
This card was super simple to put together.  I die cut SSS black cardstock with a stitched rectangle die, the black starred patterned paper with a wonky stitches die and the hello sentiment from the Magicals piece.  I layered those over a cardbase, added sequins and done!  Whenever you have scraps or backgrounds that didn't turn out great, use them for die cuts.  Here is the link to the video on my YouTube channel and my supply list is below.

Supplies:
Strathmore 140 lb watercolor paper
LSG Magicals (in order of use)
-Cuckoo Clock Cardinal
-Oktoberfest Orange
-Yodeling Yellow
-Lederhosen Laurel
-Guten Tag Teal
-Bavarian Blue
-Polka Purple
Concord & 9th Say Hello die
SSS Black cardstock
Lawn Fawn Stitched Rectangle die
My Favorite Things Wonky Stitches die
SSS Crystal Reflections sequins
Scor-tape
Ranger Multi Medium Matte

Thanks for stopping by.  See you next time!

Much love,
Jasmine

Monday, February 13, 2017

DT Post: Faith based Spring Mixed Media with Infinity Engraving LLC


 It has been a minute since I've done a mixed media canvas and I missed it!  I love card-making but being creative on larger scale has it's own appeal.  I like doing irregular or unexpected shapes with my pieces because for me, it inspires creativity.  I love texture, color and purpose in my work.  With so much unrest and animosity in the world today, I wanted to project of the some love, peace and hope that I find through my faith in Christ into it.  That is the purpose behind todays piece.

I started with a 10" circle board.  These come in a variety of shapes and sizes and are made of layered chipboard.  I bought mine at Hobby Lobby.  After adding three coats of white Gesso (acrylic medium), I covered my board with Tim Holtz "Melange" Tissue Wrap using Prima Soft Matte Gel, smoothing over the surface and wrapping around to the back.  After that was dry, I went in with acrylic paint.  I laid down a coat of clear Gesso to make the paint go on a little thinner so that you could see the print of the tissue paper and to make blending easier.  I used pink and green, which are complementary colors.  Complementary colors means that if you mix them together, they make brown.  So where they met on the canvas, I was careful not to blend them too much.


 After the paint was dry, I applied the vellum centerpiece.  I created the wording on my computer in Word and printed it on vellum.  To make a sticker out if it, I applied Stick-It sheet adhesive to the back so that the adhesive wouldn't be visible through the vellum and used a square die to die cut it.  You could also use a paper trimmer.  My chipboard die cuts and wood heart buttons are from Infinity Engraving LLC.  I wanted the wood appearance and texture to show and just used the buttons as is.  I used spray inks to color the rose and vine die cut as well as the corner trellis.  I let those dry while I added my stenciling. 

If you want to use water-based mediums on chipboard do not prime with Gesso.  Gesso is an acrylic base medium that makes whatever it's put on non-porous.  If you want to use water-based mediums, but want a white base, use watercolor grounds instead of Gesso. 

 I used E6000, which is an industrial strength glue specific to metal, to attach my metal embellishments.  It's really the only glue I've found that holds metal; the other mediums I've tried don't hold very long, including hot glue.  The only thing to be mindful of when using E6000 is that it has a strong chemical odor and needs to be used with ventilation.  I live in Michigan and open my windows, even in winter, when using it. 

 To adhere the rest of my embellishments, I use the same Prima Soft Matte Gel that I adhered the tissue paper with.  It dries matte and clear, so you can't see it if it oozes out anywhere and holds perfectly.  All the button, seed beads and flat-back pearls are from 28 Lilac Lane Button mixes and embellishment kits.  I pour them out into a little dish and use them to fill in and around to complete the project.  With the varied sizes and finishes of all the elements, it makes it really easy to shape a cohesive look while maintaining the focus on the center.  To finish off, I added a few enamel dots here and there.

Here is the link to the video tutorial on my YouTube channel if you'd like to see how this project came together.  My supply list is below.

Supplies:
10" Circle Board (Hobby Lobby)
Dina Wakely White Gesso
Tim Holtz Melange Tissue Wrap
Prima Soft Matte Gel medium
Vellum
Stitck-It sheet adhesive
Square die
Dylusions acryilic paint in Bubblegum Pink, Cut Grass and Fresh Lime
Dina Wakely Clear Gesso
Distress Ink Spray: Twisted Citron
Dylusions Spray Inks: Funky Fuchsia, Bubblegum Pink, Bubblegum Pink Mica, Cut Grass
Lindy's Stamp Gang: Lucky Shamrock Green, Salt Water Taffy Pink
Infinity Engraving corner die cut, rose die cut and Wood heart buttons
Versamark ink
Delicata Golden Glitz pigment ink
Perfect Pearls: Pearl, Gold, Forever Green
Herringbone stencil
TH Mini Blossom stencil
Hot Off The Press butterfly stencil
28 Lilac Lane mixes in Pretty Princess, Cotton Candy, French Quarter, New Leaf
E6000
Doodlebug enamel dots

If you are wanting to try mixed media, but feel intimidated, try starting with something small.  You'll never create something you love if you never try to begin with.  As always, I'm happy to answer any questions you have, so don't be afraid to ask.  See you next time!

Much love,
Jasmine

Tuesday, November 29, 2016

Handmade Christmas Series 2016: Card 5 Happy Hanukkah

For all my Jewish friends out there, Happy Hanukkah!  I'll admit that I do not know that much about Hanukkah, but I have noticed a serious lack of Hanukkah cards out there in social media and tutorials.  When I saw the Star of David set by Casual Fridays, I thought I should do my best to create some Hanukkah cards and get them out there for those that maybe have Jewish friends or are Jewish themselves and want to celebrate too.  I have always love the six pointed Star of David and was happy to be able to use it.  I utilized the traditional colors of Hanukkah, using blue and gold, and chose a dark blue to really emphasize the contrast between the muted navy blue and shiny Gold.  I created the background using IndigoBlu Megaflake in Lancashire Rose and Cosmic Shimmer glue on plain white cardstock.  I die cut the navy frame using a Mama Elephant Creative Cuts Peek a Frame die.  The star pattern strip and sentiment are both from the Casual Fridays Star of David set.  The star strip was stamped on Vellum and heat embossed using Lindy's Stamp Gang embossing powder in Slate Blue Twilight.  The sentiment was stamped on SSS Soft Navy cardstock and heat embossed using Ranger Gold ultrafine embossing powder and die cut using a Sizzix frame die.  Here is the link to the video tutorial on my YouTube channel if you want to see start to finish how I created this card and my supply list is below.

Supplies:
Mama Elephant Creative Cuts Peek A Frame die
Simon Says Stamp Soft Navy cardstock
Cosmic Shimmer glue
IndigoBlu Megaflake in Lancashire Gold
Neenah Solar White 110 lb cardstock
Casual Fridays Star of David stamp set
Vellum
Stick-It sheet adhesive
Sizzix label die
Ranger Gold superfine embossing powder
Versamark
Lindy's Stamp Gang Slate Blue Twilight embossing powder
Scor-tape
Foam squares

Please feel free to ask if you have any questions and I'd love to know what you think.

Happy Hanukkah and much love,
Jasmine


Tuesday, November 15, 2016

Handmade Christmas Series: Card 3 featuring SOA Collection

Merry Christmas!  I wanted to play with the traditional color palette and shake things up a bit, so I added lime and teal to the traditional red, green and gold.  Immediately after stamping the striped background, I applied some clear sparkle embossing powder and heat set that to add a beautiful shimmer.  After stamping and heat embossing the candies, I die cut them using the coordinating dies.  To create the vellum panel, I added Stick-It sheet adhesive to the back of the vellum, then die cut it using the Casual Fridays label dies in the SOA kit.  To stamp the sentiment and holly, I employed my MISTI to get things perfectly aligned.  It also allows for the need to repeat any stamping and it has become one of my most used items in my studio.  Here is the video tutorial on my YouTube channel if you'd like to see how I created this card from start to finish and my supply list is below.

Supplies:
2016 Stamp Of Approval Collection (* items are in the SOA box)
*Peppermint Stick background by Catherine Pooler Designs
*Candy Cane Lane Stamp and die sets by Catherine Pooler Designs
*Merry Labels die by Casual Fridays
*Merry and Bright stamp set by Catherine Pooler Designs
Simon Says Stamp inks in Lucky, Jellybean, High Dive, Lipstick Red and Dark Chocolate
Versamark
Neenah Solar White 110 lb cardstock
Lindy's Stamp Gang Candy Cane Red Gold embossing powder
Ranger Holographic embossing powder
Wow Vintage Candy Cane
Wow Metallic Gold Rich Superfine
DCWV Foiled cardstock stack
Vellum
Stick-It sheet adhesive
Glossy Accents

I hope my design has sparked some idea's for you and that you get the time to get creative.  Don't forget to subscribe to my channel so you never miss a new video.  Thanks for spending some time with me today!  See you next time.

Much love and Merry Christmas,
Jasmine

Thursday, November 3, 2016

MIO Autumn Breeze Hop


Hey guys!  Welcome to the MIO Autumn Breeze Hop.  You should have arrived here from the talented Deana's blog and if you want to start from the beginning, head to our fearless leader, Laura's blog.  Starting with a piece of watercolor paper that I colored with spray inks by Lindy's Stamp Gang and Dylusions, I die cut a variety of leaves.  On another piece of watercolor paper colored with Colorburst dry watercolor pigments, I stamped my image and heat embossed it in gold.  I arranged the leaves around the stamped panel and completed my card with a die cut sentiment.  This design is perfect for the guys too, especially if they're outdoorsy like mine!

Here's the video tutorial on my Youtube channel if you'd like to see how I created my card from start to finish.  My supply list is below.

Supplies:
Canson 140lb Watercolor Paper
Colorburst Watercolors: Pthalo Green, Alizaron Crimson, and Orange
Lawn Fawn Stitched Leaves dies
Lawn Fawn Stitched Square Stackables die
Janes Doodles Owl stamp set
Versamark
Wow Metallic Gold Superfine embossing powder
MISTI
Scor-tape
ARC Wood Veneer paper
Stick-It
Simon Says Stamp Blessed die
Neenah 110 lb Solar White cardbase

Your next stop on the hop is the lovely Linda's blog and in case you get lost or want to visit one of us again, the complete list is below.


1. Laura
2. Deana Benson
3. Jasmine Burgess - You're here!
4. Linda Gorman
5. Lisa

Can't forget about the prize!

Now all you need to do to enter to win is leave some love at each blog on the hop; how easy is that!?!  The hop runs through 11/17/16 and we'll announce the winner on 11/21/16.  Thanks for stopping by and don't forget to hit the subscribe button on my YouTube channel so you'll be in the know when I post a new project video!

Much love,
Jasmine

Monday, October 17, 2016

Happy Halloween with Infinity Engravings LLC

Happy Halloween!  Infinity Engraving has teamed up with Sasayaki Glitter so the design team is pairing IE die cuts with SG digital images to create fun and dynamic projects.  I started my project with the girl and wheelbarrow full of skulls image, using Word to resize the image and printing it out on Copic friendly cardstock.  After die cut and colored the image, I created a mask and placed my stencil.  To create the stars on the background, I combined glitter paste and powdered watercolor, removing the mask while the paste was still wet.  After the paste was dry, I added two shades of purple around the edges, leaving the center of the panel fairly light.  I applied two layers of embossing powder to the ghost die cut and mounted him with foam squares.  Here's the video tutorial on my YouTube channel if you'd like to see how I created this card from start to finish and my supply list is below.

Supplies:
Sasayaki Glitter digital image
Avery Elle Stitches frame die
Copics: C1, 3, 5, 7; 100; R27, 37, 59
B69; E13, 51; R20; Y00
Simon Says Stamp Mosaic Stars stencil
BoBunny Sugar Glitter Paste
Colorburst Alizarin Crimson and Violet
Infinity Engraving Ghost die cut
Lindy's Stamp Gang Angel Wings Peacock
Black cardstock
Versamark
Doodlebug Black Crushed Velvet cardstock
Simon Says Stamp Halloween die
Simon Says Stamp Oh Happy Day die

Thanks for stopping by and hanging out today!  We'd love to know what you think or if you have any questions.  We love to interact with you guys!!  See you next time!

Much Love,
Jasmine

Thursday, October 13, 2016

MIO Challenge: Ombre

 Hello and Happy Fall!  I created today's card for the My Inky Oasis Challenge for October and the theme was Ombre.  Typically we see Ombre as a transition from light to dark or dark to light in a single color and is also seen with two colors, one dark and one light.  Purple is my favorite color, so I used three shades transitioning from dark to light using the ink blending technique over an embossed background and incorporated a heat embossed vellum image with a die-cut sentiment to complete the project.  A scattering of sequins finished off my ombre masterpiece!  Here is the link to my video tutorial on my YouTube channel and my supply list is below.

Supplies:
Neenah Solar White 110 lb cardstock
Sizzix Butterfly EF
Distress Inks: Wilted Violet, Shaded Lilac and Milled Lavender
Vellum
Stick-It
Unity Everything kit
Versamark
Lindy's Stamp Gang Midnight Violet
Doodlebug White Glitter cardstock
Simon Says Stamp Blessed die
Little Things Purple Velvet sequin mix
Scor-tape
Matte Medium
Tombow Mono Multi glue

To enter the challenge, make a card using Ombre as the theme and upload a picture to the October Challenge Album.  You can enter as many times as you'd like and it will run 10/15/16 through 11/05/16.  The winner will be announced on 11/11/16.  Good luck everyone!!

Saturday, October 1, 2016

Pumpkin Spice Owl Halloween Card

Happy Halloween!  This guy is from JessicaLynnOriginal stamps.  They have digital images, like this guy, as well as rubber and clear stamps.  His name is Pumpkin Spice Latte Owl and he is currently free to download.  I don't usually do a lot of Halloween stuff because I don't care for scary/creepy/gore, but Halloween is my birthday and this guy is so adorable as well as combines a few of my favorite things: Coffee, Pumpkin and Owls.  How could I not?!?  My background uses two stencils, glitter paste, Colorburst, and Distress inks.  I know, it's a lot, but it looks so cool and perfect for a Halloween card.  It's also simple and easy.  Here is my video tutorial at my YouTube channel for a start to finish process if you want to see how I created this project and my supply list is below.

Supplies:
JessicaLynn Pumpkin Spice Latte Owl
Momento Tuxedo Black ink
Momento Luxe Tuxedo Black pigment ink
Simon Says Stamp Waves Stencil
Simon Says Stamp Stars Stencil
Colorburst Watercolors in Violet, Ultramarine Blue and Pthalo Green
Distress Inks in Blueprint Sketch and Black Soot
Copics: E31, 33, 35, 37, 51, 70, 74; YR04, 07, 09, 15; Y08, 13, 17; YG11; G05, 09; B00
Sizzix frame die
Little Things Sequin Mix in Iridescent White
Lawn Fawn Scripty Sayings stamp set
Lindys Stamp Gang Twilight Slate Blue embossing powder
Vellum
Stick-It sheet adhesive
Neenah Solar White 110 lb cardstock
Crafters Companion Spectrum Noir cardstock
Spectrum Noir Sparkle Pen


Thanks for stopping by and hanging out with me today!  Let me know what you think or if you have any questions.  See you next time!

Much love,
Jasmine

Friday, July 29, 2016

Personalized Collage Canvas with Infinity Engravings LLC


Hello and Welcome back!  Todays project is a mixed media canvas utilizing chipboard letters and bright colors to create a fun, bright and exciting piece of art.  Here is the link to the video on my YouTube channel where I filmed the tutorial from start to finish.  I had my nephew in mind when creating this piece, so I used his favorite colors and embellishments that would resonate with him, such as feathers because he loves birds and nature and an anchor because he loves going boating and the water.

 Here is my supply list:
8" X 14" canvas
Tim Holtz Postale Tissue Wrap
Dina Wakely Heavy Body Acrylics:
  Tangerine and Lemon
Dylusions Acrylics:
  London Blue, Cut Grass, Vibrant Turquoise
Dreamweavers Crackle Texture Medium
Lindy's Stamp Gang pigment powders:
  Curiouser Chartreuse, Tweedle Dee Denim
  Lucky Shamrock Green and Tilt-A-Whirl Teal
Shimmerz Jelly Bean Green Paint
Paper Studio Chipboard Letters
Creative Medium in Gold
Tim Holtz Mini Stencils Set 3
Mosaic Star stencil
Metal Embellishments
E6000 Metal Glue
Prima Soft Matte Medium
28 Lilac Lane Buttons


I included several close up shots of the canvas to give you an idea of the texture created by combining texture pastes with stencils and how the colors transition one into the next.


Thanks for stopping by and hanging out with me today!  I'd be happy to answer any questions you have and I'd also love to know what you think!  


Thursday, July 21, 2016

Floral Shaker featuring Concord & 9th with Tupelo Designs LLC

Hello there!  Todays project is a Vellum Shaker using 2 stamp sets and a die set from Concord & 9th.  Wildflowers is one of my favorite sets from Concord & 9th, so having the images condensed into a collage image was right up my alley.  I also did some ink blending and finished it off with some die cut butterflies and sentiment.  The smile sentiment makes it suitable for a birthday, thinking of you, hello or even a sympathy card.  By changing the sentiment, it's suitable for a congratulations or recognition of achievement.  Here is the link to the video on my YouTube channel and be sure to subscribe, like, and let me know what you think or if you have any questions in the comment section below the video.  Below is my supply list.

Supplies:
Concord & 9th You're My Person stamp set
Concord & 9th Wildflowers stamp set
Concord & 9th Floral & Flutter die set
LSG Aurora Amethyst Embossing Powder
Archival Black ink
Distress Inks: Wilted Violet and Mermaid Lagoon
Neenah 110 lb cardstock
Purple glitter paper
White glitter paper
3M Foam tape
Circle Die
Vellum
Versamark
MISTI
Imagine Crafts Sheer Shimmer Spritz
Purple Sequins
Smile die 
Tape runner 

Thanks for stopping by and hanging out with me today!  I'd love to know what you think and am happy to answer any questions as well.  See you next time!

Much Love,
Jasmine


Monday, June 27, 2016

Queen & Co Shaker Card kit with Tupelo Designs LLC

Hello and welcome to another card tutorial on my blog and YouTube channel!  I first noticed these Queen and Co Shaker Card Kits on a CHA video and they looked so fun and easy.  They come with a card base, die cut foam piece, acetate and die cut card front to match the foam.  I added those ADORABLE baby dragons, confetti and sequins and viola! Here is the link to the video on my YouTube channel.

Supplies: (* denotes item supplied to me by TDLLC)
*Queen and Co Squares Shaker Kit
Crafters Companion Cardstock
Clearly Besotted Hot Stuff stamp set
Copic Markers: (RV00, 10, 13, 14, 17, 19, 21)
(E00, 000, 31)
(BG09, 10, 15, 23)
(Y17, YR04, 07, 09, 15)
(C1, 3, 7; B39)
Momento Tuxedo Black
Versamark
Lindy's Stamp Gang Angel Wings Peacock embossing powder
Little Things Sequin Mix
Wink of Stella Clear Glitter Brush pen
Confetti

Thanks for stopping by and hanging out with me today!  See you next time!

Thursday, June 23, 2016

Mixed Media Faith Canvas with Infinity Engraving

 Hello and welcome!  Todays project is a mixed media canvas.  My faith in the Father, Son and Holy Spirit is certainly a cornerstone of my life as it's shaped who I am, my career, my marriage and how I go about everyday life.  I grew up in Northern Michigan and have always loved the water.  The lake is a refuge of sorts and that was the inspiration for this piece.  Here is the link to the video on my YouTube channel if you want to watch my process and all the supplies I used are listed below, along with a few close up shots of the different elements. 

Supplies:
9x12 canvas
Tim Holtz Melange Tissue Wrap
Prima Soft Matte Gel Medium
Dylusions London Blue Acrylic Paint
Dylusions Vibrant Turquoise Acrylic Paint
Dina Wakely White Gesso
Dina Wakely Blue Violet Acrylic Paint
Dina Wakely Lemon Acrylic Paint
Lindy's Stamp Gang pigment powder in Tweedle Dee Denim
Prima White Sand Texture paste
Stampendous Fratage Vintage Embossing Powder in Aged Gold
Faber Castell Glitter  Glass Bead gel
SU Vellum
Lindy's Stamp Gang Royal Peacock Fire Glitz Spritz
Lindy's Stamp Gang Hydrangea Blue
Distress Blueprint Sketch Spray and Reinker
Distress Crazing Medium
28 Lilac Lane Button Embellishment mixes in Cotton Candy and Winter Blues

Thanks for stopping by and hanging out with me today!  If you have any questions, leave them in the comments and I'll be happy to answer.  I'd also love to know what you think!

Much love,
Jasmine


Handmade Christmas Series 2018: Day 1 Watercolors and EH Mondo Holly 2 ways

Here's an exciting sale for everyone!  ellenhutson.com is having a 20% off sale on all dies with the code above.  I...