Saturday, April 9, 2016

Mardi-Gras Inspired Mini-Canvas

 Welcome and thanks for stopping by!  Today's canvas is one I'm crazy about and I can't wait to share it with you!  The impetus to this design was the top hat shaker from Infinity Engravings.  

I had some new sequins sitting on my table, next to a naked top hat shaker to be.  I began to play around with color and elements and this is what came out of it.  The top hat is 5 layers of chipboard, all with a hole cut in expect the bottom layer.  Theres an acetate piece, also a top hat shape that sits between the top two layers to seal in the shaker bits.  I traced a scrap of black glitter cardstock to fit on the bottom layer so the bare chipboard wouldn't be visible through the shaker window.
I used Glossy Accents to glue each layer together because it's strong, dries fast and clear, and doesn't remain sticky after it's dry.  The top layer is etched with the lines that you'd see in a top hat- those lines remained visible after three layers of embossing powder, which is impressive and adds to the elegance of the piece.  Let's get to how I achieved the silver filigree.
Supplies:
VersaMark embossing ink
Black detail embossing powder
Silver pigment ink- Delicata Silvery Shimmer
Large filigree stamp - having a wood mount stamp will make it easier
Heavily ink a large filigree stamp.  Cover the top layer in VersaMark.  Cover with embossing powder and heat to melt.  Repeat the process two more times; while the third layer is still warm, press stamp onto the chipboard and lift off.  Let cool.  Glue bottom four layers of die cut together.  Add shaker bits.  Glue acetate in place and top with the final stamped layer.  Add feathers and roses.  Top hat is complete. 


I covered the canvas in printed tissue paper using gel medium as a glue.  Once dry, I added my acrylic paint.  I used Dina Wakely heavy body Acrylics in Blackberry, Magenta and Lemon.  I blended between the colors using my brush, so even though I only used 3 colors of paint, it looks like I have 5 colors.  After my paint was dry I added some texture with a stencil, texture medium, glitter and pigment powders.  I mixed two shades of green to add variety and depth to the composition.  Scoop 2 piles of about a teaspoon each of the texture medium.  Add glitter to both and each a different shade of pigment powder.  The ones I use are Magicals by Lindy's Stamp Gang, Mad Hatter Mint Green and Merry Go Round Green.  Smooth over stencil in an even layer, remove stencil and let dry. 

Wash stencil and palette knife immediatly, so the medium will ruin them if allowed to dry on there.  After it's dry, re-apply stencil and add a layer of gel medium.  Add seed beads and press into medium- this adds color and texture.  Let dry.

I used paper roses from Wild Orchid Crafts in a variety of sizes and colored them using ink sprays.
Purple: LSG Royal Amethyst Fire
            Dylusions Crush Grape
Blues: LSG Royal Emerald Fire
           LSG Hydrangea Blue
           Dylusions Polished Jade
           Distress Spray Stain Mermaid Lagoon
All the metal elements are from The Paper Studio "Spare Parts".  The Journey wood die cut is from my stash and I used the same technique as the top hat, without the filigree stamping: two layers of heat embossing with LSG Midnight Violet embossing powder.  The top hat, wood piece, roses and feathers are adhered using hot glue.  The metal elements are adhered using E6000; it's stinky, but the only glue I've found that holds on to metal. 

I hope you've enjoyed your time with me today! Feel free to ask questions and I'd love to know what you think!

Much Love,
Jasmine

Thursday, April 7, 2016

Moms Rock Hop with Laura's Loft

Welcome to my stop on our April Mothers Day Hop! We wanted to make this hop about honoring all the Moms in our lives.  I have two cards to share with you today and I know you'll love them as much as I do.  You should have landed here from Deana's blog, but if not Laura's blog is the place to start.  Don't forget to leave some love on each hop stop to be entered into the drawing for the impressive prize pack! We also have a killer 30% off sale on everything from 4/7/16 to 5/4/16 as well as $10 off a $75 purchase with the code $10off$75.  Lets get this show on the road!

 This set is "Amanda is Awesome" by Stamping Bella.  A little back story: I am the third of four children in my family and my older two siblings have always complained that not only am I the favorite, but also happen to have a high opinion of myself.  I don't believe I'm arrogant, but I am confident, stubborn and willful, so maybe that's where they're confused! LOL.  Anyway, the sentiment in this set is something I say to my Mom, so I had to have it and this is what I came up with.
Supplies:
Crafters Companion SN cardstock
Spectrum Noir markers
Distress Ink: Broken China (Set #6)
Lawn Fawn Stitched Rectangle dies
Tim Holtz Rays stencil
Faber-Castell Glass Bead Glitter Gel
Tim Holtz Distress Crayon - Mustard Seed (Set #3)
Lawn Fawn Perfectly Plaid 6x6 paper pack
VersaMark
WOW Black detail embossing powder
MISTI

I started by stamping the girl image onto a piece of SN cardstock using the MISTI, just in case I missed a spot and needed to restamp.  Using the third largest stitched rectangle die, I centered my image in the die, used a post it note to secure placement and ran it through the big shot.  I colored the image with SN markers and used a blending tool to buff some Broken China around the top and side edges.  This will add the to outdoor, sitting in the sunlight imagery.  I set it aside to allow the sky to dry; Distress Ink will reactivate with water and knowing I wanted to add stenciling over it, letting it dry thoroughly lessens the chance the texture medium will blend with the distress ink.  I let it dry for 10 minutes or so since it was a very light layer.  Using the MISTI again, dust the area with an anti-static powder bag or tool and stamp the sentiment in VersaMark.  Heat emboss with black embossing powder.  Next, run the patterned paper through the big shot with the largest of the stitched rectangle dies, adhere the focal layer to the plaid paper and arrange the stencil over the paper.  I masked off any areas I didn't want the texture medium with post-it tape.  Scribble the Distress Crayon into your craft mat and scoop about 1/2 tbsp of glitter bead gel onto it.  Blend together with a palette knife.  The crayon dissolves really easily and as you can see in the photos, the color stays strong.  Apply the gel over the stencil, smoothing in one direction and making an even layer.   Carefully remove the tape and stencil.  Set the card front to the side so it can dry and immediately wash the stencil and palette knife.  The medium will ruin your stencil and knife if allowed to dry on it.  I let mine dry overnight.  Mount the card front to a card base and you're card is complete!  This image is great for practicing shadows and contours.  Lawn Fawn's Perfectly Plaid paper pack is sold out in the shop, but Lawn Fawn's Beachside paper pack is just as versatile!

 
 This card features Lawn Fawn's Mom & Me stamp set.  It's so fun and sweet.  Perfect for a Mom of little ones, or to remind Mom of when she had little ones around.  I had my Moms favorite colors in mind when creating this.
Supplies:
Lawn Fawn Mom & Me
Avery Elle Wonky Stitches die set
Momento Tuxedo Black ink
SN Cardstock
Kraft cardbase
Lawn Fawn JalapeƱo ink
SSS Fern ink
SN Markers
Distress Inks: Mowed Lawn (Set #2), Lucky Clover (Set #15), Broken China (Set #6) and Mermaid Lagoon (Set #13)
Doodlebug Kraft in Color: Kraft 6x6 pad
Doodlebug Enamel dots
Design Creative Bling: Laurens Bouquet
MISTI

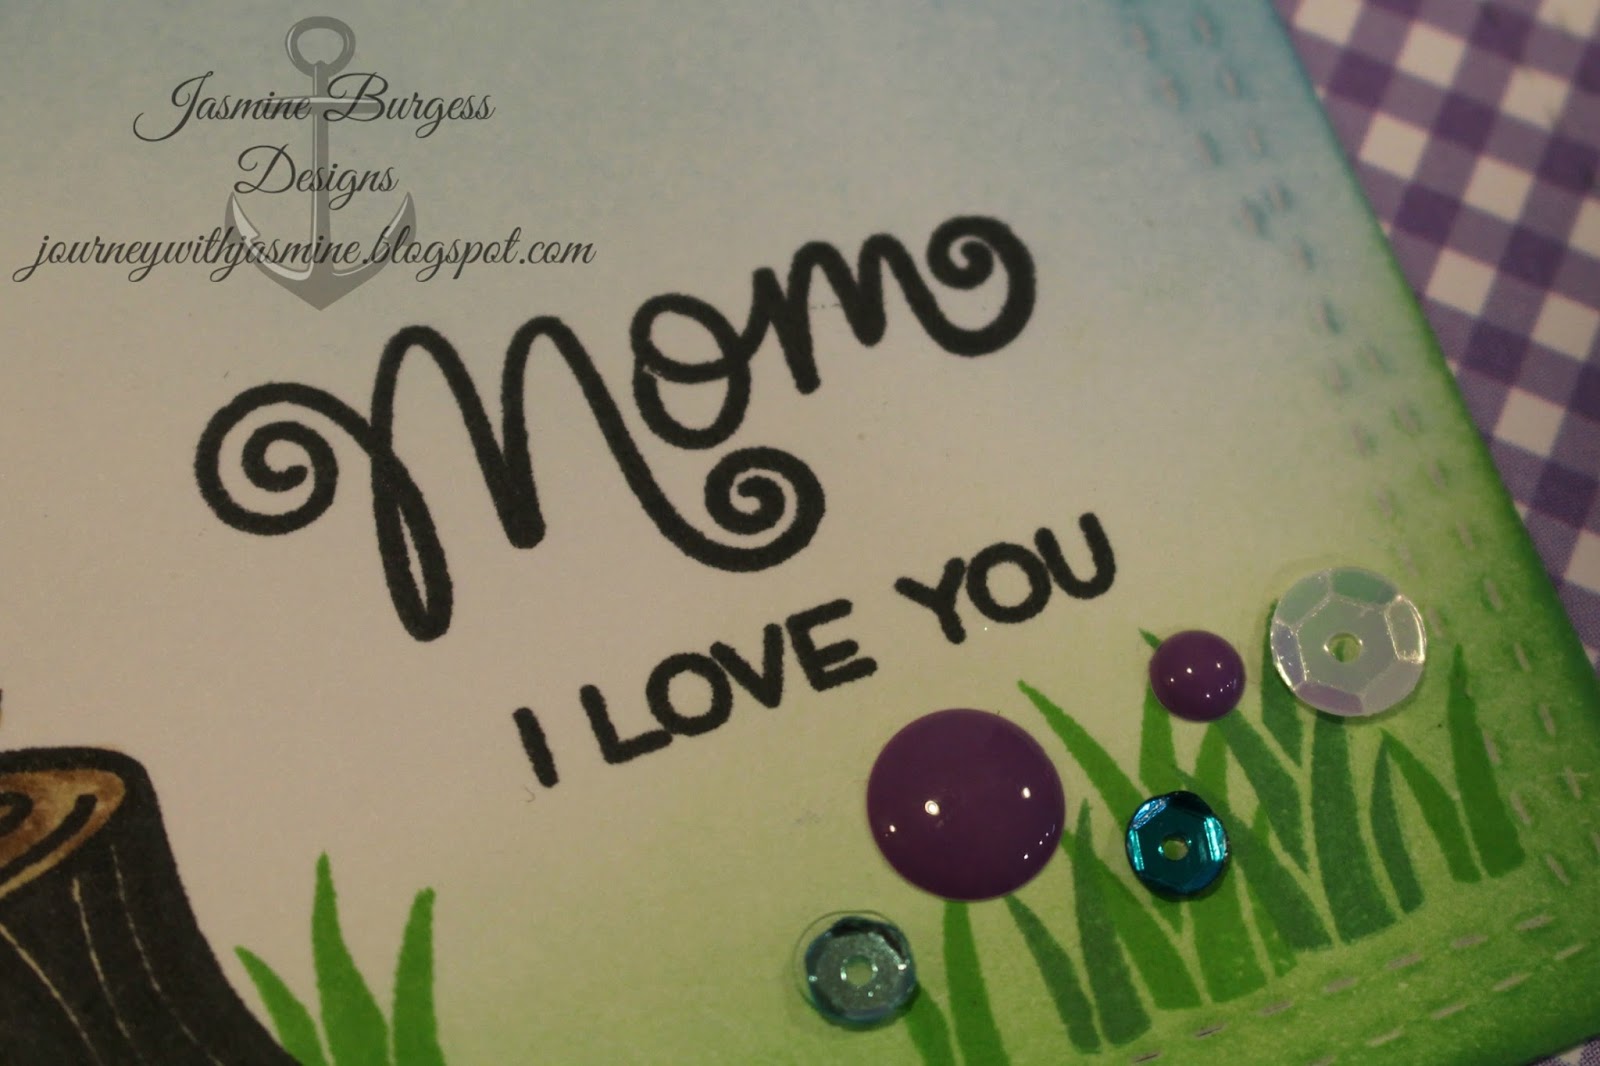
I employed a bit of masking in this project, which probably sounds more intimidating that it is.  I wanted the Owl and chick image to be complete, so I stamped her first on the cardstock and again on a post it note.  Fussy cut out the image, leaving no border along the bottom of the owl.  Apply the mask to the Owl and stamp the wood stump slightly over the mask, so that she's standing on it.  I stamped it twice with my MISTI so that all the lines were nice and black.   When coloring with alcohol based markers, make sure to use a dye based black ink.  I always use Momento with my SN markers and have never had my images bleed.  I googled images of owls to get the coloring somewhat natural.  I also stamped the sentiment images twice and ran it through the big shot using the smaller of the Wonky Stitches frames.  After I finished coloring the images, I stamped the grass using LF Jalapeno and SSS Fern to give a variance in color and added grass behind the stump to ground it.  For the green at the bottom of the panel, I blended Mowed Lawn over the bottom third with Lucky Clover on the edges for a bit of depth.  For the sky, I started with Broken China and finished with Mermaid Lagoon.  I added Enamel Dots, Jewels and Sequins to look like flowers to complete the scene.  I ran the purple gingham paper through the big shot using the large Wonky Stitches frame, centered the focal panel over the purple panel and adhered it.  I finished up the card by mounting the layers to a kraft cardbase.


Thanks for coming to hang out for a bit today!  I hope you're enjoying everything you've seen so far and I know you'll have fun with what's coming up!  Robbie is your next stop on our Moms Rock hop.


Here's a complete list of all the hop stops:
Laura - http://www.lauralscott.com/moms-bouquet-hop/
Jasmine Burgess - You're here!

Now about that prize I mentioned...
Giveaway Entry:
There are several ways to enter and the more comments you make in the different social media platforms, the more entries you earn! It is required that you comment on each blog in the Hop.  After that, we encourage you to like and comment on our Facebook page, tag on our Instagram post and pin on Pinterest, as well as share on your own pages. The participant with the most entries wins the fabulous prize package! How cool is that!?!


You may be wondering what the prize is...

Sweet, huh!?! Altenew's Winter Cardinal stamp set, Cool Summer Nights ink set and, exclusive to Laura's Loft, Glacial Bliss Design Creative Bling Sequin mix.  Those sequins are among my favorites!


Don't forget to leave a comment on each blog stop to be entered into the drawing to win the prize!  See you later!

Much love,
Jasmine

Wednesday, March 23, 2016

Steampunk Mixed Media Canvas

Hey chicas! Today I wanted to share this Steampunk inspired canvas, featuring Infinity Engraving chipboard gears.  I started with a black canvas and printed tissue paper, added texture paste, several colors of ink spray, roses, keys, gears, buttons and a wise old owl.
Supplies:
8" x 10" black canvas
Prima Art Basics Soft Matte Gel
Tim Holtz Melange Tissue Roll
Wild Orchid Crafts Roses
Stampin Up Buttons
Metal Embellishments from my stash
Infinity Engraving Chipboard Gears
Prima Art Basics Opaque Matte texture paste
Stencils
Perfect Pearls: Perfect Copper pigment powder
Lindy's Stamp Gang Sprays
  • Cape Cod Coral
  • Sweet Violet Purple Teal
  • Salt Water Taffy
  • Royal Emerald Fire
  • Cowabunga Copper
  • Hydrangea Blue
  • Pretty in Pink Pink
  • Sunset Pink
Dylusions Sprays in Bubblegum Pink and London Blue
Hot Glue
E9000 glue


Starting with the canvas, adhere the tissue paper using Prima's soft matte gel.  I like to leave enough overhang to wrap around the edges.  Apply a thin layer of gel over a third of the canvas at a time and smooth out any bubbles or wrinkles with your fingers or a bone folder.  I apply the paper over the surface of the canvas and let it dry, then wrap it around the edges.  I let mine dry overnight, but it will take around an hour or so depending on the room.  Humidity or cold will make it take longer.  If it's cold to the touch, its not dry yet.

After it's dry, apply texture paste using a variety of stencils.  I keep mine to the corners and edges.  You can use texture paste white, adding color to it after it's dry, or you can color it using pigment powders, alcohol inks, gelatos or re-inkers.  Just be careful how much liquid you add to because you don't want to thin it out.  As you can see, I added copper perfect pearls to the paste to give it a gorgeous color and shimmer when it dried.  It will take between 20 to 30 minutes to dry completely.


While the paste is drying, we can color the roses.  I used a variety of colors, because as you can see, I love bright and bold color in my work.  I also used the sprays to add color to the background and gears.  The sprays dry fairly quickly, about 15 minutes; the heavier you apply them, the longer it will take to dry.

I like to create clusters with my elements and lay them out and rearrange until I like what I see.  For all my elements expect the metal bits, I used hot glue to attach them.  I used E9000 glue for the metal bits because it's the only glue I've found that works for metal.  Use it in a well ventilated room, away from heat or flame.  It has a strong smell to it, but it goes away after it dries. 

I really love how the mix of colors, textures and finishes came together in this project.  It's so exuberant, exciting and energetic.  I was careful not to overload it, leaving plenty of room in the middle for pictures, momentos or keepsakes.

Thanks for stopping by and hanging out with me today! Please feel free to ask questions and let me know what you think!

Much love,
Jasmine

Thursday, March 17, 2016

Calling All Sistahs with CAS-ual Fridays


Calling All Sistahs!
1 in 8 women in the U.S. will develop invasive breast cancer in her lifetime.

On August 17th, 2015  an Awesome friend of ours became 1 in 8

Calling All Sistahs was started by Michele Gross, owner of CAS-ual Fridays Stamps, shortly after she was diagnosed with breast cancer. It is her hope to create awareness for breast cancer beyond just the month of October by reminding you to do your self breast exams on the 17th of each month, and encouraging us all to remind all the great women in our lives to do the same. You can read more about her story HERE .
The Calling All Sistahs Collection was created by Michele with the specific intent of donating 50% of her profits from this collection to Breast Cancer Research and Awareness programs in honor of all who have been affected by breast cancer.
We at Laura's Loft are thrilled to be one of the first stores in the country to offer this special collection of stamps and dies. It's important to us to be able to remind all of our sistahs to check yourself and we are proud to continue Michele's effort by donating 50% of our own profits from this collection to breast cancer research in VA.
Join us here on the blog on the 17th of each month for CAS-ual Fridays projects dedicated to the fight against Breast Cancer and in support of our sistahs suffering through it along with a personal reminder to get yourself checked. 

 ***This is your reminder to do your breast self-exam!***
And remind your sistahs too! 
If you're not exactly sure how to do a self exam, you can click here  to get the information you need, and then follow up with your doctor at your next appointment.


For More information on Breast Cancer Awareness just click here.
Please do your self exams!
We'll be back next month to remind you again :)

 I wanted to demonstrate the incredible courage I've witnessed in so many of our sistah's fighting this disease in my project, so I kept the rest of the design simple so that the focus could be on the sentiment.  I stamped the ribbon from the CAS-ual Fridays Hope Ribbon set in VersaMark and heat embossed it in Verdigris.  Using Picked Raspberry Distress Marker, I outlined the ribbon and pulled it out using a paintbrush and water.  If you don't have the marker, you can do the same technique using the ink pads.  Just swipe some ink an a non-porous surface and pick it up with the paintbrush.  Stamp the sentiment from the Calling All Sistahs set in black Archival using the MISTI; I stamped it twice so that it would be boldly black.  Run the panel through the Big Shot with Avery Elles Wonky Stitches die, then add Cracked Pistachio around the perimeter with a blending tool.  Adhere the stamped panel to a 4.25 by 5.5 inch panel of white glitter cardstock and adhere to a cardbase.  I added purple watercolor to the hearts in the ribbon as a final touch to finish off the card.

Emma is the next stop on the hop.  If you get lost, just click here to head back to the beginning.  Don't forget to comment on each and every stop on the hop to increase your chances of winning one of five prizes!  Michele is has a generous 3 gift cards to the CAS-ual Fridays shop to give away and Laura has a generous 2 gift cards to Laura's Loft to give away.  So be sure to leave some love along the hop as Michele and Laura will pick random winners from the blog comments on February 20, 2016.

I just wanted to take the time to say thank you to Michele for the opportunity to participate in support of such an important cause as Breast Cancer Awareness, Prevention and Research.

Much love,
Jasmine


Wednesday, March 16, 2016

A Fairy Hello

Welcome! Today's project features the absolutely adorable Fairy Friends set by Lawn Fawn.  I saw this set on all the YouTube videos at CHA and couldn't wait to play with it.  I also used their new 6x6 Perfectly Plaid paper stack for the sky background.  Another CHA product I got to play with in this project is Yupo paper, which is really fun stuff!  Let's get started!
Supplies:
Lawn Fawn Perfectly Plaid 6x6 paper stack
Lawn Fawn Fairy Friends stamps and matching dies
Lawn Fawn Forest Border Lawn Cuts die
Lawn Fawn Stitched Rectangle die
Avery Elle Wonky Stitches die
Crafters Companion Spectrum Noir cardstock
Spectrum Noir markers
Yupo paper
Tim Holtz Alcohol Inks in Raspberry, Twilight, Gold and Pearl
Alcohol Blending Solution
Momento Tuxedo Black ink
VersaMark ink
WOW Metallic Gold Superfine embossing powder
Doodlebug Daydream cardstock in Limeade
DCWV Gold Foiled cardstock
SSS Hello die
Clear Wink of Stella glitter pen
Green cardstock (here's my tutorial for making my own)
Fun foam


Lets start with the houses.  Those were made with a scrap of inked Yupo paper from another project and here's the link to Tim's technique tutorial.  After the inked Yupo is dry, stamp two houses in VersaMark and emboss in gold.  Die cut and set aside.  Stamp the fairies and flowers in black dye-based ink.  Color with SN Markers and die cut.  Add Wink of Stella glitter to their wings.   Die cut the hello using the hello die and gold cardstock.  Die cut a sheet of blue plaid paper with the largest of the AE Wonky Stitches dies.  Die cut the green cardstock using the largest of the Stitched Rectangle dies.  Die cut a panel of the Doodlebug using the same Wonky Stitches die.  Die cut the same piece with the border die and adhere to the blue piece flush at the bottom and foam dots towards the top edge to add dimension.  Cut a piece of fun foam slightly smaller than the blue piece and adhere to the back.  Center this piece in the middle of the green and adhere.  I used a single layer of foam squares behind the purple and green fairies and a double layer behind the pink; this will give movement to the fairies and make the pink appear closer.  I also used a single layer behind the flowers.  The houses are adhered with flat adhesive and the hello is adhered using liquid glue.

 I had so much fun playing with this set, combining new stamps with other products already in my stash and engaging several different textures to produce a whimsical and magical card.  
I linked products back to one of my favorite shops and everything in Laura's shop is 15% off through 4/3/16.  So go shop! LOL!  Her shipping is quite low and really fast. 

Thanks for stopping by and hanging out with me today! I hope you had fun and learned something new.  Feel free to ask questions and let me know what you think!

Much love,
Jasmine

Saturday, March 12, 2016

CHA New Release Hop with Laura's Loft


  Welcome to our CHA New Release Hop!  I can tell you all of us at Laura's Loft have been beyond excited to bring you so many awesome products and this hop has been seriously cool to bring together.  We have tons of awesome projects, a store wide 15% off sale through 4/3/16 (so you can pick up all those new products!), $10 off a $75 purchase and a prize package giveaway to enter.  I don't think we could fit anymore in this hop if we tried! Giveaway entry details are at the bottom of the post along with the coupon code :)
  You should have landed here from Deana's blog, but if not, Laura's is the place to start.  To enter the giveaway, we ask that you comment on each blog in the hop.  We love to hear what you think :)  I have three projects to share, so lets get started on the good stuff!

I love the contrast between the black background and bright greens and yellow.  Tim's new mini stencils worked perfectly with Ranger Texture Paste to add raised texture and allow the colors to stand out.  Avery Elle's Sentimental die set "hugs" added a bit of whimsy with the doodley font and the Virginia Turtle Enamel Dots finished it off nicely and I put a piece of fun foam behind the black panel for some dimension.  Here's my supply list if you'd like to recreate this one.
Avery Elle Sentimental die set
Tim Holtz Mini Stencils Set #4: Blossom
Ranger Texture Paste
Distress Ink in Cracked Pistachio (Set #13) and Lucky Clover (Set #15)
Virginia Turtle Enamel Dots
Lawn Fawn Stitched Rectangle dies
Black cardstock
Doodlebug Bumblebee Daydream cardstock
White fun foam
White card base
Adhesive

Cut black panel with the second largest stitched rectangle die.  Using stencil and palette knife, apply texture paste in a smooth, even layer over the black panel.  I use post-it notes to mask off around the stencil to avoid paste in any unwanted areas.  Remove stencil and let dry.  Wash stencil and knife immediately; if the paste dries, it will ruin the stencil.  While the paste dries, cut a panel from the yellow cardstock with the largest stitched rectangle die.  Also cut the sentiment using the hugs die from the yellow cardstock.  Cut a piece of fun foam slightly smaller than the black panel.  Once the paste is dry, apply Cracked Pistachio using a blending tool over the paste.  Apply Lucky Clover over a few areas to vary the color.  Adhere yellow panel to the card base.  Adhere fun foam to black panel.  Center black panel over the yellow and adhere.  Glue sentiment die cut to the black panel and trim off the ends.  Add enamel dots and the card is complete.


 I had fun playing with alcohol inks and Yupo paper in the making of the background for this card.  I wanted an edgy, artistic look in this project and the Dylusions Mica Sprays worked well.  I also utilized two of the new Tim Holtz stamp sets with some gold embossing.  Here's my supply list if you want to try this one out.  
Alcohol Inks: Raspberry, Twilight, Gold and Snow Cap
Tim Holtz Lady Rose stamp set
Tim Holtz Ponderings stamp set     
Avery Elle Wonky Stitches die set
Design Creative Bling Sequin mix in Raspberry Crush
Little Things sequin mix in Warm Golden Glow
VersaMark embossing ink
WOW Metallic Gold Superfine and Opaque Bright White embossing powder
Zots Bling glue dots
Black cardstock
White card base
Adhesive

  Here's the link to Tim's tutorial for alcohol inks and glossy cardstock; the technique using the Yupo paper is the same.  Die cut a panel of black cardstock with the largest of the Wonky Stitches dies.  Stamp the sentiment from the Ponderings set and the large rose spray from the Lady Rose set using VersaMark ink.  Add gold embossing powder to the roses and white to the sentiment.  Heat set both; let your heat tool run for 60 to 90 seconds before applying it to your cardstock so that it can get good and hot.  If it's hot enough, the powder will melt almost immediately and the less heat you have to apply to the cardstock, the less warping you'll see.  Shake the pink and purple mica sprays vigorously to get the mica distributed.  Spray the black panel twice with each color, concentrating it towards the center so that you see the splatters when it dries.  Cut the Yupo background to 4.25 by 5.5 inches and adhere to a card base.  Adhere dry black panel to the card base, lining it up with the bottom right corner.  Add sequins using glue dots and you're finished!


Watercolor is one of my favorite mediums to work with, which the Botanical Garden and Painted Inspiration sets by Altenew lend themselves to so easily.  I loved the texture of this Tim Holtz Distress Woodgrain cardstock and added to it using another of the Mini Stencils and Dylusions Mica Sprays.  Here's my supply list for this beauty so you can try it if you want.
Tim Holtz Distress Woodgrain Cardstock
Dylusions Mica Spray (Vibrant Turquoise)
Tim Holtz Mini Stencils Set #4
Altenew Botanical Garden Stamp Set
Altenew Painted Inspiration Stamp Set
Avery Elle Wonky Stitches die set
Distress Ink is Wilted Violet (Set #15)
VersaMark embossing ink
WOW Metallic Gold Superfine embossing powder
White card base
Vellum cardstock
Archival Black ink
MISTI
Pretty Pink Posh 6mm Amethyst sequins
Little Things sequin mix in Warm Golden Glow
Daniel Smith Watercolors: Quinacridone Rose
Silver Brushes Black Velvet #6

  Arrange the trellis stencil diagonally across the woodgrain cardstock, from the top left corner to the bottom right corner.  Mask off the surrounding paper with post-it notes or scratch paper.  Shake Turquoise Mica spray vigorously and spray over stencil, being sure to get even coverage.  Remove masks and let dry.  Using the MISTI, stamp the flower images in Archival black ink.  You'll want to use a waterproof ink so that it doesn't run when you add watercolor.  I wanted the roses to stand out, so I only applied color to the roses, not the leaves, stems or butterfly.  Stamp the sentiment in VersaMark on Vellum.  Emboss in Gold.  I used the largest of the Wonky Stitches dies width wise to add the stitching detail along the edges of the sentiment and leaving it long enough to wrap around the back of the panel.  After the watercolor is dry, blend Wilted Violet lightly around the edges of the panel.  This will help the texture of the woodgrain to stand out as well as help to highlight the stencil design and shimmer from the mica spray.  Add adhesive to the back of the panel to adhere vellum.  Adhere panel with vellum to the card base.  Add sequins with glue dots and the project is complete.

The next stop on the hop is Robbie and below is the complete list.

There are several ways to enter and the more comments you make in the different social media platforms, the more entries you earn! It is required that you comment on each blog in the Hop.  After that, you are encouraged to like and comment on our Facebook page, tag on our Instagram post and pin on Pinterest, as well as share on your own pages. The participant with the most entries wins the fabulous prize package! How cool is that!?! 


So, what's the prize? Wait for it...

Sweet, right?!? That Stamping Bella Stuffies is a favorite of mine and I'm sure you'll make room for it in your own space :)

Don't forget to comment on each of the 7 blogs in the hop to enter the giveaway and we'd really appreciate it if you wanted to share! (Those count for extra entries too, but we'll keep that between us ;)  I have decided to give these three projects and an extra surprise to a random commenter on my blog, too!  And can't forget the coupon code! $10off75

Thanks for stopping by and hanging out with me today! I'd love to know what you think and answer any questions you might have.  See you later!

Much love,
Jasmine


Thursday, March 3, 2016

Hopping into Spring with Laura's Loft

Hello! Welcome to my stop on the Hopping Into Spring shop and hop with Laura's Loft. You should have landed here from Deana's blog, but if not and you want to start from the beginning, click on Laura.  We have lots of projects along the hop to inspire you today, not to mention a bomb prize pack giveaway to enter, exciting new CHA products added to the shop collections, a 15% off store-wide sale to celebrate National Crafting Month and as always, $10 off a purchase of $75 or more from the shop.  More details are at the bottom of my post :)

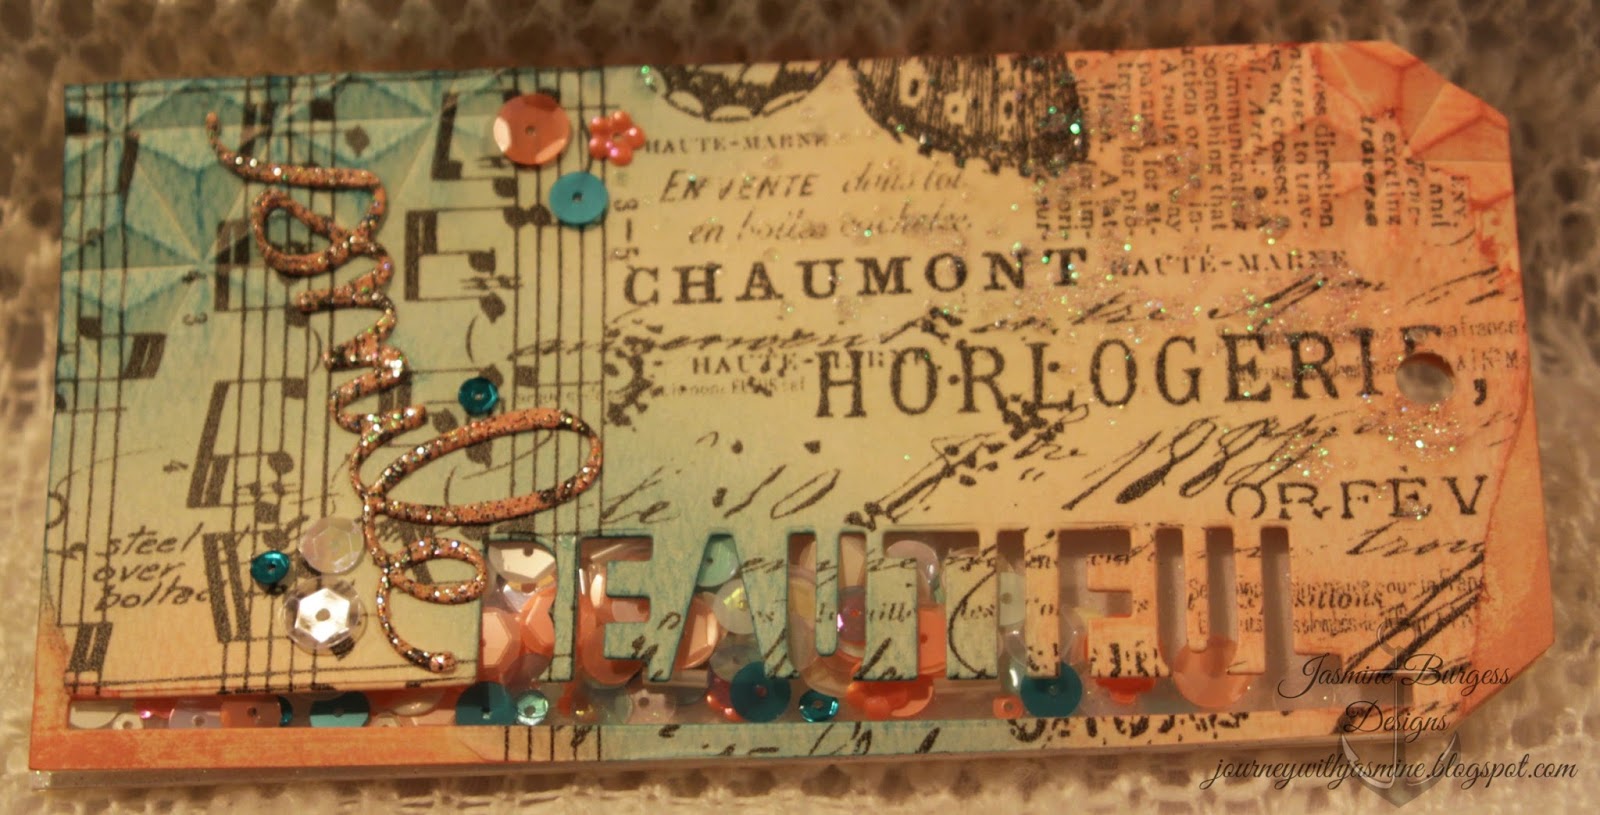
This shaker tag is my first project and I absolutely love how it turned out.  It was inspired by the colors in the Design Creative Bling Sequin Mix in Lauren's Bouquet, which is exclusive to Laura's Loft.  Let's see how it came together.


Supplies:
Ranger #8 Manila tag (2)
Distress Inks in Tattered Rose (Set #10), Abandoned Coral (Set #13) and Mermaid Lagoon (Set #13)
Faber-Castell Glass Bead Glitter Gel
VersaMark
WoW Clear Supergloss Embossing powder
Tim Holtz Speckles Stencil
Tim Holtz Beautiful Die
Simon Says Stamp smile die
WRMK Fuse Tool
WRMK Next Gen 3D Gemstone embossing folder
Avery Elle Stamp Pockets
Design Creative Bling Sequin Mix in Laurens Bouquet
Tim Holtz Melange Tissue Paper
Prima Art Basics Soft Matte Gel
3M Foam Tape
Scor-tape - 1/4" and 1/8"
Tombow Mono Multi liquid glue

Plug in your Fuse tool to let it warm up.  It takes a good 15 to 20 minutes.  Tear off a section of tissue paper wide enough to cover the tag.  Adhere paper with matte gel using a large paint brush.  I like to brush a thin, even layer of gel over a third of the tag at a time and smooth out the paper with a bone folder.  Once it's adhered, I place it under something heavy for 15 minutes or so to dry (this helps to keep it flat).

Once dry, place the die along the right edge of the tag, leaving at least 1/4" border along the outer edge.  You'll need that to adhere the shaker pouch later.  Run through the Big Shot (or other die cutting machine).   Use the actual die cut for another project.  Using the embossing folder, I did some partial embossing on the top and bottom left corners of the tag.  The "smile" die cut was from another tag covered with the same tissue paper.  I covered it with VersaMark and heat embossed it with clear embossing powder.

To create the peachy-orange color in the sequin mix, I tap back and forth a couple times between Tattered Rose and Abandoned Coral and blend onto the tag, starting on the edges and working in toward the middle.  I kept all the inking on the light side to keep the vintage feel of the tissue paper and to coordinate with the sequins.  Mermaid Lagoon is an intense color, so I was sure to keep a light hand with it as well.  I inked the smile die cut with the same Tattered Rose/Abandoned Coral mix to make it stand out against the Mermaid Lagoon.  I really like how the inking makes the texture of the embossing stand out.  AFTER the ink is dry, I added more texture and sparkle with the glitter gel and Speckles stencil.  Make sure you wash your stencil and palette knife as soon as you're done using them; the gel will ruin them if it dries on.


 Time to make the shaker pouch from a stamp pocket.  I like to lay the pocket down over the back of the tag and draw my seam lines on using a sharpie and the ruler.  I added Scor-tape adhesive along the edge of the word on each side and where I could on the back of the letters.  I leave at least 1/4" of plastic along the outer edge of the seam to attach it to the tag.  Don't forget to leave an opening to add your shaker bits.  Add the bits and seal it up.  As you can see, I made a long and narrow pouch so that the sequins would show along the entire cutout.  I added a double layer of 3M Foam tape to add stability and make a level surface of the finished tag.  Adhere the smile die cut and a few sequins to the front with Tombow liquid glue and our tag is finished.


This watercolor card is my second project and was a lot of fun to do.  I used the original set of Colorburst watercolors, Liquid Metals Colorburst, stamps and gold embossing.  Let's get started.

Supplies:
Strathmore 140 lb hot press watercolor paper
WorldWin Petallics Cardstock in Gold
Neenah Solar White 110 lb cardstock
Colorburst pigments in Pthalo Green, Ultramarine Blue,
Violet, and Lemon Yellow
Colorburst Liquid Metals in Mandarin, Amethyst, Sky and Jade
Altenew Beautiful Day stamp set
Unity Wondrous stamp
Archival Black ink
MISTI
Post It notes
VersaMark ink
WOW Metallic Gold Superfine Embossing Powder
Lawn Fawn Stitched Rectangle dies, largest two
Fun Foam
1/2" Scor-Tape
Black Velvet #4 paintbrush

Step 1)  Starting with a 4.25" by 5.5" piece of watercolor paper and the MISTI, stamp the rose outline from the Beautiful Day set in the top left corner in Archival black ink.  When using watercolors, or water techniques, make sure the ink is waterproof when dry.  Otherwise it can smear and run.  Stamp the rose on a Post-It note and cut it out, making sure to stamp with the adhesive on the back.  Add the mask on top of the rose and stamp the leaves to the right of the rose and the flower spray along the left edge.
Step 2)  Stamp the Wondrous stamp in the middle, but along the right edge, in the same ink.  Stamp the sentiment towards the bottom left edge in VersaMark ink.  Remove the mask from the rose and stamp it again in VersaMark.  Using the MISTI makes this much easier.  Add Gold embossing powder over the rose and sentiment.  Tap off excess and return to the jar.  Heat to melt.
Step 3)  Colorburst are powdered watercolor paints.  They are fun, but can be messy and unpredictable.  I spray my paper with two or three spritzes of water and add the colorburst powder lightly and spread with a paintbrush if necessary.  If two colors mix too much, just use a paper towel to soak it up and remove it.  Be careful with purple and yellow; these are complimentary colors, but will make brown if they mix.  Let dry.
Step 4)  Using a paintbrush, make a drop of water on your work surface.  Add a tiny bit of blue to the drop and add color to the girls hair.  Add color to the flowers with the girl using the Liquid Metals.  Let dry.
Step 5)  Position the smaller of the two Stitched Rectangles dies over the watercolored piece and run it through the Big Shot.  Run a 4.25" by 5.5" piece of the gold cardstock through the big shot with the largest of the rectangle dies.  Adhere the gold piece to a card base using Scor-tape.
Step 6)  Cut a piece of fun foam slightly smaller than the watercolored piece and adhere it to the back with Scor-tape.  Remove the backing from the tape, center it over the gold and stick it down.  Our card is complete!

Be sure to check out these collections for
new additions we have this month:
Stamping Bella stamps
Hero Arts stamps, including Handmade Kindness
Tim Holtz Distress watercolor paper,
Lawn Fawn Paper packs

We will be having an extra Hop coming up as we are finally getting in the last of our CHA New Releases and there will be lots of Inspiration heading your way soon along with some awesome prices and sales.  But first, we aim to knock your socks off with a store-wide sale, 15% off everything in the store starting NOW thru to April 3 at Midnight, as well as $10 off at checkout for all order $75 or more: use code $10off75 at checkout!

Here is a complete list of stop on the hop this month:
1. Laura - http://www.lauralscott.com/hopping-into-spring/
2. Deana Benson -http://www.designcreativelybling.com/2016/03/hopping-into-spring-with-lauras-loft.html
3. Jasmine Burgess - You're here!
4. Robbie Rubala - http://inkedx2.blogspot.com/search/label/LL
5. Emma Hall - http://heartofcraft.blogspot.com/2016/02/hopping-into-spring-with-lauras-loft.html
6. Sue T.-http://thecre8tivestudio.blogspot.com/2016/02/hopping-into-spring-at-lauras-loft.html
7. Lisa - http://royalpumpkinart.blogspot.com/2016/02/hopping-into-spring-with-lauras-loft.html

Now for that killer prize pack I mentioned! Sweet, eh!


There are several ways to enter and the more comments you make in the different social media platforms, the more entries you earn! It is required that you comment on each blog in the Hop.  After that, you are encouraged to like and comment on our Facebook page, tag on our Instagram and pin on Pinterest, as well as share on your own pages. The participant with the most entries wins the fabulous prize package! How cool is that!?!  Robbie is the next stop on the blog hop and I'm sure you'll love what she has to offer.

Thanks for hanging out with me today! I hope you had fun and were inspired to try something new! Be sure to comment to be entered to win!  See you later!

Much love,
Jasmine


Handmade Christmas Series 2018: Day 1 Watercolors and EH Mondo Holly 2 ways

Here's an exciting sale for everyone!  ellenhutson.com is having a 20% off sale on all dies with the code above.  I...