Friday, April 29, 2016

Gorgeous Gold and Purple Altenew Peonies


Hey guys! Welcome!  Today's post is my entry into the Altenew Inspiration Challenge for April 2016.  Below is the Challenge image and the idea is to make a project using Altenew products, pulling inspiration from the image; so colors, textures, patterns or vibes.  I chose to use the dark blue-violet, gold and teal as my inspiration; not only are they my favorite colors, but also loved the high contrast and bold imagery.
 

Here is my project I created using Peony Bouquet and Painted Inspirations stamp sets as well as 3 of their ink cube sets: Shades of Purple, Cool Summer Nights and Green Fields.  Lets get started!

Supplies:
Neenah Solar White 110 lb cardstock
Simon Says Stamp Blue Violet cardstock
Altenew Peony Bouquet stamp set
Altenew Painted Inspirations stamp set
Altenew Shades of Purple ink set
Altenew Cool Summer Nights ink set
Altenew Green Fields ink set
Delicata Golden Glitz ink pad
Post-It notes (for masking)
Scor-tape (or other adhesive)
Avery Elle Wonky Stitches die set

Peony Bouquet is a layering stamp set and it's fairly easy to figure out the sequence with which to stamp.  If you have a MISTI, or other stamp positioning tool, that does make it easier to get perfect alignment, but these sets are still beautiful when you don't get them perfectly lined up.

Altenew_Inspiration Challenge_April
For the flower in the bottom left corner, I used Lavender Fields, Deep Iris and Midnight Violet, in that order.  You want to stamp lightest to darkest.  After my flower was stamped, I added the outline in Delicata Golden Glitz.  With a mask over the flower in place, I added the tealy-blue leaves and green stem.  For the leaves, I used Ocean Waves, Dusk and Desert Night, in that order, stamping lightest to darkest.  With the flower on the right edge, I used Soft Lilac, Lavender Fields, and Deep Iris, in that order.  I wanted a bit of contrast between the blooms, while staying in the same color family.  The leaves and stems are the same ink colors.  I used Forest Glades for the green.  The small outline bloom in the top left corner is Deep Iris.  The sentiment is from the Painted Inspirations stamp set and stamped in the same Golden Glitz ink.  Because Delicata is a pigment ink, it will stamp over dye inks and maintain it's opacity without needing to be heat embossed.  When all the stamping was complete, I used the largest of the frames in the Wonky Stitches die set to add the stitching detail around the perimeter, mounted it to a mat of blue-violet cardstock and adhered that to a standard top-folding cardbase.  That wraps up our card! I really love how this one turned out.

I hope you had fun and learned something new!  Feel free to ask questions and let me know what you think!

Much love,
Jasmine


Saturday, April 23, 2016

Cool Fathers Day Card

Is this cool or what!?!  I am so stoked about how this card turned out.  It's so perfect for my Dad and I can't wait to see his reaction on Father's Day.  Lets get started!

Supplies:
Tim Holtz Distress Wood-grain Card stock
Daniel Smith Iridescent Antique Gold watercolor
Distress Inks in Ground Espresso, Antique Linen and Tea Dye
Lawn Fawn Stitched Rectangle Dies
VersaMark
Black embossing powder
Doodlebug Black Crushed Velvet cardstock
Doodlebug Kraft in Color 6x6 paper pack
Alphabet die by Memorybox
Chipboard die cuts from Infinity Engraving


Starting with a piece of cardstock, lightly paint a wash of gold over the entire piece, leaving variations in the color.  Let dry.  While it's drying we'll color the die cuts.  Using Versamark or another clear, sticky embossing ink, give each die cut a coat; the surface will be shiny when it's completely covered.  Cover with embossing powder and tap off the excess.  Heat to melt powder.  When it's shiny, it's melted.  Repeat the process so that it has 2 layers of embossing powder.


Using the ink blending tool, add ink to the cardstock, starting with Antique Linen, then Tea Dye and adding Ground Espresso to the edges.  The goal is to give the cardstock an aged, rugged, masculine look.  Think plank of wood.  You want to give it some variability in the colors.  When you are done inking, die cut with the 2nd largest Stitched Rectangle die.
The next step is to die cut the letters DAD from the velvet cardstock and the gray houndstooth cardstock.  Also die cut a panel of the gray houndstooth using the largest of the Stitched Rectangle dies. 


Mount the gray piece to a card base.  Adhere the woodgrain piece in the center of the gray piece.  Adhere the die cuts using liquid glue.  I placed something heavy on top of them to make sure they made good contact and would stay put. To create the shadow behind the word, I layered the black letters behind the gray with liquid glue and then adhered them, centering the "A" and adding the "D"'s.   Let it dry with something heavy on top to get good adhesion.


Our card is complete! 

There's my Mom and Dad!  Thanks for stopping by and hanging out with me today.  Feel free to ask any questions and let me know what you think!

Much love,
Jasmine

Saturday, April 16, 2016

April 2016 Challenge with Laura's Loft


Hey there! I'm excited to share my card for the April Challenge.  The color palette fell into my favorite colors, so I couldn't wait to play.

Here is the Challenge Inspiration:


Supplies:
Neenah Solar White cardstock
WRMK 3D Geometric embossing folder
Doodlebug Black Velvet cardstock
SSS Hello die
Distress Inks in Mermaid Lagoon (Set #13), Wilted Violet (Set #15)  and Shaded Lilac (Set #4)
Avery Elle Wonky Stitches
Scor-tape 1/4"
Glitter Ritz Microfine glitter in Stardust
Altenew Shades of Purple cube set
Altenew Golden Garden stamp and die sets
Wink of Stella Clear glitter brush pen

Starting with a 4.25" by 5.5" piece of Neenah cardstock, do the ink blending.  I started with Mermaid Lagoon, followed by Wilted Violet and finished up with Shaded Lilac.  If you have trouble getting a smooth blend, overlap where the colors meet, using light pressure and small, circular motions.  Place the largest of the Wonky Stitches over the panel, secure with low-tack tape (I use a post-it note) and run through the Big Shot.  Place the panel in the embossing folder and run though the Big Shot (or whatever die cutting machine you have).
On another piece of white cardstock, stamp 3 roses from Altenew's Golden Garden stamp set using the Shades of Purple inks.  Die cut the roses.  Golden Garden is sold out in the shop, but you can use this style of card with any layering stamp set.
Using a white cardbase, apply 1/4" Scor-tape along the edge of the front of the cardbase.  Burnish along the scor-tape (with release paper still attached) to make sure it's adhered to the cardstock.  Over a full sheet of scratch paper, remove release paper from the scor-tape and add glitter over the exposed adhesive.  Pour excess glitter back in the jar.  Rub the glitter into the adhesive with your fingers and tap any excess back into the jar.  Apply adhesive to the back of the inked panel and along the edges.  Center the inked panel and adhere to the glittered cardbase.  Arrange the roses over the inked panel.  I glued the first rose flat to the surface, popped the second up with foam squares, and also used foam squares to attach the one lying across the bottom edge.  For a finishing touch I added clear Wink of Stella to the flower portion of the roses.
I love the sleek, hand drawn look of the roses and the contrast between the bright, yet cool tones and the platinum glitter.


Here's the rest of the DT's Challenge blogs!

  1. Laura- http://www.lauralscott.com/llc4
  2. Deana- http://www.designcreativelybling.com/2016/04/lauras-loft-challenge-llc3.html
  3. Emma-   http://heartofcraft.blogspot.com/20...
The prizes for the Challenge: $20 gift card to Art Impressions and $25 gift card to Laura's Loft!

Winners will be announced May 2, 2016 and you can link your entry here.  Enter as many projects as you want!
Please feel free to ask questions and let me know what you think!

Much love,
Jasmine

Wednesday, April 13, 2016

Emerald Birdsong Canvas

 
Hey there! Todays project is this stunning canvas.  I was inspired by the changing of seasons and coming of Spring.  One of my favorite sounds is listening to the birds in the morning and using the bird chipboard die cuts from Infinity Engraving, I created my piece.  Here's how it came together!
Supplies:
6"x 8" Canvas
Tim Holtz Melange Tissue Wrap
Prima Soft Matte Gel
Faber-Castell stencils set 301
Imagine Crafts Creative Medium Purple Iridescent
Infinity Engraving bird die cuts
Tsukineko Essentials Glue pad
IndigoBlu Gilding Flakes in Lancaster Rose and Royal Peacock
Gelatos - Spearmint, Lime and Metallic Mint
Distress Paint - Twisted Citron, Cracked Pistachio and Lucky Clover
28 Lilac Lane Embellishment Bottles- Cotton Candy and Fresh Mint
28 Lilac Lane Embellishment Kits - French Quarter and Party On
Little Things sequin mix - Pretty Pansy

In the picture to the left is an assortment of products; I used some, but not all.  I started by tearing off a section of tissue wrap and adhering it to the canvas with matte gel medium.  I use a paintbrush to brush a thin, even layer over a quarter to a third of the canvas at a time and smooth the tissue wrap with my fingers or a bone folder.  I also adhere the wrap over the sides of the canvas as well.  It doesn't take long to dry.  My next step was to add the texture medium with a stencil.

I added dabs of Tombow to the back of the stencil and let it dry.  This creates a temporary stick, making sure the stencil doesn't shift when I add my texture paste.  The Imagine Crafts paste will dry to a pearl finish in one light and shift to purple.  It will take around an hour or so to dry; the thicker it's applied, the longer it will take to dry.  While that dried, I completed my birds.


Add fresh glue from the bottle to the pad.  Tap the glue pad over the surface of the die cut, as if you were inking a stamp.  The entire surface of the die cut should be shiny when it's covered.  Let them sit for 20 minutes for the glue to cure. 


After 20 minutes, add the gilding flakes to the die cut and tap to adhere.  You don't need a lot and the flakes are very light.  A lint roller comes in very handy for clean up. 


The black piece is a corner of a Ranger RUBit SCRUBit pad.  Using the scrubby side, rub over the surface of the die cut to remove excess flake and carefully over the edges as well.  Carefully funnel excess flake back into it's jar. 


The top two birds have Royal Peacock gilding flake and the bottom bird with nest has Lancaster Rose.


After my texture paste was completely dry, I added various shades of green gelatos over the tissue paper and blended them with my finger.  In some areas I added a tiny bit of water to my finger to help create a smoother blend and lighter color.  I also added shades of green distress paint in a few areas and Lucky Clover over the outer edges to bring it together.  I used the same matte medium to adhere the bird die cuts to the canvas.  I added a fair amount to the back with a paintbrush to ensure good adhesion and weighted them down until they were dry (I left it overnight).  Next, I wanted to use something new and a little different than what I usually use on my canvases.  Since I usually use metal elements and paper roses, I didn't want to use those here.  Since the die cuts had a metallic finish, I wanted to keep the focus on them. 

So I turned to my new button, beads and sequin mixes by 28 Lilac Lane.  I started by adding larger buttons with matte medium and adding in the smaller buttons, half pearls and sequins to look like leaves and flowers.  In a few other areas, I added medium and pressed beads into it.


Top third.

Bottom right corner.


Here is a shot of the purple shift in the texture paste.


Thanks for stopping by and hanging out with me today! Feel free to ask questions and let me know what you think! 

Much love,
Jasmine


Saturday, April 9, 2016

Mardi-Gras Inspired Mini-Canvas

 Welcome and thanks for stopping by!  Today's canvas is one I'm crazy about and I can't wait to share it with you!  The impetus to this design was the top hat shaker from Infinity Engravings.  

I had some new sequins sitting on my table, next to a naked top hat shaker to be.  I began to play around with color and elements and this is what came out of it.  The top hat is 5 layers of chipboard, all with a hole cut in expect the bottom layer.  Theres an acetate piece, also a top hat shape that sits between the top two layers to seal in the shaker bits.  I traced a scrap of black glitter cardstock to fit on the bottom layer so the bare chipboard wouldn't be visible through the shaker window.
I used Glossy Accents to glue each layer together because it's strong, dries fast and clear, and doesn't remain sticky after it's dry.  The top layer is etched with the lines that you'd see in a top hat- those lines remained visible after three layers of embossing powder, which is impressive and adds to the elegance of the piece.  Let's get to how I achieved the silver filigree.
Supplies:
VersaMark embossing ink
Black detail embossing powder
Silver pigment ink- Delicata Silvery Shimmer
Large filigree stamp - having a wood mount stamp will make it easier
Heavily ink a large filigree stamp.  Cover the top layer in VersaMark.  Cover with embossing powder and heat to melt.  Repeat the process two more times; while the third layer is still warm, press stamp onto the chipboard and lift off.  Let cool.  Glue bottom four layers of die cut together.  Add shaker bits.  Glue acetate in place and top with the final stamped layer.  Add feathers and roses.  Top hat is complete. 


I covered the canvas in printed tissue paper using gel medium as a glue.  Once dry, I added my acrylic paint.  I used Dina Wakely heavy body Acrylics in Blackberry, Magenta and Lemon.  I blended between the colors using my brush, so even though I only used 3 colors of paint, it looks like I have 5 colors.  After my paint was dry I added some texture with a stencil, texture medium, glitter and pigment powders.  I mixed two shades of green to add variety and depth to the composition.  Scoop 2 piles of about a teaspoon each of the texture medium.  Add glitter to both and each a different shade of pigment powder.  The ones I use are Magicals by Lindy's Stamp Gang, Mad Hatter Mint Green and Merry Go Round Green.  Smooth over stencil in an even layer, remove stencil and let dry. 

Wash stencil and palette knife immediatly, so the medium will ruin them if allowed to dry on there.  After it's dry, re-apply stencil and add a layer of gel medium.  Add seed beads and press into medium- this adds color and texture.  Let dry.

I used paper roses from Wild Orchid Crafts in a variety of sizes and colored them using ink sprays.
Purple: LSG Royal Amethyst Fire
            Dylusions Crush Grape
Blues: LSG Royal Emerald Fire
           LSG Hydrangea Blue
           Dylusions Polished Jade
           Distress Spray Stain Mermaid Lagoon
All the metal elements are from The Paper Studio "Spare Parts".  The Journey wood die cut is from my stash and I used the same technique as the top hat, without the filigree stamping: two layers of heat embossing with LSG Midnight Violet embossing powder.  The top hat, wood piece, roses and feathers are adhered using hot glue.  The metal elements are adhered using E6000; it's stinky, but the only glue I've found that holds on to metal. 

I hope you've enjoyed your time with me today! Feel free to ask questions and I'd love to know what you think!

Much Love,
Jasmine

Thursday, April 7, 2016

Moms Rock Hop with Laura's Loft

Welcome to my stop on our April Mothers Day Hop! We wanted to make this hop about honoring all the Moms in our lives.  I have two cards to share with you today and I know you'll love them as much as I do.  You should have landed here from Deana's blog, but if not Laura's blog is the place to start.  Don't forget to leave some love on each hop stop to be entered into the drawing for the impressive prize pack! We also have a killer 30% off sale on everything from 4/7/16 to 5/4/16 as well as $10 off a $75 purchase with the code $10off$75.  Lets get this show on the road!

 This set is "Amanda is Awesome" by Stamping Bella.  A little back story: I am the third of four children in my family and my older two siblings have always complained that not only am I the favorite, but also happen to have a high opinion of myself.  I don't believe I'm arrogant, but I am confident, stubborn and willful, so maybe that's where they're confused! LOL.  Anyway, the sentiment in this set is something I say to my Mom, so I had to have it and this is what I came up with.
Supplies:
Crafters Companion SN cardstock
Spectrum Noir markers
Distress Ink: Broken China (Set #6)
Lawn Fawn Stitched Rectangle dies
Tim Holtz Rays stencil
Faber-Castell Glass Bead Glitter Gel
Tim Holtz Distress Crayon - Mustard Seed (Set #3)
Lawn Fawn Perfectly Plaid 6x6 paper pack
VersaMark
WOW Black detail embossing powder
MISTI

I started by stamping the girl image onto a piece of SN cardstock using the MISTI, just in case I missed a spot and needed to restamp.  Using the third largest stitched rectangle die, I centered my image in the die, used a post it note to secure placement and ran it through the big shot.  I colored the image with SN markers and used a blending tool to buff some Broken China around the top and side edges.  This will add the to outdoor, sitting in the sunlight imagery.  I set it aside to allow the sky to dry; Distress Ink will reactivate with water and knowing I wanted to add stenciling over it, letting it dry thoroughly lessens the chance the texture medium will blend with the distress ink.  I let it dry for 10 minutes or so since it was a very light layer.  Using the MISTI again, dust the area with an anti-static powder bag or tool and stamp the sentiment in VersaMark.  Heat emboss with black embossing powder.  Next, run the patterned paper through the big shot with the largest of the stitched rectangle dies, adhere the focal layer to the plaid paper and arrange the stencil over the paper.  I masked off any areas I didn't want the texture medium with post-it tape.  Scribble the Distress Crayon into your craft mat and scoop about 1/2 tbsp of glitter bead gel onto it.  Blend together with a palette knife.  The crayon dissolves really easily and as you can see in the photos, the color stays strong.  Apply the gel over the stencil, smoothing in one direction and making an even layer.   Carefully remove the tape and stencil.  Set the card front to the side so it can dry and immediately wash the stencil and palette knife.  The medium will ruin your stencil and knife if allowed to dry on it.  I let mine dry overnight.  Mount the card front to a card base and you're card is complete!  This image is great for practicing shadows and contours.  Lawn Fawn's Perfectly Plaid paper pack is sold out in the shop, but Lawn Fawn's Beachside paper pack is just as versatile!

 
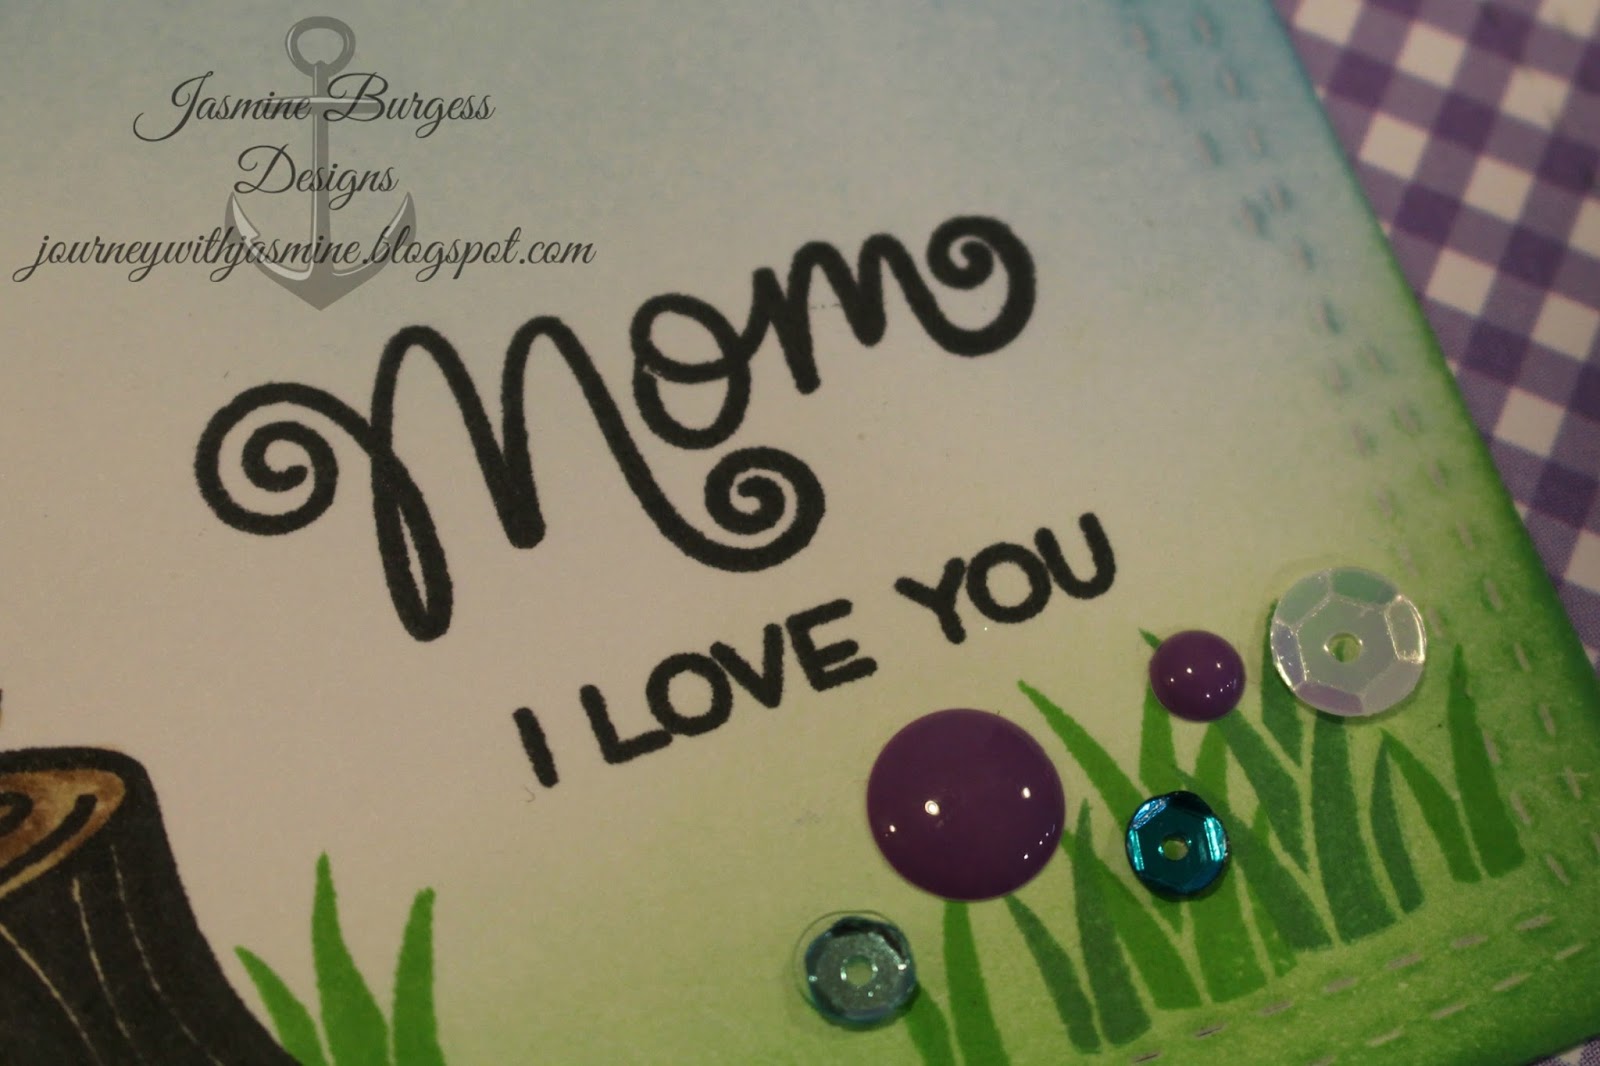
 This card features Lawn Fawn's Mom & Me stamp set.  It's so fun and sweet.  Perfect for a Mom of little ones, or to remind Mom of when she had little ones around.  I had my Moms favorite colors in mind when creating this.
Supplies:
Lawn Fawn Mom & Me
Avery Elle Wonky Stitches die set
Momento Tuxedo Black ink
SN Cardstock
Kraft cardbase
Lawn Fawn Jalapeño ink
SSS Fern ink
SN Markers
Distress Inks: Mowed Lawn (Set #2), Lucky Clover (Set #15), Broken China (Set #6) and Mermaid Lagoon (Set #13)
Doodlebug Kraft in Color: Kraft 6x6 pad
Doodlebug Enamel dots
Design Creative Bling: Laurens Bouquet
MISTI

I employed a bit of masking in this project, which probably sounds more intimidating that it is.  I wanted the Owl and chick image to be complete, so I stamped her first on the cardstock and again on a post it note.  Fussy cut out the image, leaving no border along the bottom of the owl.  Apply the mask to the Owl and stamp the wood stump slightly over the mask, so that she's standing on it.  I stamped it twice with my MISTI so that all the lines were nice and black.   When coloring with alcohol based markers, make sure to use a dye based black ink.  I always use Momento with my SN markers and have never had my images bleed.  I googled images of owls to get the coloring somewhat natural.  I also stamped the sentiment images twice and ran it through the big shot using the smaller of the Wonky Stitches frames.  After I finished coloring the images, I stamped the grass using LF Jalapeno and SSS Fern to give a variance in color and added grass behind the stump to ground it.  For the green at the bottom of the panel, I blended Mowed Lawn over the bottom third with Lucky Clover on the edges for a bit of depth.  For the sky, I started with Broken China and finished with Mermaid Lagoon.  I added Enamel Dots, Jewels and Sequins to look like flowers to complete the scene.  I ran the purple gingham paper through the big shot using the large Wonky Stitches frame, centered the focal panel over the purple panel and adhered it.  I finished up the card by mounting the layers to a kraft cardbase.


Thanks for coming to hang out for a bit today!  I hope you're enjoying everything you've seen so far and I know you'll have fun with what's coming up!  Robbie is your next stop on our Moms Rock hop.


Here's a complete list of all the hop stops:
Laura - http://www.lauralscott.com/moms-bouquet-hop/
Jasmine Burgess - You're here!

Now about that prize I mentioned...
Giveaway Entry:
There are several ways to enter and the more comments you make in the different social media platforms, the more entries you earn! It is required that you comment on each blog in the Hop.  After that, we encourage you to like and comment on our Facebook page, tag on our Instagram post and pin on Pinterest, as well as share on your own pages. The participant with the most entries wins the fabulous prize package! How cool is that!?!


You may be wondering what the prize is...

Sweet, huh!?! Altenew's Winter Cardinal stamp set, Cool Summer Nights ink set and, exclusive to Laura's Loft, Glacial Bliss Design Creative Bling Sequin mix.  Those sequins are among my favorites!


Don't forget to leave a comment on each blog stop to be entered into the drawing to win the prize!  See you later!

Much love,
Jasmine

Handmade Christmas Series 2018: Day 1 Watercolors and EH Mondo Holly 2 ways

Here's an exciting sale for everyone!  ellenhutson.com is having a 20% off sale on all dies with the code above.  I&...