Showing posts with label Canson. Show all posts

Thursday, February 22, 2018

Watercolor Emboss Resist Birthday with Moody Unicorns

 Unicorns and birthdays are best friends, so I decided to put them together in honor of one of my besties, Jen.  We met in college, became best friends and never looked back!  I started by making my own patterned paper by randomly stamping and heat embossing the larger unicorn images followed by filling in with the smaller images in the stamp set, the cupcake and little present.  Using watercolors to add pops of brightness helped each image stand out without looking overdone and the die cut sentiment finished things off nicely.  I chose a foil paper for my sentiment because it adds a contrasting finish and texture, which adds easy interest.  Here's the video tutorial and supplies are listed below!  Happy Birthday Jen!!

Supplies:
Gerda Steiner Designs Moody Unicorns
Canson XL 140 lb watercolor paper
MISTI
Versamark
Lindy's Stamp Gang Silver Moon Orchid EP
Gansai Tambi watercolor palette
Silver Black Velvet brush #8 round
My Favorite Things Wonky Stitches die
DCWV Foil and Glitter papers
Lawn Fawn Happy Birthday die
Tombow Mono Multi glue
Be Creative tape

I hope you enjoyed todays post and project and that you enjoy good friendships like I am blessed with.  Happy crafting and God bless!

For Christ's glory and much love,
Jasmine


Friday, February 16, 2018

Penguin Watercolor Ombre Emboss Resist with Gerda Steiner Designs

 Hello and welcome everyone!  Today we are playing with those sweet Valentine Penguins from Gerda Steiner Designs again.  This time, we are creating our own patterned paper with heat embossing.  Add some simple watercolor and viola.  We have an adorable and versatile panel that is perfect for so many different occasions.  The same technique can be used for almost any stamp set in your aresenal as well, so bust them out and get creative.  Here's the video on my Youtube channel and my supplies are listed below.

Supplies:
Gerda Steiner Designs Valentine Penguins
Canson XL Watercolor paper
Versamark
Brutus Monroe Icicle embossing powder
MISTI
FineTec watercolor pallete
Gansai Tambi 36 watercolor palette
Silver Black Velvet brushes
My Favorite Things Wonky Stitches die
DCWV Glitter Paper and Foiled Vellum
Sizzix Hearts die
Lawn Fawn Scripty Love die
Tombow Mono Multi glue
Stitck-It Sheet adhesive
Be Creative tape

I hope you're having a great day and I encourage you to step out of your comfort zone to try new techniques and new products, stretching your creative muscles.  It's so much fun and good for you too. 

I love interacting with you guys, so leave me a comment or question and I'll be happy to help.  Have an awesome day and I'll see you next time!

For Christ's glory and much love,
Jasmine


Friday, November 17, 2017

Handmade Christmas 2017: Easy Watercolor cards with Koi and Fine-Tec Metallics

 It's the fourth post in my Handmade Christmas 2017 series and I have 4 easy watercolor cards that are perfect for mass production.  I used 1 stamp set, 3 watercolor palettes and 1 sheet of 9x12 watercolor paper.  You don't have to be a master watercolor artist to make these cards.  If you can move a brush from side to side, you can make these.  Easy peasy. I wanted to keep products to a minimum by using them in different combinations on each card so that you get variety without needing/using tons of different things.

Here is the link to the video tutorial on my YouTube channel and my supplies are listed below.

Supplies (used in each card):
Canson XL 140 lb Coldpress watercolor paper
Hero Arts SD412 stamp set
Archival Jet Black ink
Koi Pocket Feild Sketch watercolor palette
Silver Black Velvet brushes
MISTI
Versamark
Green tree on red mat:
Green tree on Gold mat:
Blue wash on Gold mat
Blue/Bronze on Red mat


 I hope you enjoyed todays post and video.  Watercolors are really quite forgiving and these are a really easy way to get your feet wet ;)  Merry Christmas!

For His glory and much love,
Jasmine

Monday, October 16, 2017

Magical Halloween with Darcies and Zigs

 Happy Halloween friends!  Halloween is one of those holidays that people seems to love or don't really care about.  For me, Halloween is my birthday and was so much fun as a kid, but is just another day as an adult; for me, it's getting one step closer to Christmas that's the exciting part.  However, when I came across this stamp set with a Unicorn perched upon a jack-o-lantern, I couldn't resist.  I made 3 cards with it in one evening in my studio and the cute factor is unreal.  All three cards will be in 2 videos, so don't forget to hit the subscribe button over on my YouTube channel ;)

Here is the link to this cards video tutorial and my supplies are listed below.
Supplies:
Darcie's Heart and Home Magical Halloween stamp set
Zig Clean Color markers
  • 91 Lt Gray
  • 52 Bright Yellow
  • 23 Scarlet Red
  • 26 Lt Pink
  • 51 Lemon Yellow
  • 40 Green
  • 36 Lt Blue
  • 83 Lilac
  • 47 May Green
  • 28 Pale Pink

Canson XL 140 lb watercolor paper
MISTI
Archival Jet Black ink
Lawn Fawn Deep Sea ink
Paper Studio Purple glitter cardstock
Neat & Tangled Scalloped die
Scor-tape
Neat & Tangled Happy Holidays die
Simon Says Stamp Trick or Treat (Halloween) die
Spectrum Noir sparkle pen
Tombow Mono Multi glue
Scraps of glitter paper

In the video, I used Arches green label watercolor paper, but I think it's too absorbent for the Zig markers, so I listed Canson paper instead.  It's a good quality student-grade paper that works well with the Zig markers and is reasonably priced as well as available at any craft store and online.  Because we're stamping on watercolor paper, which as a bit of a texture to it, you're going to need a MISTI.  I say that because you will need to stamp it several times to get a solid outline and using a MISTI will make that possible.  I've tried re-stamping without it and no matter how sure I was that I was lined up properly, it seldom actually was and I ended up with weird lines.  I am specific to the MISTI because it is a small business and the original inventor of the product.  Other companies have shamefully stolen her design and produced copycats, but I can't support them just because they're cheaper.  Theft is wrong.  Period. 

Let me know if you have any questions.  Always happy to help.  Happy Halloween!

For His glory and much love,
Jasmine

Friday, August 25, 2017

From Backgrounds to Cards

 A few weeks ago, I posted a video on backgrounds using Distress Oxide re-inkers.  Todays post gives you some ideas for using those backgrounds in card projects.  For the top card, I really loved the rainbow effect and wanted it to be the focal point so I kept it simple with a sentiment and a few sequins.  For the bottom card, I used a stencil and some black glitter paste to add some impact while bringing the rainbow colors forward.  To finish it off, I added a die cut and heat embossed sentiment and mounted to a card base with some gold foil paper as a mat to tie in the gold in the die cut.

Here is the video on my YouTube channel demonstrating the background technique and my supply list is below.

Supplies:
Canson XL 140 lb watercolor paper
Distress Oxide Reinkers
  • Picked Raspberry
  • Wild Honey
  • Salty Ocean
  • Twisted Citron
  • Lucky Clover
Imagine Crafts Shimmer Spritz

Top card:
Stitched Rectangle die
Scor-tape
Funny Bones RWD 418 (sentiment)
Pretty Posh 4mm Sparkling Clear sequins
Little Things Ivory sequins

Bottom Card:
DCWV Gold Satin foil paper
Stitched Rectangle die
Concord & 9th Hello die
Wow Turkish Nights embossing powder
Hero Arts Swirl Stencil
Nuvo Black Diamond Glimmer paste

Monday, August 14, 2017

He is Worthy Watercolor with Scrapbooking with M.E. Boutique

Todays project is my second Design Team card for Scrapbooking with M.E. Boutique and it's gorgeous while easy.  I started out by arranging my stamps on a 4.5" x 6" piece of watercolor paper in my MISTI.  You'll want to use a stamp positioner with this project because watercolor paper can be tricky to stamp on with the uneven surface.  I stamped on the smoother side of my paper using Archival ink.  I chose Archival because it's waterproof and a dark black.  It did take several stampings to get each word smoothly even.  Because I stamped it several times, creating several layers of ink, I set it aside to dry for an hour or so before moving on to adding my watercolors. After taping my piece down to a flat surface (I used a small craft cutting board), I wet down the entire piece with a modest amount of water and began to add paint.  I used blues, teal, pink and purple, being careful about the teal and pink mixing too much to avoid mud.  You also want to be careful about adding too much water so that you avoid getting a lot of puddles.  You can sop up any puddles with a paper towel; you don't want to let them dry like that because you can get ugly edges and hidden mud.  It doesn't show in the pictures well, but I also added a shimmer spray over the top when I was done adding color.  This step adds shimmer (obviously) but also helps to blend it a bit as well.  After it was dry, I ran it through my Big Shot with a stitched rectangle die and then trimmed added a 1/8 inch wide strip of Scor-tape to each side. After removing the backing one side at a time, I added black microfine glitter and burnished it into the tape with my finger.  After mounting to a top folding cardbase, the card is complete.  Here is the video tutorial on my YouTube channel and my supply list is below.

Supplies:
Creative Worship Worthy King
Creative Worship Words of Life: Actions
Neat&Tangled Christmas Journaling
Ranger Archival Jet Black ink
Canson XL Watercolor paper
MISTI
Gansai Tambi watercolors
Imagine Crafts Shimmer Spritz
Stitched Rectangle die
Scor-tape: 1/4" and 1/8"
Black Microfine Glitter

Thanks for joining me today!  Don't be afraid or intimidated to get started with watercolors; I know it can be daunting because it looks so easy when other people do it.  This style is a perfect place to start as it's just dabbing on paint and there's no "right" way to do it.  Let me know if you have any questions and I'll see you next time.

For His glory and much love,
Jasmine


Monday, July 31, 2017

Zig Butterfly Flight with Scrapbooking with M.E. Boutique

 Hello!  Todays project is the first of three Design Team projects for Scrapbooking with M.E. Boutique and I'm so excited to be working with them.  I've stamped and masked my butterflies starting with the pink butterfly and ending with the yellow one, using Altenews Bejeweled stamp set.  I stamped the butterflies using Archival ink because it's waterproof and wont run or smear when any water based medium is applied.  Canson XL 140lb watercolor paper was the surface is chose to work on.  Zig Clean Color markers are a brush tipped water-based marker that you can use with water to create a lovely variety of watercolor effects, without having to go into actual watercolors and using them with watercolor paper gives perfect results because the paper is designed to accept a lot of water without pilling or warping.  You can use these markers with Bristol Smooth cardstock, but I don't suggest using much water with it.

Here is the link to the video tutorial on my YouTube channel.  Supplies are listed and linked below.

Supplies:
Canson XL 140lb watercolor paper
Altenew Bejeweled stamp set
Lawn Fawn Stitched Rectangle die
Masking paper or Post-It notes
Archival Jet Black ink
Zig Clean Color markers
Orange: 70, 50, 51, 52
Pink: 25, 26, 27, 28
Green: 33, 38, 42
Background: 31, 36
Spectrum Noir Clear Sparkle Pen
DCWV Shimmer stack
Matte Medium
Sequins
Versamark
Platinum Embossing powder
Scor-tape
If you are at all interested in watercolors, give these markers a try.  They are so vibrant, fun to use and you can create beautiful projects with ease.  Let me know if you have any questions; I'm always happy to help.  Thank you for stopping by.  I so appreciate every like, share and subscribe here on my blog and my YouTube channel; every one helps.

Tuesday, July 11, 2017

Mermaids Mean Summer

 I LOVE these mermaids.  And I want to go swimming with them.  I had this watercolor background sitting on my studio table and that was the inspiration for the card.  It has a fantasy ocean feel that made the mermaids a perfect fit.  I don't have footage of the background in the video, but it was very simple.  Using a wet on wet technique, I added lines of blues, purple and some teal, then laid in a bit a gold and let dry.  My mermaids are colored with Copics and finished off with a sparkle pen.  Here is the link to the video tutorial on my YouTube channel and my supply list is below.

Supply list:
The Greeting Farm Merisa and Maisea stamps
Gansai Tambi watercolor palette

Canson XL 140 lb watercolor paper
Avery Elle Wonky Stitches die
Elizabeth Crafts Silk Microfine Glitter Fire Opal
Scor-tape
Spectrum Noir Clear Sparkle Pen
MISTI
Memento Tuxedo Black ink
Strathmore Bristol Smooth cardstock
Copic Markers
Mermaid Merisa
Hair: RV 0000, 00, 06, 09, 02
Fins: BG 01, 05, 10, 13, 23; B 000
Skin: E 50, 31, 13
Top: V 05 BG 05

Mermaid Maisea
Hair: BV 01; V 05, 17
Fins: G 02, 16, 17; YG 41
Skin: E 50, 31, 13

Neenah Classic Cream cardbase
Powertabs clear adhesive foam
Flatback self-adhesive pearls
Little Things sequin mixes Caribbean Beach and Pacific
Pretty Pink Posh clear droplets 4 and 6 mm
Ranger Matte Medium


Thanks for stopping by and I'll catch you next time!

For His glory and much love,
Jasmine

Saturday, April 15, 2017

One Layer Beauty with Zig Clean Color Markers

 Hello and Happy Easter to you and yours.  Todays project is lovely, simple, easy and one-layer. Watercolor paper is my first choice when using just about any water-based medium because it doesn't warp easily.  I wanted to layer the sentiment over the flowers, so I stamped the floral image and heat embossed over it, then added color.  I did it in that order so that I wouldn't have to wait for the flowers to dry before stamping and heat embossing.  If the flowers were still wet at all, I may not have achieved a clean stamped sentiment and the powder would have stuck everywhere, effectively ruining the project (no bueno).

Here is the link the video tutorial on my YouTube channel and my supply list is below.
Supplies:
Canson XL 140 lb watercolor paper
Lawn Fawn Stitched Rectangle die
Archival Jet Black ink
MISTI
Penny Black Divine stamp
Mama Elephant His Love stamp set
Spectrum Noir Sparkle Pen
Versamark
Ranger Liquid Platinum embossing powder
Zig Clean Color Markers
  • 83 Lilac
  • 81 Light Violet
  • 42 Turquise Green
  • 44 Deep Green
  • 51 Lemon
Scor-tape
Neenah cardbase

Thanks for stopping by and hanging out with me.  As always, I'm happy to answer any questions and would love to know what you think.

To His glory and much love,
Jasmine

Monday, December 12, 2016

Handmade Christmas Series 2016: Card 8 Watercolor Skating Rudy

Merry Christmas and welcome!  Todays project is the eighth in my series for 2016 and starts off with this adorable Rudolph the Skating Reindeer by Stamping Bella.  I die cut my watercolor paper with a stitched circle die and stamped the image in Archival ink because it's a waterproof ink and I used watercolors to paint in the image.  To get a straight edge for the ice he's skating on, I laid down painters tape so that one hoof is just touching the ice.  The background is a large sheet (9x12 inches) that I colored using spray inks and cut down to card size.  I ran the panel through my big shot with a stitched rectangle die to give it a finished edge.  After heat embossing the sentiment, I added a few enamel dots to complete the card.  Here's the link to the video tutorial on my YouTube channel if you'd like to see how I made it from start to finish and my supply list is below.

Supplies:
Stamping Bella Rudolph the Skating Reindeer
Canson 140 lb watercolor paper
Lawn Fawn Stitch Circle and Rectangle dies
Archival Black ink
Memento Black ink
MISTI
Daniel Smith watercolors
Versamark
Brutus Monroe Icicle embossing powder
Signo White gel pen
Scor-tape
Virginia Turtle enamel dots

 Thanks for stopping by!  Be sure to let me know what you think and what you'd like to see next.  Merry Christmas to you and yours!

Much love,
Jasmine

Wednesday, December 7, 2016

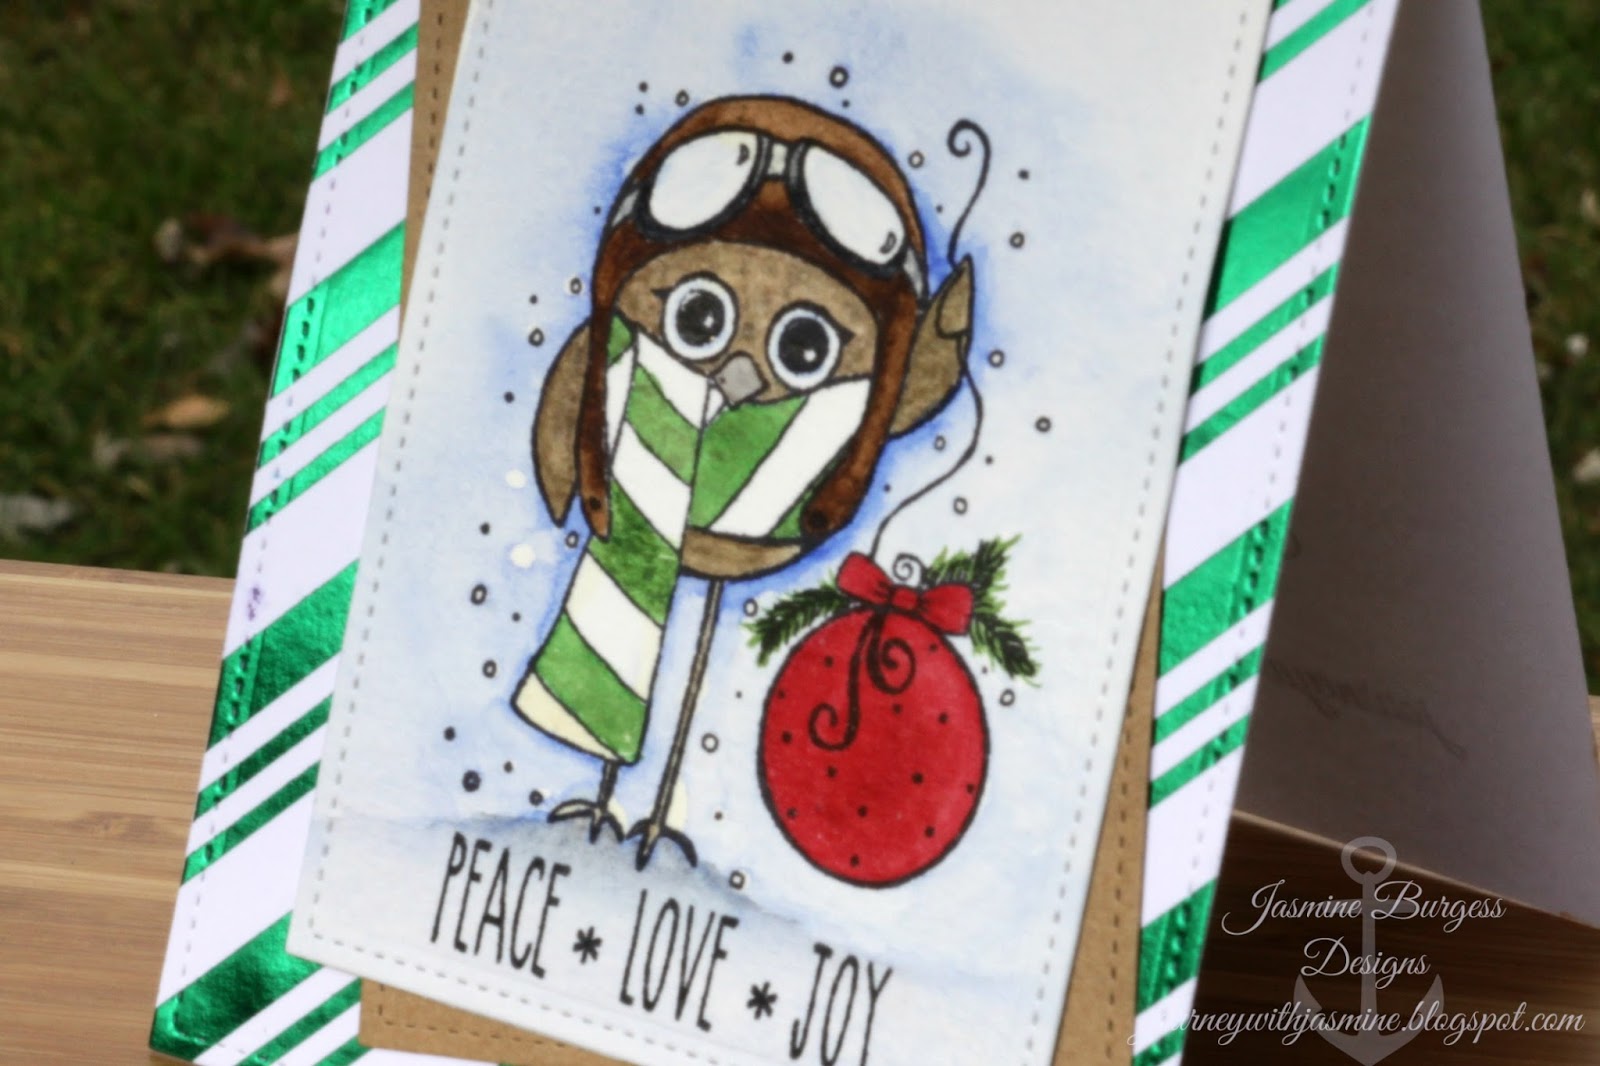
Handmade Christmas Series 2016: Card 7 Watercolor Owl Flyer

My wish for all of us this Christmas is that we feel the Peace, Love and Joy of Christ throughout the year.  This Pilot Owl image is the Cool Little Christmas set by Unity Stamp Company.  My grandfather used to have an old leather bomber jacket from WWII.  Even though he wasn't a pilot, that little owl reminded me of him and I can still smell the leather and pipe tobacco.  Such lovely memories.

I die cut both the watercolor paper and kraft cardstock with a stitched rectangle die and then stamped on the watercolor panel.  I also die cut the green striped panel; you don't have to, but I like the finished look it gives.  If you intend on using watercolors or any other wet medium, you'll want to make sure the stamping ink you're using will work with your coloring medium.  I used watercolors, so I used a waterproof ink.  If you're using Copic markers (alcohol based) you'll want to use a water-based dye ink to stamp such as Memento.  If you're using Zig Clean Color Brush Pens, those are water based so you'll want to use a waterproof ink to stamp such as Archival. 

By using a compatible stamping ink, you'll avoid smearing or running of your stamped image (and a lot of frustration and heartache!).  A basic rule of thumb for inks and mediums is that opposites attract.  Your ink needs to be unaffected by your medium.  Alcohol markers work well with water-based inks and water-based mediums don't affect or disturb alcohol or solvent based inks. 

Here is the link to the video tutorial on my YouTube channel if you want to see how I created this project from start to finish.  My supply list is below.

Supplies:
Unity Stamp Co Cool Little Christmas
Archival Black ink
Memento Black ink
Canson 140 lb watercolor paper
Faber Castell Pitt Artist Pen XS
Daniel Smith Watercolors
Masking Fluid
Lawn Fawn Stitched Rectangle dies
DCWV Evergreen Stack 12x12
Spectrum Noir Sparkle Pen - Clear
Neenah Solar White 110 lb cardstock (base)
Recollections Kraft cardstock
Scor-tape

Peace, Joy and Love to you and yours as we celebrate the coming of our Savior!  I'd love to know what you think or if you have any questions.  I love to interact with you guys and help in any way I can.  See you next time!

Merry Christmas and much love,
Jasmine


Sunday, December 4, 2016

Handmade Christmas Series 2016: Card 6 Watercolor Floral

Merry Christmas and Happy Holidays!  I loved the floral image from the Steps of Courage set by Unity Stamp Co.  As soon as I saw it, I imagined it in red and gold, working out how I could create a Christmas card out of it.  I came up with two designs and I love each of them.  The sentiment is one of my favorites and perfectly conveys the reason we celebrate Christmas.  The details for the painting are in the video.  Here is the link to the video tutorial on my YouTube channel and my supply lists are below.

Supplies:
Unity Stamp Co Steps of Courage
SSS White Pigment Ink
SSS Clear Embossing Powder
Canson 140 lb watercolor paper
MISTI
Neenah Solar White 110 lb cardstock
Lawn Fawn Stitched Rectangle dies
Daniel Smith Watercolors:
  • Iridescent Aztec Gold
  • Permanent Alizaron Crimson
  • Green Apatite Genuine
  • Jadeite Genuine
  • Amazonite Genuine
  • Quinacrinone Gold
Penny Black Rejoice with Joy
Versamark
Lindys Stamp Gang Candy Cane Red Gold embossing powder
DCWV Foiled Cardstock Stack
Fun Foam
Scor-tape

Bonus card:

Unity Stamp Co Steps of Courage
Canson 140 lb watercolor paper
Versamark
Brutus Monroe Gilded Embossing Powder
Daniel Smith Watercolors- Perm Alizaron Crimson
Lawn Fawn Stitched Rectangle dies
DCWV Foiled Cardstock Stack
Scor-tape
Neenah Solar White 110 lb cardstock


As you can see, this designed is quite simplified in comparison to the other while maintaining the elegance and charm.  For this design, I die cut the panels using the stitched rectangle dies.  Using my MISTI, I stamped the floral image in Versamark and heat embossed with gold embossing powder.  After painting my flowers and letting them dry, I heat embossed the sentiment, assembled the card and done!  This design would work well for assembly-line style card production and is also quite versatile.  All you would need to do is change the sentiment.

Thank you for stopping by and hanging out for a bit!  Let me know if you have any questions and I'd love to know what you think.

Merry Christmas and much love,
Jasmine

Thursday, November 3, 2016

MIO Autumn Breeze Hop


Hey guys!  Welcome to the MIO Autumn Breeze Hop.  You should have arrived here from the talented Deana's blog and if you want to start from the beginning, head to our fearless leader, Laura's blog.  Starting with a piece of watercolor paper that I colored with spray inks by Lindy's Stamp Gang and Dylusions, I die cut a variety of leaves.  On another piece of watercolor paper colored with Colorburst dry watercolor pigments, I stamped my image and heat embossed it in gold.  I arranged the leaves around the stamped panel and completed my card with a die cut sentiment.  This design is perfect for the guys too, especially if they're outdoorsy like mine!

Here's the video tutorial on my Youtube channel if you'd like to see how I created my card from start to finish.  My supply list is below.

Supplies:
Canson 140lb Watercolor Paper
Colorburst Watercolors: Pthalo Green, Alizaron Crimson, and Orange
Lawn Fawn Stitched Leaves dies
Lawn Fawn Stitched Square Stackables die
Janes Doodles Owl stamp set
Versamark
Wow Metallic Gold Superfine embossing powder
MISTI
Scor-tape
ARC Wood Veneer paper
Stick-It
Simon Says Stamp Blessed die
Neenah 110 lb Solar White cardbase

Your next stop on the hop is the lovely Linda's blog and in case you get lost or want to visit one of us again, the complete list is below.


1. Laura
2. Deana Benson
3. Jasmine Burgess - You're here!
4. Linda Gorman
5. Lisa

Can't forget about the prize!

Now all you need to do to enter to win is leave some love at each blog on the hop; how easy is that!?!  The hop runs through 11/17/16 and we'll announce the winner on 11/21/16.  Thanks for stopping by and don't forget to hit the subscribe button on my YouTube channel so you'll be in the know when I post a new project video!

Much love,
Jasmine

Handmade Christmas Series 2018: Day 1 Watercolors and EH Mondo Holly 2 ways

Here's an exciting sale for everyone!  ellenhutson.com is having a 20% off sale on all dies with the code above.  I...