Monday, October 15, 2018

Handmade Christmas Series 2018: Day 1 Watercolors and EH Mondo Holly 2 ways


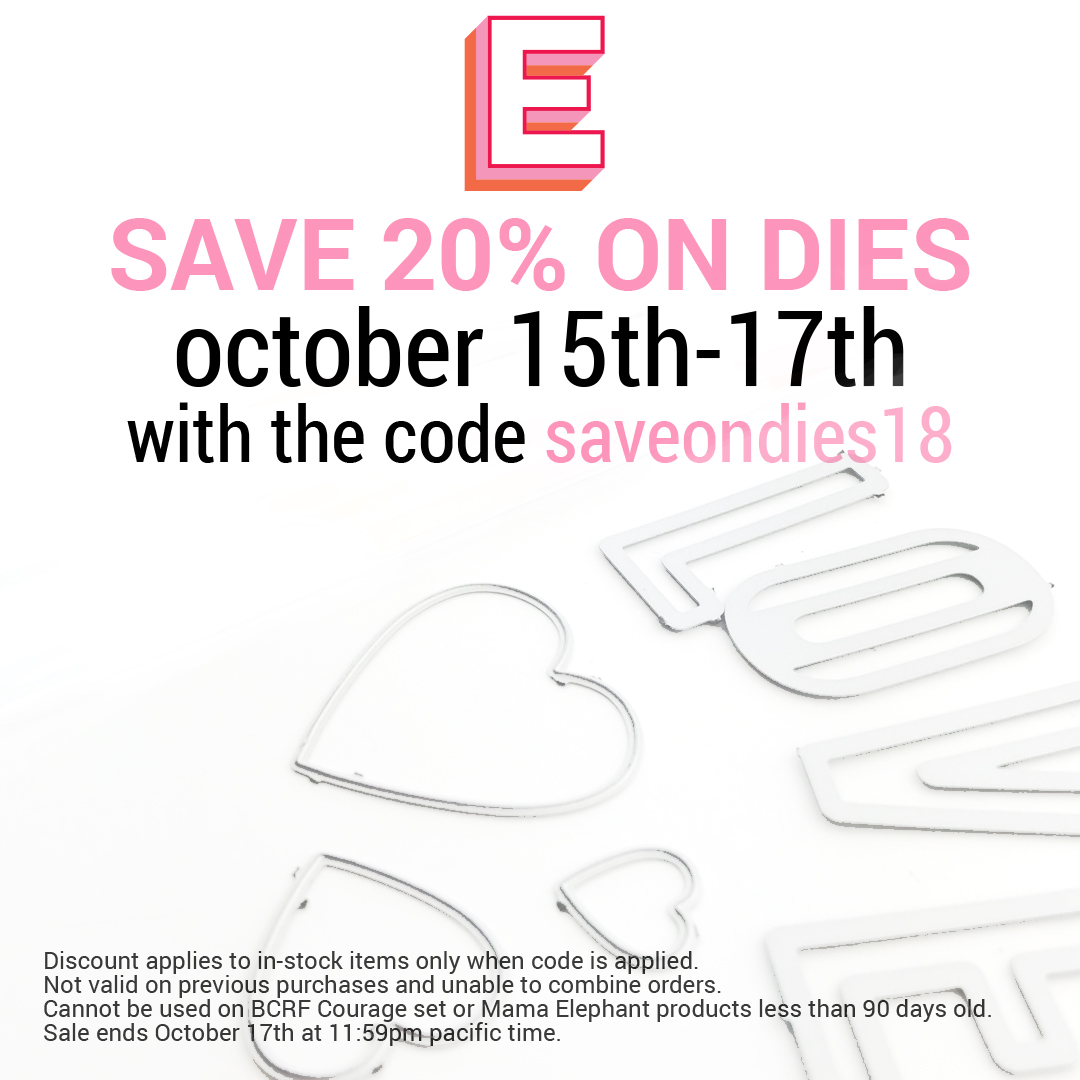
Here's an exciting sale for everyone!  ellenhutson.com is having a 20% off sale on all dies with the code above.  I've made a list of some "must have" dies when it comes to card making and these are basic shapes that don't necessarily coordinate with stamps.  These are ones I use nearly every time I craft.
Lawn Fawn Heart Stackables dies

Ellens sale happens to coincide with my latest project which uses EH products, the Mondo Holly stamp and dies.  I love their Mondo line; it has gorgeous floral images are they're perfect for watercolors.  With this project, I used Arteza watercolors, as I was invited by the company to play with and review.  If you'd like to see that video, click here.  This project was already complete when EH invited me to share their upcoming sale with my viewers, I thought the project and sale made the perfect couple to combine into one post.  Through Nov 10, 2018, I have a 10% off coupon code for Arteza as well, which is  JasmineBurgess1.  Lets see what I used in the card and here is the video.

Supplies:
Ellen Huston Mondo Holly stamps
Ellen Hutson Mondo Holly dies
Arteza Watercolors  
Strathmore 140 lb watercolor paper
Ink on 3 Blackout
Kuretake gold watercolor
Versamark
Brutus Monroe Raven embossing powder
Brutus Monroe Gilded EP
Be Creative Tape
Gold Foil Embossed paper
Charcoal/ Dark Gray cardstock
Neenah Classic Cream cardstock
MISTI


I've shown 2 different versions of the same card using different, yet simple watercolor techniques.  The reasoning was two-fold.  The first is that I was testing these to see how they performed in comparison to other brands of similar quality.  The other was to show the viewer simple and easy, yet lovely results they can employ in their own cardmaking.  I also like to add versatility to a stamp set if I can.  I think I was successful with each of my objectives and I love how each card turn out.  

Wishing you and yours a joyous Christmas,
Jasmine
Glow in the Dark Halloween Shakers with MFT and Arteza Watercolors with a sale at Ellen Hutson!


Happy Halloween!  Todays project is a frightfully fun set of shaker cards that glow in the dark!  Given the fact that *most* cameras need light, I was not able to capture the glowing effect satisfactorily on either of my cameras.  My cell phone camera got an ok picture and you can see that at the end of the video on my YouTube channel.  However, they do glow quite brightly and look really cool in real life.  My nieces and nephews are going to love them.  Lets get started!  Added bonus- you can save 20% on the die set used in this project until 10/17/18!

Supplies:
MFT Frightfully Sweet Stamps
MFT Frightfully Sweet dies
Distress Ink Originals


MISTI
Strathmore 140 lb WC paper
Ranger Matte Medium
Nuvo Green Glow in the Dark drops
Hero Arts Star Stencil
Bristol Smooth cardstock
Arteza Watercolors
Ink on 3 Blackout
Hot Off the Press Heat Resistant Acetate
Circle dies
Be Creative Tape
3M Foam tape
Versamark
Ranger Black Sparkle EP
EK Success Powder Tool
MISTI
Staz-on Black ink
28 Lilac Lane Bold and Bright sequins
Little Things Clear Irridescent Stars and Star Shine
Patterned Paper from stash

I your Halloween is full of fun and excitement!  Valid through 11/10/18 is a coupon code, JasmineBurgess1, for 10% off the Arteza watercolors I used to paint the critters.  If you're interested in my review video of Arteza watercolors, click here for that video.  As always if you have any questions, let me know.  Happy to help!

Friday, October 5, 2018

Puppy Birthday Shaker with Custom Patterned Paper and Copics

Todays project is this adorable shaker.  I had a lot of fun designing and creating this one.  I love animals.  In another life I may have become a Zoologist, just so I could hang out and play with the animals at the Zoo all day.  My husband always laughs because every time I see someone with their dog in their car, I always say "Puppy!", no matter how old the dog may be.  My brother has a black lab and I bring her pig ears every time we visit and she knows I'm hers.  My cat, Onyx, is my fur baby, and the first animal my husband and I have had together, as well as the first cat Howard has had experience with.  Onyx knows we are his.  The shaker card is a technique I love, as use often, which you know if you hang out here with any regularity.  They are easy and so versatile.  For this one, I used the main image stamps on the background to create custom patterned paper and tie the background in with the focal panel on the front.  To add interest to the kraft frame, I skewed the smaller interior die so that it was crooked; this creates something unexpected.  If you struggle with placing embellishments on the front of your card use odd numbers.  Your brain wants to match even numbers, making even numbers of elements unpleasant to look at (you wont necessarily notice this), but when looking at odd numbers it doesn't need to match anything; it just is, making odd numbers more pleasing.  If you look at the picture, I have 3 woofs and 4 bones.  Because they are die cut from the same paper, it's an odd number and your brain isn't playing matchy-matchy (yes, that's a highly technical term). 
Here is the video on my YouTube channel and my supplies are listed below.

Sunny Studio Party Pups stamp set
Sunny Studio Rainbow Dots and Stripes paper
Neenah Solar White 110 lb cardstock
Neenah Classic Cream cardstock
MISTI
Ink on 3 Blackout 
Avery Elle Wonky Stitches dies
Neenah Desert Storm Cardstock
Versamark
Brutus Monroe Icicle EP
Hero Arts Acetate panel
3M Foam tape
Catherine Pooler Inks
-Coral Cabana
-Tiara
Copic Markers:
Gray dog: C0, 2, 4, 8; R20 RV14
Brown dog: E37, 49; R20 RV14
Crop-a-dile Corner Chomper
Scor-tape
Tombow
Nuvo Glitter Gloss pen
Rounded Square die, 2.5"

Thanks for stopping by and I'll catch you next time!

Much love,
Jasmine


Saturday, September 22, 2018

Scrapping For Less August Card Kit Tutorial 1 with Copics and Stenciling


 Hey guys!  I have something special to share with you today.  Teresa from Scrapping For Less asked me to review their card kit and I was excited to see what goodies she would include.  Card kits can be a mixed bag depending on who you buy yours from.  Some are heavy on what I consider filler items such as patterned papers, ribbon and stickers or die cuts and have few useful items such as stamps, dies, stencils or inks.  SFL's kit, however, includes several well thought out mini kits with a stamp set, patterned paper, sequins, and embellishments in addition to stencils, high quality card stock, dies and 4 envelopes.  I was impressed with the value of the kit.  If your friends are pet lovers, you'll have just want you need for a perfect card.  If you'd like to see a review of the contents here's the video at my YouTube channel. 

I made 8 cards in total, 2 from each mini collection.  For my supplies, I've listed and linked only the items that aren't included in the kit.  Here is the link for the video tutorial for these cards.

"Sticking By Me"
Scrapping For Less August Kit
Altenew Paperbag and Dark Chocolate inks
Copic Markers
-Spotted Dog E 17, 19; 50, 51
-Black Dog C 6, 8, 9
-Branch E23, 27
-Collar B29
-Handkerchief R 37, 39
Be Creative Tape
Ink on 3 Blackout 
Circle die 3.5"
Versamark embossing ink
Nuvo Black embossing powder
MISTI


"Friends Fur-ever"
Altenew Paperbag ink
Copic Markers
-Spotted Dog E 21, 23; E 23, 25, 29
-Gray Dog E 71, 74
-Collar R39
-Branch E 18, 19, 23
-Handkerchief B 28, 29
Nuvo Moonstone Glimmer paste
Ink on 3 Blackout
Circle die 3.5"
MISTI
Nuvo Aqua Shimmer pen
Glossy Accents
Be Creative Tape


Stay tuned to my blog and YouTube channel for the rest of the projects I created using this kit.  I think you'll like them!  Thanks for stopping by and I'll see you next time.

Choose Joy,
Jasmine


Sunday, August 19, 2018

Faith Forward Card with Copics, Alcohol Inks and Stenciling

As a Christ follower, I am quite excited about the increasing availability of faith based stamp sets.  These sentiments go with so many other stamp sets in my collection that the hard part is narrowing it down to which one I'm going to use next.  In this card, I started with the sentiment.  I ordered the Janes Doodles Bless Your Heart stamp set around the same time as ordering the Stamping Bella Butterfly Girl Briana and they happened to be sitting together on my studio table, putting together my card for me.  Adding the alcohol ink wings (inspired by Marker Geek) and gold stenciling brought it together perfectly.  While there are several techniques in this card, they are simple to do and add a lot of texture, dimension and interest.  Here is the link to my video tutorial on my YouTube channel and my supplies are listed below.

Supplies:
Janes Doodles Bless Your Heart stamp set
Ink on 3 Blackout

Neenah Solar White 80lb cardstock
MISTI
Stamping Bella Butterfly Girl Brianna Bundle
Alexandra Renke Stencil Heart in the Middle
Ranger Alcohol Inks: Gunmetal, Teakwood, Indigo, Aqua, Pebble
Ranger Alcohol Ink Blending Solution
Glossy Cardstock
Creative Medium Embossing Paste in Metallic Gold
Inkadinkado Masking Paper
Copics:
Dress- BG11, 13, 15  Flowers- B28, BG02
Hair- E27, 29  Skin- E11, 13, 21; R20

I know I often say that I love my cards and this one is no exception.  It's so pretty and the sentiment is a foundation for me.  Like most other creatives, I don't share work I'm not happy with, so if you see it on my blog, YouTube or elsewhere, it's something I'm proud of and want to invite others to share my joy.

For Christs glory and much love,
Jasmine

Thursday, August 9, 2018

Rose Gold Hello Gorgeous Eclipse Card with Alcohol Inks

This project turned out so beautifully.  When I'm creating, I tend to let my products inspire me.  Sometimes I choose a stamp set to play with, sometimes it's certain colors, sometimes it's a technique.  I find that my creativity flows best when I'm not trying to force it and a clean workspace is also a necessity; when things are cluttered, I can't work.  For this project, it started with the dies.  I had a stack of alcohol ink backgrounds that I'd made and this pinky gold one was a favorite, so I pulled it out.  The dies, as you can see, are a full A2 card size, 4.25" by 5.5" and become the focal point, so this card really designed itself.  I placed the dies on the panel so that they'd fit and die cut them.  I didn't want to do an in-laid die cut technique; I wanted something different and it hit me.  It was perfect for an Eclipse technique.  I've seen several variations of the Eclipse technique and I wanted to keep this fairly low profile, so rather than foam, I used cardstock.  Because the alcohol ink is so pretty, it didn't need much, but did need something, so I added 3 floral images from the coordinating stamp set.  Added a few sequins and it was done.  I love how soft, feminine and pretty this card turned out.  Really easy to mass produce as well and with alcohol inks, the color palette is unlimited.

Here is the link to the video on my YouTube channel and my supplies are listed and linked below.

Supplies:
The Ink Road Hello Gorgeous stamp and dies
Translucent Yupo
Alcohol Inks: Shell Pink, Rose Gold Mixative, Flamingo, Pink Sherbet
Alcohol Blending Solution
Delicata Rose Gold
MISTI
Tombow Mono Multi glue
Neenah Classic Cream cardstock
Be Creative tape
Glad Press and Seal
Little Things Garden Flowers Jasmine and Peony

Monday, July 30, 2018

Simply Colored Fuchsias


Hey guys!  Todays project has simple coloring and minimal embellishments while being quite pretty.  I'm one of those crafters who likes bling and upping the wow factor, but I wanted to demonstrate that it's not always necessary and sometimes, less IS more.  Fuchsias are sentimental for me because I grew up with them; my mom loves them and she always had several baskets hanging around the house.  Hummingbirds are sentimental because my nephew loves them and always says "Jazz, look at the hummingbirds" when he sees them at his feeders.  I'm still young at 36, but as I get older, I'm realizing how important moments are with the people you love.  This card is full of memories and faith and so much love.

Here is the link to the video on my YouTube channel.  My supplies are listed below.

Supplies:
Avery Elle Hummingbird stamp set
Avery Elle Wonky Stitches die set
Ink on 3 Blackout ink
MISTI

Bristol Smooth cardstock
Janes Doodles Bless Your Heart stamp set
Arteza Brush Markers
Versamark
Nuvo Black Embossing Powder
Copic Markers: B000 and B0000
Bazzill Candy Necklace (4.25"x5.5")
Ranger Matte Medium
Pretty Pink Posh 4mm Clear Droplets
Nuvo Clear Glitter Gloss pen
Be Creative Tape (also called Scor-tape)
Delicata Golden Glitz

Thanks so much for hanging out with me!  Happy to help if you have any questions!

For Christs glory and much love,
Jasmine

Wednesday, July 25, 2018

Soft Encouragement Card with Ink Blending and a Stencil

 Hello!!  I know it's been a minute since I've posted a project or video.  Sometimes life gets in the way of art and you have to prioritize.  My husband is in Stage 5 Kidney Failure and is on the transplant list.  As you can imagine, that has taken all of my focus over the past several weeks and I've needed to get back to my studio to restore myself a bit.  Todays project was inspired by two elements in my life; my faith in Jesus and my friends and family that have rallied around my husband and I to support us.  God is amazing. 

The sentiment stamp is from The Ink Road and it's a favorite expression of mine.  I love the size and different fonts Lara used in it's design.  I started by stamping it in the middle of my panel and heat embossing with Rose Gold embossing powder.  Next, I used the Radiating Star stencil by Neat and Tangled off center to the upper left of the sentiment with a pale blue ink by Catherine Pooler Designs.  Side note: if you haven't tried Catherines inks, you are missing out.  They are fantastic and rival any ink I've ever used (including Distress).  I followed the stenciling with a brighter toned blue ink around the edges, keeping it soft.  It still needed something so I looked through all my floral stamps and decided on the Mondo Sakura, which is a Cherry Blossom, by Ellen Hutson and stamped that twice using a medium lilac shade.  To tie everything together and add a bit of shine, I finished it off with some flat-back pearls in Thistle by Little Things.  Those pearls are teeny-tiny and so pretty, so they add just a bit of flair without going overboard.  Perfection.

Here is the link to my Youtube channel where I have the video tutorial if you're interested in watching.  Below is my supply list with links if you're interested in getting any of the products I use and love.

Supplies:
https://www.ellenhutson.com/wow-embossing-powder-regular-rose-gold/#_a_186Neenah Solar White Classic Crest
Ink Road Stamps: Chin Up Buttercup
Wow Rose Gold embossing powder
Versamark
MISTI
Neat and Tangled Radiating Star stencil
Catherine Pooler Designs inks: It's a Boy, Something Borrowed and Sweet Sixteen
Ellen Hutson Mondo Sakura stamp
Little Things Pearls: Glossy Thistle Mix


Thanks so much for stopping by!  It's good to get back into my studio and creating again!  Be sure to let know what you think here or over on my YouTube channel.  It's so much fun getting to interact with you! 


Saturday, May 19, 2018

10 cards using Foils, Transfer Gel and a Laminator


Hello!  Todays video has 10 cards in it with a simple foiling technique that is quite versatile and will help you get more out of the dies you already have in your stash.  I didn't new any of my newer dies for this; they're all a few years old.  My goal with this card design was to think outside the typical and find new uses for my stuff.  I used transfer gel and heat-transfer foils for these cards, so you'll need a laminator.  However, you don't need one that is uber expensive.  Mine was $18.  A cool thing about these foils is that you can usually get at least 2 cards out of a sheet of foil and I'll show you how to use the negative.  I had so much fun designing and creating these cards, so lets get started.  Using older products in videos, sometimes things have been discontinued and I came across that issue with this video.  I've done my best to find similar products to serve the same purpose although they may not be identical.  Here's the link to the video on my YouTube channel and my supplies are listed and linked below.

Supplies: 

Memory Box Snowflake die (discontinued) 
Penny Black Inspire die


The formatting on todays post is a bit wonky, and I apologize, but Blogger doesn't want to cooperate with me, so it is what it is.  Regardless, I do hope you enjoyed the post, video and design ideas and encourage you to delve into your stash and see what new ideas you come up with.  Happy crafting!

Love and grace,
Jasmine


Saturday, May 12, 2018

Spring Themed Cards Collaboration with Gerry from Gerry's Craft Room Part 1


 Hello there!  I don't know about you, but I am so excited that it's finally warming up outside.  We have had the weirdest weather in the Midwest over the past few weeks, but I think it's safe to say it's SPRING!  Gerry, from Gerry's Craft Room and I decided to do a little collaboration.  We each created backgrounds and exchanged them so that I could finish the cards with her backgrounds and she finish cards with my backgrounds.  And without discussing what we'd use, both reached for Distress Oxide inks.  Both cards could be gender neutral, especially if your guy likes birds.  The second one with the cupcake, was made with my husband in mind, as it was his birthday around the time I was crafting and he loves loves loves cupcakes.  The colors Gerry used in the background made it perfect for a masculine design, so I carried that through with a Tim Holtz Blueprint stamp and bold die cut letters for the sentiment.
Usually, when I do collaborations with other artists on YouTube, I have footage of the creations of my backgrounds and the completed cards.  However, for this project, the gremlins got my footage.  So while I can't show you how I created them, I can list what I used.  Sorry! So frustrating...  Anyway, here's the video on my YouTube channel and the supplies are listed below.  You can find Gerry's video here.
Supplies:
My backgrounds (Gerry's finished cards)
Bristol Smooth Cardstock
Distress Oxide Inks:
Shaded Lilac
Blueprint Sketch
Cracked Pistachio
Hickory Smoke
Nuvo Glimmer Paste Black Diamond 
The Crafters Workshop Swirl Stencil
The Crafters Workshop Butterfly Swirl Stencil
Black cardstock
Nuvo Glimmer Paste:
Green Peridot
Blue Sapphire
Moonstone
Gerry's Backgrounds:
White cardstock
Distress Oxide Inks:
Peacock Feathers
Twisted Citron
Spiced Marmalade
Squeezed Lemonade
Embossing folders
Birdsong Card:
Gerry's Blue/Green background
Versamark ink
Ranger Holographic embossing powder
Ranger Enchanted Gold embossing powder
Vellum
Stick-It sheet adhesive
Dina Wakely Scribbly Birds stamp set
MISTI
Copper glitter paper
Archival Jet Black ink

Cupcake Birthday:
Gerrys Orange/Yellow background
Memento Tuxedo Black ink (Copic friendly)
Copic markers
Cake: E29, 37, 47, 49
Frosting: E23, 25, 27
Candle: B02, 05, 18
Flame: Y00, 13, YR04
Lawn Fawn Stitched Rectangle die
Tim Holtz Birthday Blueprint stamp set
Sizzix Celebrate Thinlits
Stick-It Sheet Adhesive
Black cardstock
Be Creative Tape
MISTI
Bristol Smooth cardstock

Gerry and I both had a lot of fun creating new cards with each others backgrounds.  It's a creative and exciting challenge for sure.  Be sure to check out both videos and let us know what you think.  See you next time!

Much love and prayers,
Jasmine

Friday, May 4, 2018

Mother's Day Watercolor Colab with Maaike

 Hello and Happy Mothers Day to all the Mom's out there!  Moms are superheros in my book.  They don't get a day off, work tirelessly, love compassionately, and always have to be prepared for battle.  Thinking of my own Mom and how she managed to raise 4 kids mostly by herself as my Dad was in the Navy and away on deployment most of the time, it's astounding how she didn't implode.  I totally own up to the fact that I wasn't easy to raise.  I didn't get into real trouble much, but I pushed her patience as far as I could far too often.  With this card, I wanted to do something she would love.  My Mom loves everything I make, and always has, but as we get older and each year passes, I become more aware of the fragility of life and how I wont have her forever.  Things are an inadequate way to express how much someone means to you, but sometimes it's the best/ only way you have.  Handmade items are special because you take the time to create it, usually with someone specific in mind.  So I went back to my roots with this card.  My mom indulged my creative interests from a young age, taught me about Jesus, how to cook, bake, paint, draw, sew, garden and otherwise be courageous and unafraid to try new things.  She is and always will be my hero.  I love you, Mom.

Here is the link to the video tutorial on my YouTube channel and my supplies are listed and linked below.  Maaike and I teamed up to do a collaboration for Mothers Day and you can find her video here.
Supplies:

Unity Stamp Co “Beautiful is Never Perfect” : https://www.unitystampco.com/beautiful-is-never-perfect/
Unity Stamp Co: ”Feather Soft Love” https://www.unitystampco.com/feather-soft-love/

 
Thank you for stopping by to hang out and chat!  I hope you get the opportunity to get creative with or for your mom any time of the year.

For Christ's glory and much love,
Jasmine


Handmade Christmas Series 2018: Day 1 Watercolors and EH Mondo Holly 2 ways

Here's an exciting sale for everyone!  ellenhutson.com is having a 20% off sale on all dies with the code above.  I&...