Thursday, April 27, 2017

Shaker Cards Galore

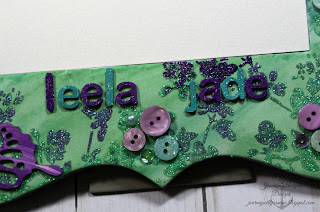
Hello!  I'm back with a new shaker card menagerie.  We finished up with AWANA for the year this week and I wanted something to give to my kids that was fun and personalized.  What's better than a shaker with your name on it?  I did each one a little different with their favorite colors in mind and did my best to keep the boys' cards' as masculine as I could as they are definitely in that "pink is for girls" phase.  3 of them are moving on to youth group next year and we'll certainly miss them.  

If you aren't familiar with AWANA, it's a program that spans for 4 years old - 6th grade that teaches kids about the Bible and Jesus at an age appropriate level.  I work with the 5th and 6th graders and we have so much fun while making sure they know we are there for them and are a support system if/when they need it.  

I only filmed one card because the process is the same for each card; I only changed colors of ink and paper between the girls' and boys' cards.  Here's the link to the video on my YouTube channel and my supply list is below.

Supplies:
Boys Ink colors:
  • Lawn Fawn Lobster
  • Simon Says Stamp Orange Peel
  • LF Sunflower
  • SSS Fern
  • LF Fish Tank
  • LF Sugarplum
 Girls Ink colors:
  • LF Carrot
  • LF Sunflower
  • LF Jalepeno
  • LF Peacock
  • SSS Island Blue
  • LF Sugarplum
  • SSS Doll Pink
Stamping Bella Java Spills stamp set
My Favorite Things Wonky Stitches dies
Lawn Fawn Stitched Rectangle dies
Bristol Smooth cardstock
DCWV Shimmer, Foiled and Golds cardstock stacks
Concord & 9th Double Cut Alphabet dies
Stick-It sheet adhesive
Ranger Matte Medium
Little Things Jewels 
Littel Things Sequin mixes 
  • Lucky Dip Purple Paradise
  • Misty Rainbow
  • Deep Fuchsia
Scor-tape
Hero Arts Acetate sheets
3M Foam tape


 Thanks for joining me today guys!  See you next time.

Much love,
Jasmine


Saturday, April 15, 2017

One Layer Beauty with Zig Clean Color Markers

 Hello and Happy Easter to you and yours.  Todays project is lovely, simple, easy and one-layer. Watercolor paper is my first choice when using just about any water-based medium because it doesn't warp easily.  I wanted to layer the sentiment over the flowers, so I stamped the floral image and heat embossed over it, then added color.  I did it in that order so that I wouldn't have to wait for the flowers to dry before stamping and heat embossing.  If the flowers were still wet at all, I may not have achieved a clean stamped sentiment and the powder would have stuck everywhere, effectively ruining the project (no bueno).

Here is the link the video tutorial on my YouTube channel and my supply list is below.
Supplies:
Canson XL 140 lb watercolor paper
Lawn Fawn Stitched Rectangle die
Archival Jet Black ink
MISTI
Penny Black Divine stamp
Mama Elephant His Love stamp set
Spectrum Noir Sparkle Pen
Versamark
Ranger Liquid Platinum embossing powder
Zig Clean Color Markers
  • 83 Lilac
  • 81 Light Violet
  • 42 Turquise Green
  • 44 Deep Green
  • 51 Lemon
Scor-tape
Neenah cardbase

Thanks for stopping by and hanging out with me.  As always, I'm happy to answer any questions and would love to know what you think.

To His glory and much love,
Jasmine

Wednesday, April 12, 2017

Easter Triple Play

Todays post and video are done in a bit of a different style than usual.  I have 3 cards, all of an Easter theme celebrating the resurrection of our Lord Jesus, utilizing experiments.  When I get new products, I like to play with them and experiment so I have a bin in my studio with several random bits.  These cards were created using a few of those panels.  I chose to do it this way because Easter has devolved into chicks, bunnies, toys and candy.  I wanted to convey it's true purpose and true meaning and I hope you enjoy.
Oh Happy Day Supplies:
Nuvo Glimmer Paste
Tanzanite Lavender
Peridot Green
Neat & Tangled Scalloped stencil
Bristol Smooth cardstock
Simon Says Stamp Cross die
Simon Says Stamp Oh Happy Day die
DCWV Gold Foil cardstock
Stick-It Sheet Adhesive
Neenah 110 lb Solar White cardstock base
Scor-tape

Start with a Bristol Smooth panel cut to 4"x 5.25" and tape the stencil down on the corners.  Smooth the lavender Nuvo paste over the top half and the green over the bottom half, blending the two colors in the middle.  Remove stencil while paste is still wet.  Set aside the panel to dry and immediately wash the stencil and palette knife.  The panel will take an hour or so to dry completely, but I let mine sit for several hours.  Once dry, center the cross die in the middle of the panel so that the pattern is even in the die and run it through your die cutting machine.  Give it a few passes; you may have to use your craft knife to help complete the cuts in a few places.  Cut the gold cardstock to 4.25" x 5.5" and adhere to the card base using Scor-tape.  Center the glitter paste panel and center it over the gold.  Apply Stick-It to the back of some gold cardstock and run the Oh Happy Day die with the gold cardstock through the die cutting machine.  Remove the die cut from the rest and remove all the little bits and pieces.  Arrange the die cuts over the glitter panel, remove backing paper and press down.  I started with Day because it was at the bottom and wanted to make sure it didn't hang off the edge of the glitter panel.  The card is complete.

Loved You Supplies:
MISTI
Bristol Smooth cardstock
Nuvo Moonstone Glimmer Paste
Neat & Tangles Scalloped stencil
Lawn Fawn inks
  • Minty Fresh
  • Moonstone
  • Fresh Lavender 
  • Ballet Slippers
  • Peachy Keen
My Favorite Things Wonky Stitches dies
Penny Black Faith stamp set
Mama Elephant His Love stamp set
Wplus9 Oatmeal cardbase
Vellum
Stick-It sheet adhesive
Sizzix rectangle frame die
Versamark
Ranger Liquid Platinum embossing powder
Scor-tape

In order listed above, I used the ink blending technique to add color to my panel.  Next, I applied the glimmer paste using the stencil and let that dry.  Once the paste was dry, I ran in through my die cut machine with the largest of the MFT Wonky Stitches dies.  Using vellum with Stick-It on the back, I stamped and heat embossed my images followed by die cutting them.  To finish up, I adhered the colored panel to the cardbase with Scor-Tape and layered the vellum images on the front.  Card completed.

His Love Never Fails Supplies:
MISTI
Glossy cardstock
Alcohol Inks
  • Pearl
  • Flamingo
  • Patina
Alcohol Ink Blending Solution
My Favorite Things Wonky Stitches die
Mama Elephant His Love stamp set
Versamark
Ranger Liquid Platinum embossing powder
Die cut Cross from the first card
Ellen Hutson Natural White cardbase
Scor-tape
3M Foam tape
Here is the link to a previous video demonstrating the alcohol ink technique on my YouTube channel so you can see how I created the background. 

Here is the link to the video tutorial with these three cards on my YouTube channel.  It was a joy creating these cards to share my faith and I sincerely hope you can share in the joy and promise of Easter as well. 

To His glory and much love,
Jasmine

Monday, April 10, 2017

Hooty Whoo Owls with Copics and Newtons Nook

 I have loved owls since I was a little girl and would fall asleep listening to them in the pine trees.  They were secretive, elusive and majestic and every time I would catch a glimpse of one I felt such awe.  That was the inspiration behind this card.  I wanted to keep the focus on the birds, so I kept the rest of the card fairly simple with some simple ink blending over a stencil.  I used Copic markers to color my images and you'll notice that it doesn't disturb the dye ink in the ink blending; alcohol ink works well with dye ink because they won't dissolve each other so their compatible and safe to use together.  If you are having trouble figuring out how to color an image and want to be true to life, just google whatever it is and you'll have tons of reference photos to go on. 

Here is the link to the video tutorial on my YouTube channel and my supply list is below.

Supplies:
Newtons Nook What A Hoot stamp set
Bristol Smooth cardstock
My Favorite Things Wonky Stitches die
Post-It Masking Tape (2" wide)
Memento Tuxedo Black ink
MISTI
Tim Holtz Mini Blossom Stencil
Simon Says Stamp Jellybean and Fern inks
Lawn Fawn Celery Stick ink
Copic Markers
Red Owl: E13, 15, 19, 51, C4, C6
Gray Owl: E70, 74, 79, YR15, C4, C6
Branches: E23, 27, 25, 79
W+9 Oatmeal card base
Scor-tape

Friday, April 7, 2017

Sunset Flights with Distress Oxides, Concord & 9th and Impression Obsession

 Hello there!  Sunsets are among my favorites of God's artistry in nature and is what inspired this project.  Using three colors of Distress Oxides, ink blending and ink lifting, I created the background, added the butterflies on top and finished it off with a heat embossed sentiment.  This project is  simple, quick and easy with gorgeous results that you can use for just about any occasion: birthday, encouragement, illness, sympathy or thinking of you.
 Here is the link to the video tutorial on my YouTube channel with my supply list below.

Supplies:
Distress Oxide Ink
Wilted Violet
Worn Lipstick
Spiced Marmalade
Bristol Smooth cardstock
My Favorite Things Wonky Stitches die
Imagine Crafts Sparkle Spritz
Concord & 9th Butterfly Beauty stamp set
Simon Says Stamp Smoke Ink
MISTI
Impression Obsession "What if I Fall"
Versamark
Nuvo Black embossing powder
Neenah Solar White 110 lb card base
Scor-tape

Thanks for stopping by and I'll catch you next time!

Much love,
Jasmine

Thursday, April 6, 2017

Mixed Media Watercolor Frame with Infinity Engravings LLC

 Have I got a fun project for you!  With this project, I was making it for my 3 year old niece, so the design I had in mind was colorful, outdoorsy and exciting.  A few months back I saw a project using watercolor grounds and was very interested in what it was and what you could do with it.  It's a medium that allows you to turn surfaces such as metal, glass and chipboard into a surface that accepts watercolors.  I typically use acrylic paints in my mixed media projects, but am a much strong watercolor artist than acrylic artist so the watercolor grounds opened up a whole new avenue for me. 
 I applied 2 coats of watercolor grounds to the frame and to the fairy and letter die cuts.  I ended up using acrylic paint on the letters because the watercolor just wasn't standing out enough. 
 I painted both butterflies with acrylic paints as well and topped the smaller butterfly with glitter.
 I didn't care for how the bodies of the fairies turned out, so I painted over them with white acrylic paint and added glitter. 
 Here is the finished project and I think it's enchanting, especially for a little girl.  If you'd like to see how I created it, here is the link to the video tutorial on my YouTube channel and the supply list is below.
Supplies:
Paper Studio frame
Infinity Engraving die cuts
Daniel Smith Watercolor Grounds
Daniel Smith Watercolors
Dylusions Acrylic Paints
  • Crush Grape
  • Vibrant Turquoise
  • White Linen
Nuvo Glimmer Paste
  • Tanzanite Lavender
  • Amethyst Purple
  • Peridot Green
  • Moonstone (Small butterfly, fairy bodies, and letters)
28 Lilac Lane
  • Pretty Princess
  • Minty Fresh
  • On Lilac Lane
TH Mini Blossom Stencil
Dina Wakely Matte Medium

Thanks for hanging out with me for a bit and I'll catch you later!  As always, I'm happy to answer questions and love to know how you like it.

Much love,
Jasmine

Monday, April 3, 2017

Embossed Resist with Distress Oxides, MFT and Concord & 9th

 Trying out the new Distress Oxides has been so much fun and todays project is no exception.  These inks are a hybrid between pigment and dye inks, so they have the properties of both.  They heat emboss beautifully, blend seamlessly and easily and because they're the Distress formula, you can do all those delightful techniques as well. 
 Using a 6x6 MFT background stamp, I layered the inks across it on the diagonal and stamped it.  Using a MISTI here is an excellent idea, just in case you miss a bit (you'll see in the video where I did it).  After heat embossing it in clear, I went in and ink blended over the top to make the background stamp really pop.  The background was really vivid and I didn't want to detract from it, so I kept my finishing touches simple with the die cut sentiment and vellum butterfly.  Here's the link to the video tutorial on my YouTube channel and my supply list is below.

Supplies:
Distress Oxide Ink
  • Fossilized Amber
  • Broken China
  • Peeled Paint
My Favorite Things Floral Fantasy stamp
Bristol Smooth cardstock
SSS Clear detail embossing powder
My Favorite Things Wonky Stitches die
Concord & 9th Butterfly Beauty dies
Vellum
Stick-It sheet adhesive
ARC Wood Veneer paper
Simon Says Stamp Blessed die
Lawn Fawn Stitched Rectangle die
Little Things Lily White and Ivory sequin mixes
Ranger Multi Matte Medium
Scor-tape
Neenah 110 lb card base

Thanks for stopping by and I'll catch you next time! 

Much love,
Jasmine

Handmade Christmas Series 2018: Day 1 Watercolors and EH Mondo Holly 2 ways

Here's an exciting sale for everyone!  ellenhutson.com is having a 20% off sale on all dies with the code above.  I&...