Showing posts with label Stick-It. Show all posts

Saturday, May 12, 2018

Spring Themed Cards Collaboration with Gerry from Gerry's Craft Room Part 1


 Hello there!  I don't know about you, but I am so excited that it's finally warming up outside.  We have had the weirdest weather in the Midwest over the past few weeks, but I think it's safe to say it's SPRING!  Gerry, from Gerry's Craft Room and I decided to do a little collaboration.  We each created backgrounds and exchanged them so that I could finish the cards with her backgrounds and she finish cards with my backgrounds.  And without discussing what we'd use, both reached for Distress Oxide inks.  Both cards could be gender neutral, especially if your guy likes birds.  The second one with the cupcake, was made with my husband in mind, as it was his birthday around the time I was crafting and he loves loves loves cupcakes.  The colors Gerry used in the background made it perfect for a masculine design, so I carried that through with a Tim Holtz Blueprint stamp and bold die cut letters for the sentiment.
Usually, when I do collaborations with other artists on YouTube, I have footage of the creations of my backgrounds and the completed cards.  However, for this project, the gremlins got my footage.  So while I can't show you how I created them, I can list what I used.  Sorry! So frustrating...  Anyway, here's the video on my YouTube channel and the supplies are listed below.  You can find Gerry's video here.
Supplies:
My backgrounds (Gerry's finished cards)
Bristol Smooth Cardstock
Distress Oxide Inks:
Shaded Lilac
Blueprint Sketch
Cracked Pistachio
Hickory Smoke
Nuvo Glimmer Paste Black Diamond 
The Crafters Workshop Swirl Stencil
The Crafters Workshop Butterfly Swirl Stencil
Black cardstock
Nuvo Glimmer Paste:
Green Peridot
Blue Sapphire
Moonstone
Gerry's Backgrounds:
White cardstock
Distress Oxide Inks:
Peacock Feathers
Twisted Citron
Spiced Marmalade
Squeezed Lemonade
Embossing folders
Birdsong Card:
Gerry's Blue/Green background
Versamark ink
Ranger Holographic embossing powder
Ranger Enchanted Gold embossing powder
Vellum
Stick-It sheet adhesive
Dina Wakely Scribbly Birds stamp set
MISTI
Copper glitter paper
Archival Jet Black ink

Cupcake Birthday:
Gerrys Orange/Yellow background
Memento Tuxedo Black ink (Copic friendly)
Copic markers
Cake: E29, 37, 47, 49
Frosting: E23, 25, 27
Candle: B02, 05, 18
Flame: Y00, 13, YR04
Lawn Fawn Stitched Rectangle die
Tim Holtz Birthday Blueprint stamp set
Sizzix Celebrate Thinlits
Stick-It Sheet Adhesive
Black cardstock
Be Creative Tape
MISTI
Bristol Smooth cardstock

Gerry and I both had a lot of fun creating new cards with each others backgrounds.  It's a creative and exciting challenge for sure.  Be sure to check out both videos and let us know what you think.  See you next time!

Much love and prayers,
Jasmine

Friday, February 16, 2018

Penguin Watercolor Ombre Emboss Resist with Gerda Steiner Designs

 Hello and welcome everyone!  Today we are playing with those sweet Valentine Penguins from Gerda Steiner Designs again.  This time, we are creating our own patterned paper with heat embossing.  Add some simple watercolor and viola.  We have an adorable and versatile panel that is perfect for so many different occasions.  The same technique can be used for almost any stamp set in your aresenal as well, so bust them out and get creative.  Here's the video on my Youtube channel and my supplies are listed below.

Supplies:
Gerda Steiner Designs Valentine Penguins
Canson XL Watercolor paper
Versamark
Brutus Monroe Icicle embossing powder
MISTI
FineTec watercolor pallete
Gansai Tambi 36 watercolor palette
Silver Black Velvet brushes
My Favorite Things Wonky Stitches die
DCWV Glitter Paper and Foiled Vellum
Sizzix Hearts die
Lawn Fawn Scripty Love die
Tombow Mono Multi glue
Stitck-It Sheet adhesive
Be Creative tape

I hope you're having a great day and I encourage you to step out of your comfort zone to try new techniques and new products, stretching your creative muscles.  It's so much fun and good for you too. 

I love interacting with you guys, so leave me a comment or question and I'll be happy to help.  Have an awesome day and I'll see you next time!

For Christ's glory and much love,
Jasmine


Saturday, December 2, 2017

Handmade Christmas 2017 using Concord & 9th, Ink Blending and Heat Embossing

 For the entire series this year, I wanted to challenge myself to create all new designs with stamps and dies that I already owned.  I didn't buy a single new release.  Not because there weren't any that I liked; there were plenty of lovely designs available.  It was because I needed to reign in superfluous spending and there's a lot of folks who simply can't go buy all the pretty new things.  So I made due.  And it was fun!  I discovered how many stamp sets I have bought but never used and how versatile non-Christmas sets can be.  The Cozy Up set by Concord & 9th is a Valentines set, so why not make a Christmas card with a romantic vibe?  I ended up putting both cards in one video because the footage gremlins stole enough footage so that I couldn't make 2 videos and they are quite similar, so it fit together anyway.  Here's the link to the video on my YouTube channel and the supply list is below.

Supplies:
Concord & 9th Cozy Up S&D
Concord & 9th Joy stamp set
SSS Merry Christmas die
Avery Elle Wonky Stitches die
SSS Heavyweight White cardstock
MISTI
Versamark
Ranger Liquid Platinum EP
Brutus Monroe Icicle EP
Altenew Inks:
  • Caramel Toffee
  • Dark Chocolate
  • Paper Bag
  • Ruby Red
Distress Oxide ink: Candied Apple
Tim Holtz Holiday Knit stencil
Distress Inks: Antique Linen and Tea Dye
Doodlebug White Velvet cardstock
Stick-It
ARC Wood Veneer paper
Lawn Fawn Stitched Snowflake die

Thanks for joining me today.  I hope you get a chance to get crafty and enjoy the Christmas season with those you love.

In His glory and much love,
Jasmine


Friday, November 24, 2017

Handmade Christmas 2017: Scraps and Die Cuts

 As you may have noticed, there's no stamping in todays cards.  It's all scrap papers and die cuts so we not only use up otherwise unusable excess, but also give ourselves a creative stretch.  I have all sorts of different papers in these cards; glitter, foil, patterned paper, wood veneer, velvet and shimmer.  To add interest and flair, mix up your finishes.  Varying the textures also gives depth and dimension to the finished product.  You also want to pay attention to widths.  Place wide pieces next to skinny pieces so that you draw the eye and add interest.  You can make these any size too.  I went with the standard 4.25" x 5.5", but the size is only limited by the length of your scraps.  This technique also works for absolutely any occasion and it's perfect for guy cards.  I have strips as thin as 1/8" and as wide as 3/4".  I used my paper trimmer to cut strips down and trim off any torn or crooked edges.  Here is the link to the video tutorial on my YouTube channel and my supplies are listed below.
Supplies:
DCWV papers
  • glitter
  • foil
  • shimmer
Doodlebug
ARC wood veneer paper
MemoryBox Snowflake Border die
Simon Says Stamp Merry Christmas die
Simon Says Stamp Christmas Blessings die
Neat & Tangled Happy Holidays die
Sizzix TH Alterations Reindeer Flight die
Stick-It sheet adhesive
Scor-tape
Tombow Mono Multi glue
Snowflake dies
White cardstock, cut to 4.25x5.5"
Neenah Cream cardbases
 I hope you're enjoying some creative time and get the opportunity to give yourself a creative stretch to try this technique out.  It's really easy and a great way to create quick yet beautiful cards and use up some leftovers in the process.

Merry CHRISTmas and much love,
Jasmine


Wednesday, November 1, 2017

Handmade Christmas 2017: Penny Black Winter Fairy with Copics

Hello and welcome to the kick off of my Handmade Christmas 2017 series.  Christmas is my favorite time of the year and I'm always looking forward to the creativity that comes with cardmaking.  The only rules are the ones we give ourselves.
I fell in love with the Penny Black Winter Fairy image because she looks so sweet, innocent and darling; it reminded me of childhood Christmases that were magical and lovely.  I imagine that snowball as her gift to baby Jesus; heartfelt and genuine.
The blue and purple version was a practice card, but I absolutely loved how it turned out and decided to include it in the post.  Copic markers are amazing in the right hands and they're a labor of love, but I'm determined to get better with them.  The blue and purple is in the non-traditional color family while the red and gold is certainly in the traditional realm and both are beautiful.
Here is the link to the video tutorial on my YouTube channel and my supply list is below.

Supplies: Red/Gold
Penny Black Winter Fairy stamp
Memento Tuxedo Black ink
Strathmore Bristol Smooth cardstock
MISTI
Copics:Red/Gold
Hair: E31, 33, 37; YR20
Skin: E50, 51, 21; R11, 20
Skirt: R27, 29, 37, 39, 59
Wings and Snowball: RV0000
Earmuffs and legwarmers: C00, 0, 1; R27, 37, 59

DCWV Foiled Cardstock Stack- Red/Gold
Lawn Fawn Stitched Rectangle dies
Viva Decor Hologram Glitter Pen
Neenah Classic Cream cardbase
SSS Merry Christmas die
Stick-It sheet adhesive
Scor-tape


Blue/Purple:
DCWV Shimmer Cardstock: Pale Blue
Lawn Fawn Stitched Rectangle dies
Spectrum Noir Clear Sparkle Pen
Neenah Classic Cream cardbase
Doodlebug White Glitter cardstock
Stick-It sheet adhesive
Neat & Tangled Happy Holidays die
Scor-tape


Thanks for stopping by to hang out with me.  Let me know if you have any questions; always happy to help.  If you're interested in Copic marker classes, go see Sandy at art-classes.com.  She's got mad skills and so easy to learn from.  Merry Christmas!!

For His glory and much love,
Jasmine

Tuesday, September 5, 2017

You're A Hoot by Brutus Monroe

 Todays post is a 2 for 1 deal!  I've made 2 cards with similar styles using the Brutus Monroe You're A Hoot Inspiration Box and I love each of them.  The Inspiration Box is basically a card kit that includes a stamp set, cardstock, dies, embellishments, stickers and an ink cube but goes a step further to include toner prints that you can foil using a laminator.  Super cool.  This certainly has a fall color scheme to it, but the stamp set and owl die are usable all year.  I have a few ideas for Christmas cards too.  I hope Brutus Monroe makes the toner sheets available as a stand alone item in their shop because they are so versatile and cool.
 In the video tutorial on my YouTube channel, I give an overview of the kit contents and how I made each card and my supplies are listed below.

Supplies:
Shaker:
Brutus Monroe You're A Hoot Inspiration Box
Vellum 1.5" wide by 5.5" long (trim the edges)
Stick-It Sheet Adhesive
BARC Cherry Wood Veneer paper
Stitched Rectangle die
MISTI
Bristol Smooth cardstock
Branch Die
Distress Oxide Inks
  • Wild Honey
  • Frayed Burlap
  • Vintage Photo
Deco-Foil Amber Watercolor
Catherine Pooler Inks
  • Something Borrowed
  • It's A Boy
Versamark
BM Gilded Embossing Powder
3M Foam Tape
Hero Arts Acetate
Scor-tape 1/8"
Little Things Gold Dust sequin mix
Pretty Pink Posh Nature sequin mix
Neenah Classic Cream cardbase

Emerald Card:

Brutus Monroe You're A Hoot Inspiration Box
Vellum 1" wide by 5.5" long (trim the edges)
Stick-It Sheet Adhesive
BARC Cherry Wood Veneer paper
Stitched Rectangle die
MISTI
Bristol Smooth cardstock
Branch Die
Distress Oxide Inks
  • Fossilized Amber
  • Vintage Photo
  • Walnut Stain
Deco-Foil Emerald Watercolor
Catherine Pooler Inks
  • Something Borrowed
  • It's A Boy
Versamark
BM Penny Embossing Powder
Neenah Classic Cream Cardbase

Thanks for stopping by guys!  Let me know if you have any questions and I'll see you next time.

For His glory and much love,
Jasmine

Thursday, August 31, 2017

Starry Sky for Scrapbooking with M.E. Boutique

 Hey guys!  Todays post is my final Guest DT project with Scrapbooking with M.E. Boutique.  This card is fairly simple.  We have some ink blending using colors from the second set of the Distress Oxides with a stencil and some BoBunny Glitter Paste over the top.  What I love about the glitter paste is that it picks up the color of whatever ink you put underneath it, so it looks almost as if it's lit from behind; such a cool effect.  To finish it off, I added a strip of gold on the left side to tie in the gold on the die-cut sentiment.  Simple, yet stunning.  This technique offers such a plethora of variations, so I encourage you to break out you inks and stencils to see what you come up with.
Here is the link to the video tutorial on my YouTube channel and my supply list is below.

Supplies:
Bristol Smooth cardstock
Distress Oxide Inks
Distress Ink
Hero Arts Sky Stencil
BoBunny Glitter Paste in Sugar
Avery Elle Wonky Stitches die
DCWV Gold Foil paper
Stick-It sheet adhesive
Neenah Classic Cream cardbase
Scor-tape 

Thanks for stopping by and hanging out with me today.  I'm always happy to answer any questions, so feel free to ask.  See you next time!

For His glory and much love,
Jasmine

Sunday, July 30, 2017

Under the Sea with a Distress Oxide Background

 Summer is beginning to wind down, but it's not over yet.  I've been playing with my Distress Oxide re-inkers to see what they can do and created a few backgrounds (here's the video with those).  Stamping Bella had a new release in the beginning of July with Mermaids, fishes and lots of other sea life which I couldn't resist.  Flipping through my backgrounds and going through some new stamps, these two just fit together like sun and sand.  I colored my images with Copic markers and created a Shaker card with elements on the inside and outside to create a bit more dimension.  If you are new to Copics or are interested in learning more about them, I highly recommend Sandy Allnock's Copic Jumpstart class at art-classes.com.  Here is the video tutorial on my YouTube channel and my supply list is below.

Supplies:
Stamping Bella Under the Sea sentiments
Stamping Bella Tiny Townie Mermaid S&D
Stamping Bella Under the Sea creatures S&D
Memento Tuxedo Black ink
Strathmore Bristol Smooth cardstock
Black cardstock
MISTI Original
Lawn Fawn Stitched Rectangle dies (2 largest)
Hero Arts Acetate
3M Foam Tape
Vellum
Stick-It Sheet Adhesive
Versamark
Ranger Black Sparkle embossing powder
Oval die
Scor-tape
Little Things Caribbean Dream Sequin mix 
Spectrum Noir Clear Sparkle Pen
Matte Medium
Copic Markers
Mermaid:
  • Hair: E08, 35; R59
  • Tail: B16, 24, 28, 69
  • Top: Y17, 35
  • Skin: E51, 33, 35; R20
  • Flower: BV11, 01, V05
  • Conch: RV42, 51
Treasure Chest: E23, 25, 27; C0, 2, 4; Y35, 17; RV000
Turtle: YG17, 67; E23, YG99, G94
Fish: B24, 28; Y11, 17; RV21, 25; V04, 05, 09; BV01, 11, V04

Distress Oxide Ink Background
  • Salty Ocean
  • Twisted Citron
  • Peacock Feathers


I had a lot of fun creating this card and I hope I've sparked your creativity as well.  Thanks for joining me.  As always, I'm happy to help if you have questions.  See you next time!

For His glory and much love,
Jasmine


Saturday, July 15, 2017

Shaker Shake-up with Heat Resistant Acetate

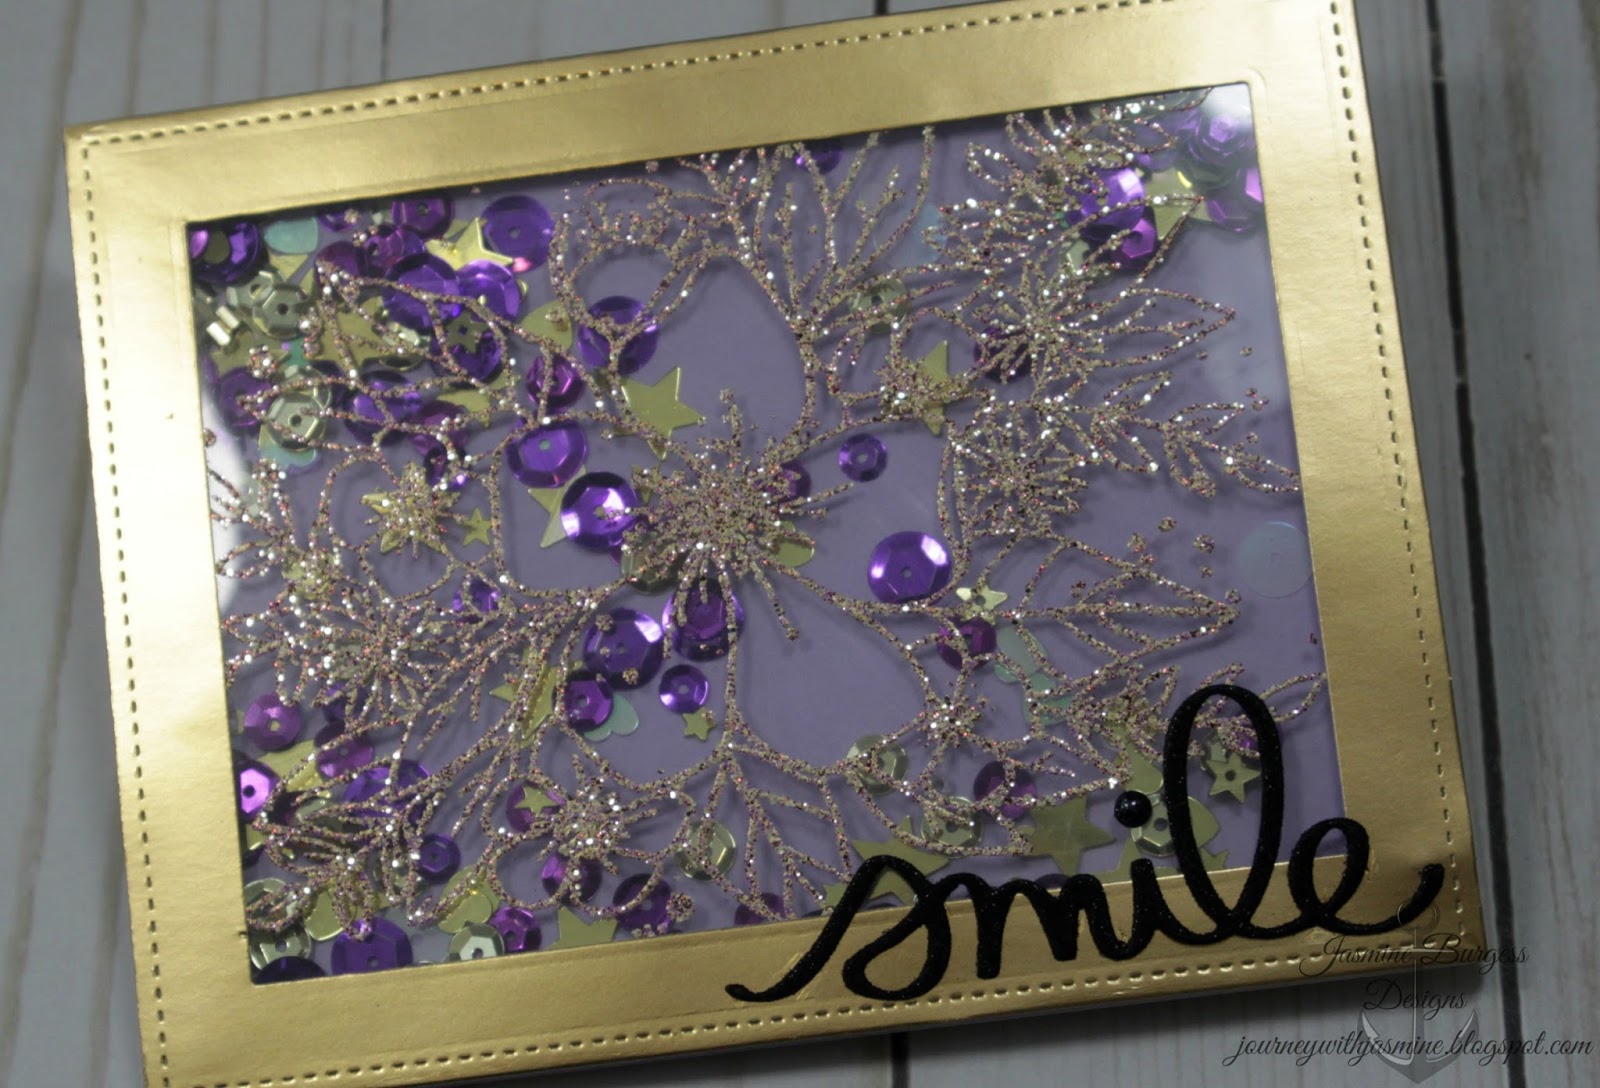
 Todays project is a bit of a spin on a Shaker card.  Instead of a die cut window with stamping on the surrounding panel, the stamped image is on the window, making the shaker window the true focal point.  I created this using Heat Resistant Acetate.  Because it's heat resistant, you can stamp and emboss on it without it shrinking, warping or twisting.  A powder tool is key when using the acetate with embossing powder because of how prone to static acetate is.  I rub my powder tool over the entire area I'm going to stamp and heat emboss to ensure that my image comes out clearly.  Here is the link to the video tutorial on my YouTube channel and my supply list is below.

Supplies:
Concord & 9th Hello Lovely stamp set
Lawn Fawn Stitched Rectangle dies
Versamark
Wow Turkish Nights embossing powder
Hot Off The Press Heat Resistant Acetate
3M Foam tape
Scor-tape
Little Things Sequin Mixes
  • Gold Dust
  • Pretty Pansy
Lavender cardstock
MISTI
DCWV Gold Foil paper
Smile die
Elizabeth Crafts Black Microfine Silk Glitter
Black cardstock
Stick-It
Black Glitter enamel dots

Thanks for stopping by!  See you next time!

For His glory and much love,
Jasmine

Sunday, June 4, 2017

Leather Look Father's Day with Distress Oxides and Concord & 9th

Father's Day is certainly one of those occasions that requires a masculine design and it can be a challenge to create something different every year.  Woodgrain is a texture that is perfect for masculine cards, but I wanted to do something different and thought of leather.  I combined the emboss resist technique and ink blending with Distress Oxide inks to create this card and I really love how it turned out.  Here's the link to the video on my YouTube channel and my supplies are listed below.
Supplies:
MISTI
Bristol Smooth cardstock
Concord & 9th Background Block stamp set
Concord & 9th Doublecut Alphabet dies
My Favorite Things Wonky Stitches die
Distress Oxide inks
  • Faded Jeans
  • Iced Spruce
  • Vintage Photo
  • Walnut Stain
  • Peeled Paint 
  • Faded Jeans
Brutus Monroe Icicle embossing powder
Doodlebug Bluejean Crushed Velvet cardstock
Simon Says Stamp Stone cardstock
Arc Wood Veneer paper
Scor-tape
Tombow Mono Multi glue

Thanks for stopping by!  Let me know if you have any questions and I'll see you next time.

Much love and for His glory,
Jasmine


Wednesday, April 12, 2017

Easter Triple Play

Todays post and video are done in a bit of a different style than usual.  I have 3 cards, all of an Easter theme celebrating the resurrection of our Lord Jesus, utilizing experiments.  When I get new products, I like to play with them and experiment so I have a bin in my studio with several random bits.  These cards were created using a few of those panels.  I chose to do it this way because Easter has devolved into chicks, bunnies, toys and candy.  I wanted to convey it's true purpose and true meaning and I hope you enjoy.
Oh Happy Day Supplies:
Nuvo Glimmer Paste
Tanzanite Lavender
Peridot Green
Neat & Tangled Scalloped stencil
Bristol Smooth cardstock
Simon Says Stamp Cross die
Simon Says Stamp Oh Happy Day die
DCWV Gold Foil cardstock
Stick-It Sheet Adhesive
Neenah 110 lb Solar White cardstock base
Scor-tape

Start with a Bristol Smooth panel cut to 4"x 5.25" and tape the stencil down on the corners.  Smooth the lavender Nuvo paste over the top half and the green over the bottom half, blending the two colors in the middle.  Remove stencil while paste is still wet.  Set aside the panel to dry and immediately wash the stencil and palette knife.  The panel will take an hour or so to dry completely, but I let mine sit for several hours.  Once dry, center the cross die in the middle of the panel so that the pattern is even in the die and run it through your die cutting machine.  Give it a few passes; you may have to use your craft knife to help complete the cuts in a few places.  Cut the gold cardstock to 4.25" x 5.5" and adhere to the card base using Scor-tape.  Center the glitter paste panel and center it over the gold.  Apply Stick-It to the back of some gold cardstock and run the Oh Happy Day die with the gold cardstock through the die cutting machine.  Remove the die cut from the rest and remove all the little bits and pieces.  Arrange the die cuts over the glitter panel, remove backing paper and press down.  I started with Day because it was at the bottom and wanted to make sure it didn't hang off the edge of the glitter panel.  The card is complete.

Loved You Supplies:
MISTI
Bristol Smooth cardstock
Nuvo Moonstone Glimmer Paste
Neat & Tangles Scalloped stencil
Lawn Fawn inks
  • Minty Fresh
  • Moonstone
  • Fresh Lavender 
  • Ballet Slippers
  • Peachy Keen
My Favorite Things Wonky Stitches dies
Penny Black Faith stamp set
Mama Elephant His Love stamp set
Wplus9 Oatmeal cardbase
Vellum
Stick-It sheet adhesive
Sizzix rectangle frame die
Versamark
Ranger Liquid Platinum embossing powder
Scor-tape

In order listed above, I used the ink blending technique to add color to my panel.  Next, I applied the glimmer paste using the stencil and let that dry.  Once the paste was dry, I ran in through my die cut machine with the largest of the MFT Wonky Stitches dies.  Using vellum with Stick-It on the back, I stamped and heat embossed my images followed by die cutting them.  To finish up, I adhered the colored panel to the cardbase with Scor-Tape and layered the vellum images on the front.  Card completed.

His Love Never Fails Supplies:
MISTI
Glossy cardstock
Alcohol Inks
  • Pearl
  • Flamingo
  • Patina
Alcohol Ink Blending Solution
My Favorite Things Wonky Stitches die
Mama Elephant His Love stamp set
Versamark
Ranger Liquid Platinum embossing powder
Die cut Cross from the first card
Ellen Hutson Natural White cardbase
Scor-tape
3M Foam tape
Here is the link to a previous video demonstrating the alcohol ink technique on my YouTube channel so you can see how I created the background. 

Here is the link to the video tutorial with these three cards on my YouTube channel.  It was a joy creating these cards to share my faith and I sincerely hope you can share in the joy and promise of Easter as well. 

To His glory and much love,
Jasmine

Monday, April 3, 2017

Embossed Resist with Distress Oxides, MFT and Concord & 9th

 Trying out the new Distress Oxides has been so much fun and todays project is no exception.  These inks are a hybrid between pigment and dye inks, so they have the properties of both.  They heat emboss beautifully, blend seamlessly and easily and because they're the Distress formula, you can do all those delightful techniques as well. 
 Using a 6x6 MFT background stamp, I layered the inks across it on the diagonal and stamped it.  Using a MISTI here is an excellent idea, just in case you miss a bit (you'll see in the video where I did it).  After heat embossing it in clear, I went in and ink blended over the top to make the background stamp really pop.  The background was really vivid and I didn't want to detract from it, so I kept my finishing touches simple with the die cut sentiment and vellum butterfly.  Here's the link to the video tutorial on my YouTube channel and my supply list is below.

Supplies:
Distress Oxide Ink
  • Fossilized Amber
  • Broken China
  • Peeled Paint
My Favorite Things Floral Fantasy stamp
Bristol Smooth cardstock
SSS Clear detail embossing powder
My Favorite Things Wonky Stitches die
Concord & 9th Butterfly Beauty dies
Vellum
Stick-It sheet adhesive
ARC Wood Veneer paper
Simon Says Stamp Blessed die
Lawn Fawn Stitched Rectangle die
Little Things Lily White and Ivory sequin mixes
Ranger Multi Matte Medium
Scor-tape
Neenah 110 lb card base

Thanks for stopping by and I'll catch you next time! 

Much love,
Jasmine

Friday, March 31, 2017

Blessed Butterfly with Distress Oxides, Nuvo and Concord & 9th

 Bonjour! I just saw the new Beauty and the Beast movie and the opening song has been on repeat in my head and I'm not complaining.  I have always LOVED the animated version and couldn't wait to see the live action, which absolutely did not disappoint.  Anyway, we're here for a card, so let's get started.  Frankly, this project started out as an experiment with the Nuvo embellishment mousse.  I liked what I had, so, when in doubt, add ink!  My new Oxides were sitting on my desk along with the Concord & 9th sets and this card was born.  I was excited to see how the Oxides would work with heat embossing and they're beautiful.  I positively loved the background and didn't want to cover it up, so I went with Vellum for the butterfly and an open and airy sentiment. 
 I wish you could see how beautifully the glitter embossing shines on this butterfly.  Pictures just don't do it justice.  A few sequins add the perfect finishing touch.  Here is the link to the video tutorial on my YouTube channel of you'd like to recreate this card at home.  My supply list is below.

Supplies:
Distress Oxides
  • Wilted Violet
  • Cracked Pistachio
Nuvo Embellishment Mousse
  • Pure Platinum
  • Peony Pink
Simon Says Stamp Zig Zag Stencil
Simon Says Stamp Blessed die
My Favorite Things Wonky Stitches die
MISTI
Concord & 9th Butterfly Beauty Stamp and dies
Vellum
Ranger Holographic embossing powder
ARC Wood Veneer paper
Stick-It Sheet Adhesive
Wplus9 Oatmeal cardstock (cardbase)
Little Things Ivory sequin mix
Ranger Multi Matte Medium
Scor-tape

Thanks for joining me today!  Feel free to let me know how you like it and I'm happy to help if you have any questions.  Catch you later!

Much love,
Jasmine


Thursday, March 23, 2017

Masculine Ink Dipped Design with Distess Oxide Inks

 If you've played with the regular Distress inks before, you're probably familiar with the ink-dipping technique.  I used that technique with this card, but as you can see, the results are a little different; the layers stand out more, no muddying of the colors, and the colors are just as vibrant.  Distress Oxides are a hybrid between dye ink and pigment ink.  They have opacity and dry to a chalk-like finish because of the pigment ink with vibrancy and reactivity to water that we're familiar with in the original Distress because of the dye ink.  I had a lot of fun playing and creating with them and I think you will too!

Here's the link to the video tutorial on my YouTube channel with my supply list below.
Supplies:
Distress Oxides:
  • Spiced Marmalade
  • Fossilized Amber
  • Faded Jeans
  • Broken China
Strathmore 140 lb watercolor paper
MFT Wonky Stitches die
Doodlebug Black Velvet paper
SSS Painted Hello die
ARC Cherry Wood Veneer paper
SSS Wishing Tree Die
Neenah 110 lb Solar White cardbase
Scor-tape
Bonus card!
I didn't include this card in the video because I lost all my footage (gremlins!).
This one is a very simple masculine design with 1 stamp, ink blending and 2 die cuts.  It's perfect for all the dudes in our lives that don't want a lot of fuss.  Starting with a panel of Bristol Smooth cardstock I did the ink blending first.  Using my MISTI, I stamped the barnwood stamp in SSS Dark Chocolate ink and ran it through my Big Shot with a MFT Wonky Stitches die to give it a finished edge.  I added Stick-It to the back of a scrap of black velvet cardstock and a scrap of wood veneer paper to die cut a banner and the hello sentiment.  My cardbase is W+9 Oatmeal cardstock.  I adhered my panel down to the cardbase with Scor-tape, layered the sentiment over the banner and was finished.  My supply list is below!
Supplies:
MISTI
Distress Oxides:
  • Faded Jeans
  • Peeled Paint
  • Broken China
Concord & 9th Bardwood Background stamp
SSS Dark Chocolate ink
Bristol Smooth cardstock
MFT Wonky Stitches die (ink blended panel)
W+9 Oatmeal cardstock (cardbase)
ARC Cherry Wood paper (banner)
Stick-It (added to wood paper before cutting)
SSS Painted Hello die
Doodlebug Black Velvet cardstock
Neat & Tangled Scalloped die set (banner die)

Thanks for stopping by and I'll see you next time!  Feel free to ask questions and let me know how you like them in the comments.

Much love,
Jasmine

Friday, March 10, 2017

Happy Hello featuring Concord & 9th

 A happy hello to you!  Here in Michigan the weather has been all over the place with warm and cold, rain and sun and snow.  I needed to comfort myself with some Spring colors and bright imagery, so that's how this card was born.  Butterflies are the quintessential harbinger of spring and I love the life they bring to just about anything.  The watercolor look designed into Concord & 9th's Butterfly Beauty stamp set makes it so easy and simple to get the look without the work. 

If you aren't familiar with Lindy's Stamp Gang products, they make an amazing array of colorful pigment powders, sprays, embossing powders and now watercolor powders called Magicals.  I used the Magicals to create a rainbow watercolor panel that I die cut the hello sentiment from using Concord & 9ths Say Hello dies.  Magicals are somewhat similar to Colorburst or Brusho in that they are a dry powder activated with water, but also have some shimmer to them.  Let me know in the comments if you'd like to see a video specifically about the Magicals and I'll see what I can do to make that happen. 

Here is the link to the video tutorial on my YouTube channel and my supply list is below!
Supplies:
Lawn Fawn Stitched Rectangle die
Concord & 9th Butterfly Beauty stamp set
Concord & 9th Say Hello dies
Strathmore 140 lb watercolor paper
Strathmore Bristol Smooth cardstock
Memento Tuxedo Black ink
MISTI
Altenew inks: Lavender Fields, 
Deep Iris, Cotton Candy
SSS ink: Twirling Tutu
Vellum
Stick-it Sheet Adhesive
Scor-tape
Little Things Ivory sequin mix
Ranger Multi Matte Medium


Thanks for stopping by and hanging out with me!  Let me know how you like it and as always, if you have any questions, I'm happy to help.

Catch you later!

Much love,
Jasmine


Handmade Christmas Series 2018: Day 1 Watercolors and EH Mondo Holly 2 ways

Here's an exciting sale for everyone!  ellenhutson.com is having a 20% off sale on all dies with the code above.  I...