Showing posts with label My Favorite Things. Show all posts

Monday, October 15, 2018

Handmade Christmas Series 2018: Day 1 Watercolors and EH Mondo Holly 2 ways


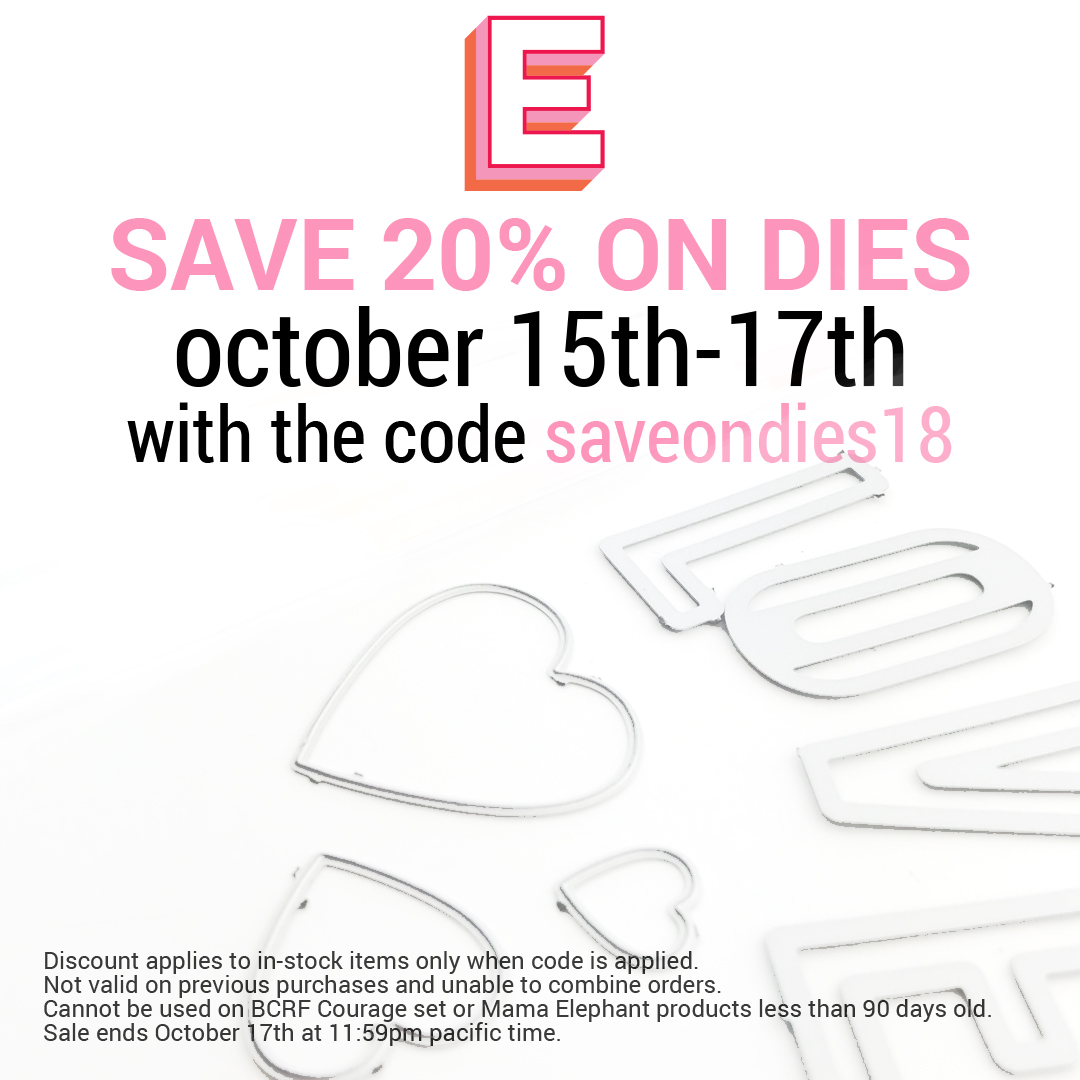
Here's an exciting sale for everyone!  ellenhutson.com is having a 20% off sale on all dies with the code above.  I've made a list of some "must have" dies when it comes to card making and these are basic shapes that don't necessarily coordinate with stamps.  These are ones I use nearly every time I craft.
Lawn Fawn Heart Stackables dies

Ellens sale happens to coincide with my latest project which uses EH products, the Mondo Holly stamp and dies.  I love their Mondo line; it has gorgeous floral images are they're perfect for watercolors.  With this project, I used Arteza watercolors, as I was invited by the company to play with and review.  If you'd like to see that video, click here.  This project was already complete when EH invited me to share their upcoming sale with my viewers, I thought the project and sale made the perfect couple to combine into one post.  Through Nov 10, 2018, I have a 10% off coupon code for Arteza as well, which is  JasmineBurgess1.  Lets see what I used in the card and here is the video.

Supplies:
Ellen Huston Mondo Holly stamps
Ellen Hutson Mondo Holly dies
Arteza Watercolors  
Strathmore 140 lb watercolor paper
Ink on 3 Blackout
Kuretake gold watercolor
Versamark
Brutus Monroe Raven embossing powder
Brutus Monroe Gilded EP
Be Creative Tape
Gold Foil Embossed paper
Charcoal/ Dark Gray cardstock
Neenah Classic Cream cardstock
MISTI


I've shown 2 different versions of the same card using different, yet simple watercolor techniques.  The reasoning was two-fold.  The first is that I was testing these to see how they performed in comparison to other brands of similar quality.  The other was to show the viewer simple and easy, yet lovely results they can employ in their own cardmaking.  I also like to add versatility to a stamp set if I can.  I think I was successful with each of my objectives and I love how each card turn out.  

Wishing you and yours a joyous Christmas,
Jasmine

Glow in the Dark Halloween Shakers with MFT and Arteza Watercolors with a sale at Ellen Hutson!


Happy Halloween!  Todays project is a frightfully fun set of shaker cards that glow in the dark!  Given the fact that *most* cameras need light, I was not able to capture the glowing effect satisfactorily on either of my cameras.  My cell phone camera got an ok picture and you can see that at the end of the video on my YouTube channel.  However, they do glow quite brightly and look really cool in real life.  My nieces and nephews are going to love them.  Lets get started!  Added bonus- you can save 20% on the die set used in this project until 10/17/18!

Supplies:
MFT Frightfully Sweet Stamps
MFT Frightfully Sweet dies
Distress Ink Originals


MISTI
Strathmore 140 lb WC paper
Ranger Matte Medium
Nuvo Green Glow in the Dark drops
Hero Arts Star Stencil
Bristol Smooth cardstock
Arteza Watercolors
Ink on 3 Blackout
Hot Off the Press Heat Resistant Acetate
Circle dies
Be Creative Tape
3M Foam tape
Versamark
Ranger Black Sparkle EP
EK Success Powder Tool
MISTI
Staz-on Black ink
28 Lilac Lane Bold and Bright sequins
Little Things Clear Irridescent Stars and Star Shine
Patterned Paper from stash

I your Halloween is full of fun and excitement!  Valid through 11/10/18 is a coupon code, JasmineBurgess1, for 10% off the Arteza watercolors I used to paint the critters.  If you're interested in my review video of Arteza watercolors, click here for that video.  As always if you have any questions, let me know.  Happy to help!

Thursday, February 22, 2018

Watercolor Emboss Resist Birthday with Moody Unicorns

 Unicorns and birthdays are best friends, so I decided to put them together in honor of one of my besties, Jen.  We met in college, became best friends and never looked back!  I started by making my own patterned paper by randomly stamping and heat embossing the larger unicorn images followed by filling in with the smaller images in the stamp set, the cupcake and little present.  Using watercolors to add pops of brightness helped each image stand out without looking overdone and the die cut sentiment finished things off nicely.  I chose a foil paper for my sentiment because it adds a contrasting finish and texture, which adds easy interest.  Here's the video tutorial and supplies are listed below!  Happy Birthday Jen!!

Supplies:
Gerda Steiner Designs Moody Unicorns
Canson XL 140 lb watercolor paper
MISTI
Versamark
Lindy's Stamp Gang Silver Moon Orchid EP
Gansai Tambi watercolor palette
Silver Black Velvet brush #8 round
My Favorite Things Wonky Stitches die
DCWV Foil and Glitter papers
Lawn Fawn Happy Birthday die
Tombow Mono Multi glue
Be Creative tape

I hope you enjoyed todays post and project and that you enjoy good friendships like I am blessed with.  Happy crafting and God bless!

For Christ's glory and much love,
Jasmine


Friday, February 16, 2018

Penguin Watercolor Ombre Emboss Resist with Gerda Steiner Designs

 Hello and welcome everyone!  Today we are playing with those sweet Valentine Penguins from Gerda Steiner Designs again.  This time, we are creating our own patterned paper with heat embossing.  Add some simple watercolor and viola.  We have an adorable and versatile panel that is perfect for so many different occasions.  The same technique can be used for almost any stamp set in your aresenal as well, so bust them out and get creative.  Here's the video on my Youtube channel and my supplies are listed below.

Supplies:
Gerda Steiner Designs Valentine Penguins
Canson XL Watercolor paper
Versamark
Brutus Monroe Icicle embossing powder
MISTI
FineTec watercolor pallete
Gansai Tambi 36 watercolor palette
Silver Black Velvet brushes
My Favorite Things Wonky Stitches die
DCWV Glitter Paper and Foiled Vellum
Sizzix Hearts die
Lawn Fawn Scripty Love die
Tombow Mono Multi glue
Stitck-It Sheet adhesive
Be Creative tape

I hope you're having a great day and I encourage you to step out of your comfort zone to try new techniques and new products, stretching your creative muscles.  It's so much fun and good for you too. 

I love interacting with you guys, so leave me a comment or question and I'll be happy to help.  Have an awesome day and I'll see you next time!

For Christ's glory and much love,
Jasmine


Wednesday, February 7, 2018

Moody Unicorn Birthday Party with Alcohol Inks and Copics

 These Moody Unicorns by Gerda Steiner Designs...can't help myself but to make more projects with them!  This guy is ready to welcome you to his birthday party or wish you a happy birthday!  This is actually a fairly simple card to make.  Make an alcohol ink background, stamp, color and die cut our adorable unicorn, a few die cut sentiment banners, some sequins and voila!  Perfect for any age, any gender and if it doesn't make you smile, I'm not sure you have a heartbeat.  Scrooge couldn't not smile.
Here is the video tutorial on my YouTube channel and my supplies are listed below!
Supplies:
Gerda Steiner Designs Moody Unicorn S&D
Ranger Alcohol Inks: 
Purple Twilight, Flamingo, Sunset, Sunshine
Memento Tuxedo Black ink
MISTI
Bristol Smooth cardstock
Ranger Alcohol Ink cardstock
Copics
C2, 4, 6/ E50, 51, 21/ R20/ B01, 02, 04
My Favorite Things Wonky Stitches die
Lawn Fawn Stitched Rectangle die
SSS HB die
SSS Crystal Reflections Sequins
Ranger Matte Medium
Versamark
Ranger Holographic Embossing powder

Thanks for stopping by guys and I will see you next time!!  Stay tuned for an EPIC vlog hop coming very soon for your chance to win some awesome prizes.

For Christ's glory and much love,
Jasmine


Saturday, February 3, 2018

Maaike's Celebrate 2k Subscribers Blog Hop Moody Unicorn Spinner with Alcohol Ink Background

 Ok party people, we're here to celebrate Maaike's having reached 2000 subscribers on her YouTube channel.  Woot Woot!  Congrats Maaike.  What better way to celebrate than with a Spinner Unicorn card?  I think this design speaks to all ages.  It's fun, whimsical, bright, playful, and mischievous with a touch of sarcasm for kicks.  English is second to Sarcasm in my world, so I love this card!  This would be so easy to change up for a dude, just by using his favorite colors in the Alcohol Ink background and the unicorns hair.  Here is the link to the video tutorial on my YouTube channel and my supplies are listed below.

Supplies:

Gerda Steiner Designs Moody Unicorn S&D
Ranger Alcohol Inks:
Memento Tuxedo Black ink
MISTI
Bristol Smooth cardstock
Ranger Alcohol Ink cardstock
MFT Channel Spinner die
MFT Spin and Slide Discs
Copics
C2, 4, 6/ RV00, 14, 17, 19/ E50, 51, 21/ R20
3M Foam tape
Archival Jet Black ink
Mini Glue Dots
3M foam tape
Penny

The fun isn't over just yet; there are more stops on the hop and prizes to be won!  The next stop on the hop is the lovely and talented Gerry.  You're going to love what she has to show you.  A complete list of hop stops is listed below in case you lose you way or want to visit someone again.

I mentioned PRIZES didn't I?  To be entered to win, you must subscribe, comment and leave some love at each stop on the hop, either on the blog post or YouTube video.  I'll give you an extra entry if you leave a comment on both of mine.  Each of us will have a different prize to offer.  My prize is the card we made and a few other goodies.  Unfortunately, due to international shipping costs, I have to limit the winners to the U.S.  Winners will be contacted directly and will have 48 hours to claim their prize before another winner is drawn.

Here is the complete list of blogs and YouTube channels on the hop:
Maaike UIjthoven: https://youtu.be/PEjPkcSAuxg
Karen Hasheck: https://www.youtube.com/watch?v=2rZK_zXGl10&feature=youtu.be
Mary Polanco: https://www.youtube.com/watch?v=K2ivbEM4xa8&feature=youtu.be
Charlotte Ehrukainen: https://www.youtube.com/watch?v=osVe3m1p7Uo&feature=youtu.be
Jasmine Burgess: https://www.youtube.com/watch?v=LiAo3_oZ5E0&feature=youtu.be
Gerry’s craft room: https://youtu.be/fYQxbTvQYK8
Maike kreations: https://maikreations.blogspot.nl/2018/01/celebrate-maaike-uithovens-2000.html
Uniquepaper15: https://www.youtube.com/watch?v=kaPbJxUDqRc&feature=youtu.be

Thank you for joining us to celebrate and good luck in winning a prize!  Happy to help if you have any questions and I'd love to know what you think.  See you next time!

For Christ's glory and much love,
Jasmine

Wednesday, December 6, 2017

Handmade Christmas 2017: Alcohol Inks and Chibitronics

 Merry Christmas and welcome to the final card of the Handmade Christmas 2017 series.  This design came about through the idea "what if there was a snowman at the manger when Jesus was born?"  Snowpeople are always such happy creatures and I imagined they would celebrate that first Christmas too.  I made several alcohol ink backgrounds and the wavy stripes made me think of a cold, winter night, just right for a snowman and the rest followed suit.  I die cut a small star in the upper right corner, added the stamps and heat embossed them and the front panel was almost complete.  Then I built the circuit for the lighted star and put everything together with some sequins to finish it off.  When you press on "Star" in the sentiment, the little star lights up.  Delightful!  This design is suitable for everyone on your list too.  From single dudes to grandparents or colleagues, done.  Here is the link to the video tutorial on my YouTube channel and my supply list is below. 

Supplies:
Penny Black Rejoice with Joy stamp set
My Favorite Things Holiday Hugs stamp set
Ranger Glossy cardstock
Ranger Alcohol Inks:
  • Denim
  • Indigo
  • Snow
  • Sky
Versamark
Wow Vintage Champagne embossing powder
Lawn Fawn Puffy Star die
Vellum
Chibitronics
3M Foam Tape
Scor-Tape/ Be Creative tape
Ranger Matte Medium
Pretty Pink Post 4mm Sparkling Clear sequins
Little Things Lily White sequin mix

Thanks for stopping by!  I hope you have a wonderfully joyous Christmas and get the opportunity to worship often.  The story of Jesus' birth can be found in Luke 2: 6-16 if you're wondering.

Merry CHRISTmas!
Jasmine

Thursday, August 31, 2017

Beach Day Slider

I'm squeezing this fun and sunny slider card in at the tail end of summer because I can!  And to be honest, this summer went by so stinking fast, so lets get started.  We have Copic coloring, ink blending, heat embossing and a slider feature.  If you're new to card-making, a project like this can seem daunting and complicated.  However, like most things, when you break it down into individual steps, it's simple and straight forward.  The sand, wave and sky are simple ink blending.  The sand and wave are die cut.  The wave is heat embossed with glossy clear embossing powder.  The critters, sun and castle are stamped, colored and die cut.  I stamped two of the hippo with the second to color and fussy cut just the watermelon and hand section to pop it up on the finished card.  Now we have all of our components. 
Die cut the slider channel from the wave piece and build the support on the back with foam tape.  Lay the wave and sand over the sky so that the wave peeks up behind the sand while the slider channel remains hidden.   Attach slider discs to the back of the elephants feet and place him in the slider channel.  Insert the elephant and move him back and forth to see how he looks and if you like the placement.  Stamp and heat emboss the sentiment at the top left corner of the sky.  Add foam tape to the back of the sand so that it doesn't interfere with the slider mechanism.  Adhere each critter, sun and castle and the card is complete. 
Here is the link to the video tutorial on my YouTube channel and my supplies are listed below. 
Supplies:
Neat and Tangled Beach Day S&D sets
Bristol Smooth cardstock
MISTI
Wplus9 Wave Border die
My Favorite Things Spin and Slide discs
My Favorite Things Surf and Turf die
Versamark
Wow Sparkling Snow embossing powder
Brutus Monroe Icicle embossing powder
Distress Oxide inks
  • Broken China
  • Salty Ocean
  • Peacock Feathers
  • Antique Linen
  • Frayed Burlap
Spectrum Noir Sparkle Pen
Copic Markers
  • Elephant: W0, 3; R11; B32  
  • Ball: Y18, YR04, YG06, BG05, V05
  • Floaty: Y13, 18; YR04; B32
  • Hippo: C2, 4; R11; R32, RV13, G17, 05
  • Rhino: W0, 3; R11; BG05, B05, B000
  • Sun:  Y11, 13, 17
3M Foam Tape
Foam Squares
Neenah Classic Cream cardbase

Thanks for hanging out with me and I hope you try this one out.  It's so much fun for any age or gender.

For His glory and much love,
Jasmine


Tuesday, June 20, 2017

Trust His Word featuring Concord & 9th

 I was so excited and appreciative the first time I saw the Faith and Love set by Concord & 9th.  While more and more companies are producing more faith based sets now, it's been a long time coming.  With Bible Journaling rising in trend, it's having a ripple effect into cardmaking and I love it.  As I sit, writing this post and watching the myriad of colorful birds at my birdfeeder, I am again reminded of how creative God is.   I like to talk to God while I drive and often look up at the sky, so that was the initial inspiration for the design.   He is the center or focus of this card so I used "His" as the center stamp and placed the other words around it until I liked the composition.

The design for this card is simple; a few stenciled clouds and heat embossing with glitter embossing powder.  Keeping the background light and simple allows for the glitter powder to stand out and catch attention.  Any time you want to use a glitter embossing powder, I suggest you do that as your last step.  Anything you do over or on top of the glitter powder (obviously after it's been heat set) will end up removing some of your glitter.   Here is the link to the video on my YouTube channel and my supply list is below.

Supplies:
Strathmore Bristol Smooth cardstock
My Favorite Things Wonky Stitches die
Concord & 9th Faith and Love stamp set
MISTI
Versamark
Wow Golden Flame embossing powder
Lawn Fawn Moonstone ink
Inky Antics Cloud stencil
Hero Arts Soft Sky ink
Turquoise cardstock
Little Things Nautical Sparkle sequin mix
Pretty Pink Posh 4mm Sparkling Clear sequins
Ranger Matte Medium

Thanks for stopping by! See you next time.

For His glory and much love,
Jasmine

Thursday, June 8, 2017

Versatile Masculine Emboss Resist with Concord and 9th

 Todays project is a versatile masculine card that can be used for so many different occasions.  Fathers Day, Birthday, Congrats, or even encouragement and goes perfectly with a gift card for those difficult to buy for guys in our lives.  This is really easy to customize with the recipients favorite colors or monochromatic with 4 shades of the same color.  Here is the link to the video tutorial on my YouTube channel and my supplies are below.

Supplies:
Bristol Smooth cardstock
Concord & 9th Triangle Turnabout stamp set
Concord & 9th Fill In Phrases stamp set
Versamark
Nuvo Black embossing powder
MISTI
Simon Says Stamp inks
Dark Chocolate
Island Blue
Lawn Fawn inks
Carrot
Jalepeno
My Favorite Things Wonky Stitches die
Simon Says Stamp Orange Peel cardstock
Scor-tape
Doodlebug enamel dots

Thanks for joining me today!  Don't forget to subscribe and I'll see you next time.

Much love and for His glory
Jasmine

Monday, May 22, 2017

Text Hugs with Concord & 9th

 I've been on a roll with Concord & 9th products lately; I just can't help it.  I get so many ideas and it's hard to narrow it down sometimes.  That's not a bad thing though.  Hopefully, my ideas and designs will inspire your ideas and designs and we'll all be happier as a result.  The world needs more cuddles and hugs anyway.

This card started with having the hugs die cuts left over from other projects, whose videos are linked below if you're curious, and using gray helped to ground the card as well as help the teal and purple tones stand out.  The tone on tone gray text background served to soften the design as well as give it a coziness.  To create the frame, you can use any two rectangle dies; just make sure they're spaced evenly before you run it through your die cutting machine.  Here's the link to the video tutorial on my YouTube channel and my supply list is below.

Supplies:
Concord & 9th Cuddles and Hugs stamp and die sets
Simon Says Stamp Fog cardstock and ink
Neenah 110 lb Solar White cardstock (base)
Tombow Mono Multi glue
Little Things Sequin mixes
  • Pearl Necklace
  • Starshine
Matte Medium
DCWV Shimmer cardstock
My Favorite Things Wonky Stitches dies
Scor-tape

 Watercolor shaker video

Rainbow Hugs video

If you have any questions, please leave them in the comments and I'll be happy to help!  Thanks for stopping by and I'll see you next time!

Monday, May 15, 2017

Traingle Turnabout with Concord & 9th

 Welcome!  Concord & 9th are becoming known for their innovative products, and this triangle turnabout stamp is no exception.  After each time you stamp, you turn it 90 degrees and stamp again until you've stamped 4 times and completed the rotation.  The possibilities for designs is really endless as you can do a minimalist approach with only one stamp, heat emboss a layer to and texture and dimension, emboss resist, 4 different colors (like I did) or monochromatic with 4 shades of the same color; so many options.  I went with really bright, fun, tropical colors and finished it off with a bold black sentiment and sequins.
Here is the link to the video tutorial on my YouTube channel and my supply list is below.

Supplies:
Concord & 9th Triangle Turnabout stamp
Concord & 9th Lovely stamp
MISTI
Simon Says Stamp inks
  • Watermelon
  • Key Lime
  • Orange Crush
  • Lemon Zest
My Favorite Things Wonky Stitches Die
Nuvo Black embossing powder
Versamark
Memento Tuxedo Black ink
Bristol Smooth cardstock
Simon Says Stamp Green Apple cardstock
Ranger Matte Medium
Simon Says Stamp Crystal Reflections sequins
Scor-tape

Let me know if you have any questions!  Don't forget to like and comment on my YouTube videos; it really helps me out ;)

In His glory and much love,
Jasmine

Wednesday, May 10, 2017

Ink Blended Rainbow Hugs with Distress and Concord & 9th

 Hello!  As you know, I love bright colors; they make you happy.  Ink blending being one of my favorite techniques; it's one I use often and I love experimenting with new color combos to see what I can create.  Emboss resist, ink blending and die cuts are all employed to create this bright, happy, punchy card. 

If you have trouble with ink blending, I have a few tips for you.  The first is to change your cardstock.  I used Neenah 110 lb Solar White for years and I got good results, but it took some work.  I heard some good things about Strathmore Bristol Smooth and once I tried it, I never looked back.  Bristol Smooth is a bit heavier and smoother than Neenah, but Neenah isn't a bad cardstock.  I still use it for sturdy cardbases.  The second tip is to hold your blending tool at an angle so that the entire surface of the tool is not in contact with the cardstock.  Use circular motions and little pressure; more pressure creates more friction making is harder to move the tool around. 

Here is the link to the video tutorial on my YouTube channel where I demonstrate how to create this project from start to finish.  My supply list is below.

Supplies:
Concord & 9th Cuddles and Hugs stamp and dies
Bristol Smooth cardstock
Neenah Solar White 110 lb (cardbase)
MISTI
Distress Inks (original)
  • Mermaid Lagoon
  • Squeezed Lemonade
  • Abandoned Coral
  • Wilted Violet
Imagine Crafts Shimmer Spritz
My Favorite Things Wonky Stitches die
Versamark
Wow White embossing powder
Scor-tape
Matte Medium

Thanks for joining me today!  Leave any questions in the comments and I'll be happy to help.  See you next time!

In His glory and much love,
Jasmine

Thursday, May 4, 2017

Soft and Loose Watercolor Mother's Day Hugs Shaker with Concord & 9th

 We are almost half way through the year already and while I'm wondering where the time has gone, Mother's Day has quietly crept up.  I have three Mother's Day cards to make every year and I enjoy the creative challenge of doing something different.  Traditionally, flowers make an appearance and while my Mom and both MIL's enjoy flowers, I went a another direction.  This design is really versatile, perfect for birthday, thinking of you, encouragement and sympathy.  Starting with white embossing on watercolor paper, I used powdered watercolor paints to create a loose and soft emboss-resist background.  After that was dry, I die cut the "hugs" and the border edge detail.  To finish it up, I stamped an accompanying sentiment in the bottom right corner, built the shaker and mounted it to a card-base. 
Here is the link to the video tutorial on my YouTube channel and my supplies are list below.  If the idea of Watercolor is intimidating, try the loose technique demonstrated in my video.  It's really easy and so user-friendly, not to mention hard to mess up.

Supplies:
140 lb Watercolor paper
Concord & 9th Cuddles and Hugs stamp and die sets
Versamark
White embossing powder
MISTI
Lindy's Stamp Gang Magicals shakers
  • Guten Tag Teal
  • Polka Purple
Colorburst Liquid Metals Platinum
Colorburst Orchid
My Favorite Things Wonky Stitches
Hero Arts Acetate
Scor-tape
Tombow Mono Multi glue
3M Foam Tape
Little Things Sequin Mixes
  • Pacific
  • Lucky Dip Purple Paradise
Memento Tuxedo Black ink
SSS Smoke cardstock

Monday, April 10, 2017

Hooty Whoo Owls with Copics and Newtons Nook

 I have loved owls since I was a little girl and would fall asleep listening to them in the pine trees.  They were secretive, elusive and majestic and every time I would catch a glimpse of one I felt such awe.  That was the inspiration behind this card.  I wanted to keep the focus on the birds, so I kept the rest of the card fairly simple with some simple ink blending over a stencil.  I used Copic markers to color my images and you'll notice that it doesn't disturb the dye ink in the ink blending; alcohol ink works well with dye ink because they won't dissolve each other so their compatible and safe to use together.  If you are having trouble figuring out how to color an image and want to be true to life, just google whatever it is and you'll have tons of reference photos to go on. 

Here is the link to the video tutorial on my YouTube channel and my supply list is below.

Supplies:
Newtons Nook What A Hoot stamp set
Bristol Smooth cardstock
My Favorite Things Wonky Stitches die
Post-It Masking Tape (2" wide)
Memento Tuxedo Black ink
MISTI
Tim Holtz Mini Blossom Stencil
Simon Says Stamp Jellybean and Fern inks
Lawn Fawn Celery Stick ink
Copic Markers
Red Owl: E13, 15, 19, 51, C4, C6
Gray Owl: E70, 74, 79, YR15, C4, C6
Branches: E23, 27, 25, 79
W+9 Oatmeal card base
Scor-tape

Friday, April 7, 2017

Sunset Flights with Distress Oxides, Concord & 9th and Impression Obsession

 Hello there!  Sunsets are among my favorites of God's artistry in nature and is what inspired this project.  Using three colors of Distress Oxides, ink blending and ink lifting, I created the background, added the butterflies on top and finished it off with a heat embossed sentiment.  This project is  simple, quick and easy with gorgeous results that you can use for just about any occasion: birthday, encouragement, illness, sympathy or thinking of you.
 Here is the link to the video tutorial on my YouTube channel with my supply list below.

Supplies:
Distress Oxide Ink
Wilted Violet
Worn Lipstick
Spiced Marmalade
Bristol Smooth cardstock
My Favorite Things Wonky Stitches die
Imagine Crafts Sparkle Spritz
Concord & 9th Butterfly Beauty stamp set
Simon Says Stamp Smoke Ink
MISTI
Impression Obsession "What if I Fall"
Versamark
Nuvo Black embossing powder
Neenah Solar White 110 lb card base
Scor-tape

Thanks for stopping by and I'll catch you next time!

Much love,
Jasmine

Monday, April 3, 2017

Embossed Resist with Distress Oxides, MFT and Concord & 9th

 Trying out the new Distress Oxides has been so much fun and todays project is no exception.  These inks are a hybrid between pigment and dye inks, so they have the properties of both.  They heat emboss beautifully, blend seamlessly and easily and because they're the Distress formula, you can do all those delightful techniques as well. 
 Using a 6x6 MFT background stamp, I layered the inks across it on the diagonal and stamped it.  Using a MISTI here is an excellent idea, just in case you miss a bit (you'll see in the video where I did it).  After heat embossing it in clear, I went in and ink blended over the top to make the background stamp really pop.  The background was really vivid and I didn't want to detract from it, so I kept my finishing touches simple with the die cut sentiment and vellum butterfly.  Here's the link to the video tutorial on my YouTube channel and my supply list is below.

Supplies:
Distress Oxide Ink
  • Fossilized Amber
  • Broken China
  • Peeled Paint
My Favorite Things Floral Fantasy stamp
Bristol Smooth cardstock
SSS Clear detail embossing powder
My Favorite Things Wonky Stitches die
Concord & 9th Butterfly Beauty dies
Vellum
Stick-It sheet adhesive
ARC Wood Veneer paper
Simon Says Stamp Blessed die
Lawn Fawn Stitched Rectangle die
Little Things Lily White and Ivory sequin mixes
Ranger Multi Matte Medium
Scor-tape
Neenah 110 lb card base

Thanks for stopping by and I'll catch you next time! 

Much love,
Jasmine

Friday, March 31, 2017

Blessed Butterfly with Distress Oxides, Nuvo and Concord & 9th

 Bonjour! I just saw the new Beauty and the Beast movie and the opening song has been on repeat in my head and I'm not complaining.  I have always LOVED the animated version and couldn't wait to see the live action, which absolutely did not disappoint.  Anyway, we're here for a card, so let's get started.  Frankly, this project started out as an experiment with the Nuvo embellishment mousse.  I liked what I had, so, when in doubt, add ink!  My new Oxides were sitting on my desk along with the Concord & 9th sets and this card was born.  I was excited to see how the Oxides would work with heat embossing and they're beautiful.  I positively loved the background and didn't want to cover it up, so I went with Vellum for the butterfly and an open and airy sentiment. 
 I wish you could see how beautifully the glitter embossing shines on this butterfly.  Pictures just don't do it justice.  A few sequins add the perfect finishing touch.  Here is the link to the video tutorial on my YouTube channel of you'd like to recreate this card at home.  My supply list is below.

Supplies:
Distress Oxides
  • Wilted Violet
  • Cracked Pistachio
Nuvo Embellishment Mousse
  • Pure Platinum
  • Peony Pink
Simon Says Stamp Zig Zag Stencil
Simon Says Stamp Blessed die
My Favorite Things Wonky Stitches die
MISTI
Concord & 9th Butterfly Beauty Stamp and dies
Vellum
Ranger Holographic embossing powder
ARC Wood Veneer paper
Stick-It Sheet Adhesive
Wplus9 Oatmeal cardstock (cardbase)
Little Things Ivory sequin mix
Ranger Multi Matte Medium
Scor-tape

Thanks for joining me today!  Feel free to let me know how you like it and I'm happy to help if you have any questions.  Catch you later!

Much love,
Jasmine


Monday, March 27, 2017

Bronzey Blue Beauty with Distress Oxides and MFT

 This is one of those rare cards that requires little else and is better for it's simplicity and minimalist design.  I can't really claim that as my intention, it just happened that way, but don't tell anybody.  It's our little secret.  Initially, I imagined this as a shaker card, but the blue and bronze were just perfect together and didn't need anything else.  I kept it simple with a small banner, die cut sentiment and a scattering of sequins to finish it off.  If your guy enjoys botany or a flower garden, leave off the sequins and it would be a great guy card too. 
 I layered two shades of Distress Oxide inks to get a faded denim look and used ink-lifting to get the look of bleach spots.  With the regular Distress inks, the spots would look more white, but with the Oxides, they maintain their color and add opacity, but lighter.  Here is the link to the video tutorial on my YouTube channel if you want to see how to recreate this at home and my supply list is below.

Supplies:
Distress Oxide Inks
  • Faded Jeans
  • Broken China
Bristol Smooth cardstock
My Favorite Things Wonky Stitches die
My Favorite Things Roses All Over stamp
Brutus Monroe Penny Embossing powder
ARC Cherry Wood Veneer paper
Simon Says Stamp Painted Hello die
Neat & Tangled Scalloped die set (banner)
Neenah Solar White 110 lb cardbase
Doodlebug Black Velvet cardstock
Little Things Sequin mixes
  • Nautical Sparkle
  • Ivory
  • New England Fall
Range Multi Matte Medium
Scor-tape

Thanks for joining me today and we'll catch you later!

Much love,
Jasmine


Thursday, March 23, 2017

Masculine Ink Dipped Design with Distess Oxide Inks

 If you've played with the regular Distress inks before, you're probably familiar with the ink-dipping technique.  I used that technique with this card, but as you can see, the results are a little different; the layers stand out more, no muddying of the colors, and the colors are just as vibrant.  Distress Oxides are a hybrid between dye ink and pigment ink.  They have opacity and dry to a chalk-like finish because of the pigment ink with vibrancy and reactivity to water that we're familiar with in the original Distress because of the dye ink.  I had a lot of fun playing and creating with them and I think you will too!

Here's the link to the video tutorial on my YouTube channel with my supply list below.
Supplies:
Distress Oxides:
  • Spiced Marmalade
  • Fossilized Amber
  • Faded Jeans
  • Broken China
Strathmore 140 lb watercolor paper
MFT Wonky Stitches die
Doodlebug Black Velvet paper
SSS Painted Hello die
ARC Cherry Wood Veneer paper
SSS Wishing Tree Die
Neenah 110 lb Solar White cardbase
Scor-tape
Bonus card!
I didn't include this card in the video because I lost all my footage (gremlins!).
This one is a very simple masculine design with 1 stamp, ink blending and 2 die cuts.  It's perfect for all the dudes in our lives that don't want a lot of fuss.  Starting with a panel of Bristol Smooth cardstock I did the ink blending first.  Using my MISTI, I stamped the barnwood stamp in SSS Dark Chocolate ink and ran it through my Big Shot with a MFT Wonky Stitches die to give it a finished edge.  I added Stick-It to the back of a scrap of black velvet cardstock and a scrap of wood veneer paper to die cut a banner and the hello sentiment.  My cardbase is W+9 Oatmeal cardstock.  I adhered my panel down to the cardbase with Scor-tape, layered the sentiment over the banner and was finished.  My supply list is below!
Supplies:
MISTI
Distress Oxides:
  • Faded Jeans
  • Peeled Paint
  • Broken China
Concord & 9th Bardwood Background stamp
SSS Dark Chocolate ink
Bristol Smooth cardstock
MFT Wonky Stitches die (ink blended panel)
W+9 Oatmeal cardstock (cardbase)
ARC Cherry Wood paper (banner)
Stick-It (added to wood paper before cutting)
SSS Painted Hello die
Doodlebug Black Velvet cardstock
Neat & Tangled Scalloped die set (banner die)

Thanks for stopping by and I'll see you next time!  Feel free to ask questions and let me know how you like them in the comments.

Much love,
Jasmine

Handmade Christmas Series 2018: Day 1 Watercolors and EH Mondo Holly 2 ways

Here's an exciting sale for everyone!  ellenhutson.com is having a 20% off sale on all dies with the code above.  I...