Hello! I will start off by warning that this may be a longer post than usual, only because I have added more photos to show a step by step process of how I make these tags. I show two in the photo above because I wanted to convey that there are no two of these tags that are the same. I did both of these with the same colors and same process. They're similar, but not the same. So bear that in mind when you try this technique for yourself. It's intended to be fun and creative, not stressful :)
Step 1.) Using either Distress Stain or the ink pad, swipe some ink onto your work surface. I use a Ranger Craft Sheet. The colors I have used are Mermaid Lagoon, Tarnished Brass and Cracked Pistachio. Spritz with a bit of water, but be careful. If you add too much, you won't get any color saturation. You want to add just enough to get things blending.

Step 2.) Using a #8 Manilla tag, lay it down over your ink; press it in and move it around a bit. If you move it too much, the colors will blend completely and you'll lose the variation in your colors. See how some areas are darker and others lighter? There's a distinct area of the Tarnished Brass right in the middle. After your first dip in the pool, heat dry your tag. It will curl up and then flatten out as it dries. Dip again into the pools of color left on the work surface. This will give you more variation and texture. Dry again. If you move onto stamping and your tag is wet or damp, the images will lose their shape and blur out. (Especially with Distress products: they are designed to react with water, but it's a risk with any dye based ink.)

Step 3.) Using the tree stamp from the Reindeer Flight stamp set by Tim Holtz, stamp it to the right side, just slightly off the edge in Chipped Sapphire Distress Ink. That set is a red rubber cling set, so you'll need acrylic blocks, a stamp press (I'm using my Fiskars one) or a MISTI. My stamp press is well loved, as you can see.
Step 4.) With the mini blending tool and foam, I used Ground Espresso around the bottom edge, blending inward, darkening the edges. I concentrated the ink along the bottom edge. I used Chipped Sapphire along the top and sides. To get an even application and avoid any lines or prints from the round tool, I use a light pressure and keep the tool at an angle so that the front edge of the tool is off the surface of the tag. To darken an area, add layers of ink. You always want to start light when ink blending. It's easy to add, but not so easy to take away.
Step 5.) Stamp the sentiment in Momento Tuxedo Black. I have had this stamp for years and there's nothing on the block to say the designer or company :( Sorry.
Step 6.) I used a rather large script stamp, "Old Letter Writing" by Hero Arts and inked it lightly across the middle of the stamp with Walnut Stain. I dabbed here and there with Tarnished Brass Distress Stain. The stain is much more fluid than the ink, so you'll want to be careful with it and use it sparingly so that it doesn't end up as a weird blob on your project. (Ask me how I know!) I wanted a light impression so that it looked faded and vintage, so I inked it lightly and stamped it quick, without much pressure. To keep the sentiment clean, I laid a piece of scrap paper over the area to make sure I didn't get any stamping there I didn't want.

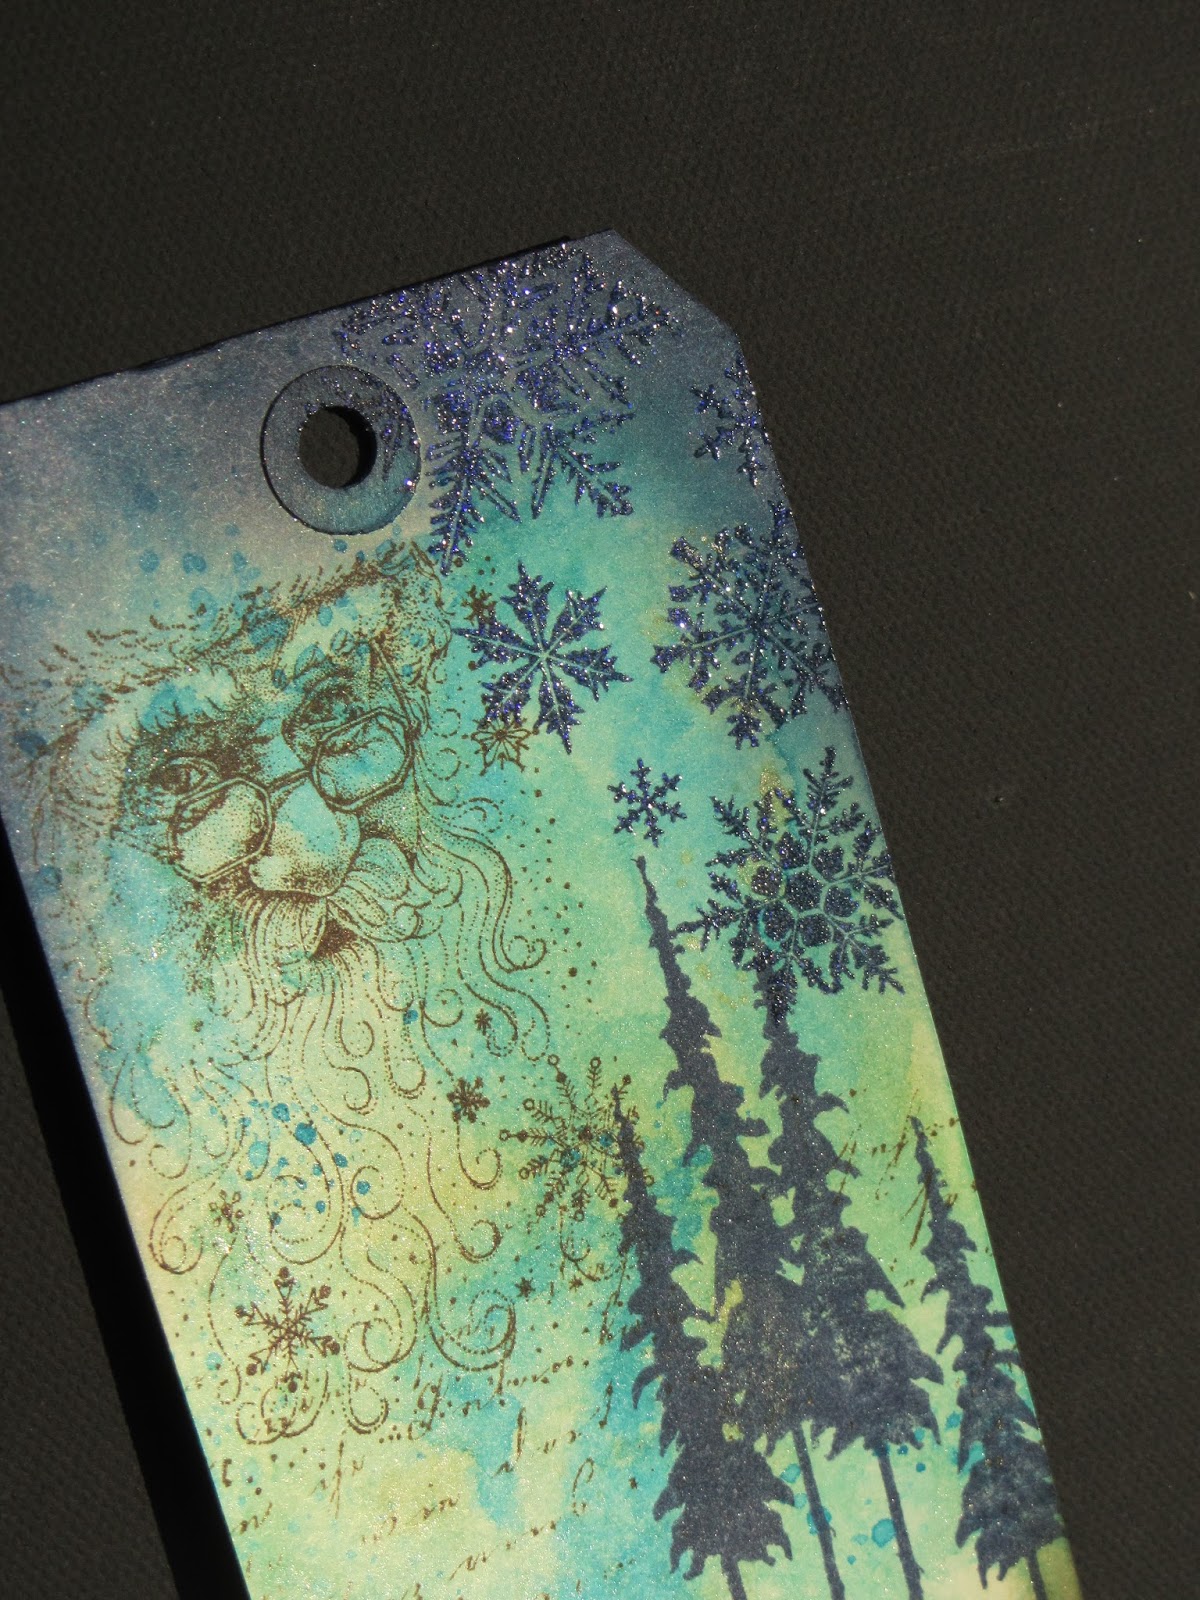
Step 7.) Santa! (I know him!) I inked him up with Ground Espresso Distress Ink so that he would stand out. This is a fine lined stamp, so it looks nice with dark ink. Another reason not to bring the darker ink blending down too far; you want to keep the area fairly light so that you can see Santa. When stamping any face images, light is important.

Step 8.) Make sure your ink along the top edge is dry. Distress inks stay wet longer than any other dye ink. That property is what allows it to blend so easily. Because we are stamping over it with the intention of heat embossing, it needs to be dry so that the embossing powder only sticks to the image we stamp. I used clear glitter embossing powder in this project, so the impact would not have been that significant. If you want to make your snowflakes gold or silver instead, it will matter quite a bit. This project is pretty friendly to heat, so heat drying it for a few minutes with a heat tool will do the trick. If it feels cool to the touch, it's not dry. You can also test it before stamping the snowflakes by pouring a bit of powder over the area you want to stamp on. If it sticks, brush it off with a paintbrush and heat dry it.

Step 9.) After you've stamped the snowflakes in Chipped Sapphire, pour your embossing powder over the snowflakes, tap off the excess and heat until melted. The snowflakes are also from Reindeer Flight.
Tip for heat embossing: let your heat gun warm up for a minute or so before applying to your project. If your gun is hot enough, the powder will melt almost immediately. It will turn from powdery to shiny. As it melts, keep moving your gun to unmelted areas. If you heat it for too long, the powder will just melt into the paper; it will look oily and you'll lose the raised texture.
Congratulations, you've just finished your tag! Thanks for spending some time with me today! I hope you have fun and learned something new. Feel free to ask any questions and let me know what you think!
Much love!


Thanks for sharing this awesome tag with us!!!
ReplyDeleteI'm so glad you like it!
DeleteI love the colors! I also love vintage Santas. Beautiful!
ReplyDeleteHi Jasmine, this is just gorgeous, thanks for the tutorial! I'm a G+ follower of yours now, and I saw you over on the Enablers board :)
ReplyDeleteI just love that group! Thank you!
DeleteBeautiful!! Thanks for sharing
ReplyDeleteThank you, Kayann!
DeleteI love this!
ReplyDeleteThank you!
DeleteHi, Can you tell me who makes the Santa stamp and the tree stamp? I LOVE your tag!! Great job!
ReplyDeleteHi Lisa! The tree is from a set by Tim Holtz called Reindeer Flight and the Santa is from Hobby Lobby. Thank you!
ReplyDelete